This is beginners guide on How to organize images in Adobe Lightroom. You will learn about how to create a collection, add keywords, and use the Painter brush tool to organize the images in Adobe Lightroom.

Do you want to find your images quickly?
Do you want to save time in organizing and searching the images?
Then you are in the right place.
Because today I am going to show you the exact Image organization tips in Adobe Lightroom. These Adobe Lightroom tips I use to effectively organize the images in Adobe Lightroom.
And the best part is?
All of these proven techniques are working great in Adobe Lightroom Classic 2020 and earlier versions of Adobe Lightroom as well.
Let’s dive right in!
Here are the techniques you will learn in this post.
- Create Collection and Add Keywords while importing
- Create Collection and Add keywords after importing
- Use Painter brush tool for image organization
1. Create Collection and Add keywords while importing the images
Image importing is the first step in Image organization. Image import is the best step for image organization as well.
Because you will be organizing the images as you import the photos.
Here are steps to Create Collection.
Create a Catalog and Click import.
Check out here: How to Import Images in Adobe Lightroom
Click the Import button, and import window will pop up
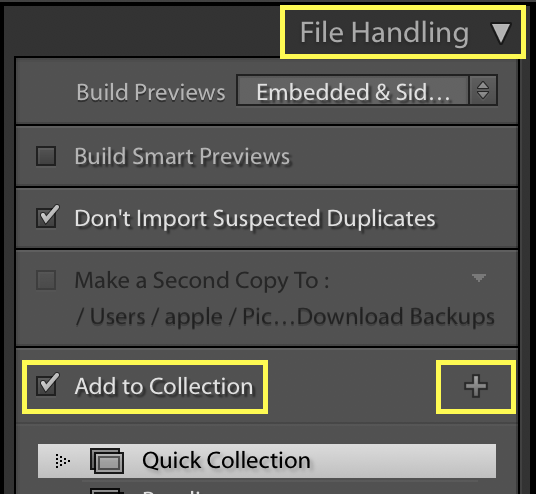
Under File Handling option:
File Handling > Check the ‘Add to Collection’
Click ‘+’ to Create a New Collection
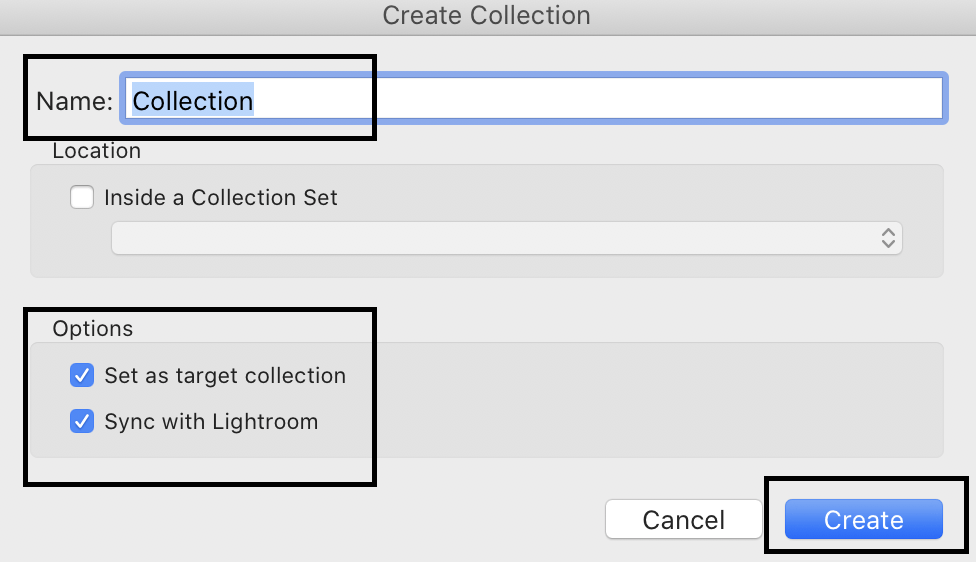
Name > Enter the Name of the Collection
Make the Collection Name Specific and relevant such as Name of National Park, Event, or Sports Event.
Location > Uncheck the option ‘Inside a Collection Set.’
You will be creating a new Collection, and it is not a subset of any other collection. Hence this box is kept unchecked
Options > Check ‘Set as target collection’
The images you are going to import will be part of Target Collection
Options > Check ‘Sync with Lightroom’
This option will help you to sync this Collection across other devices as well.
Steps to insert Keywords while importing the images
In the Import window

Apply During Import > Keywords
Enter the specific and relevant keywords
Sample keywords are: Bandipur, Elephant, AnimalPortraits or Yellowstone, GrizzlyBear, Habitat
Or EventName,EventType,Artist .
Choose and insert Keywords. Make sure you enter specific and relevant keywords. This will make the image organization effective.
Click on the Import button. Images will be imported in the new Collection you have just created.
The keywords will also be added to the pictures.
2. Create Collection and Add keywords after importing
What if you have already imported the images in Adobe Lightroom Catalog? And now you want to organize them into Collections. Well, the good news is you can do it easily in Adobe Lightroom.
Here are steps to Collections
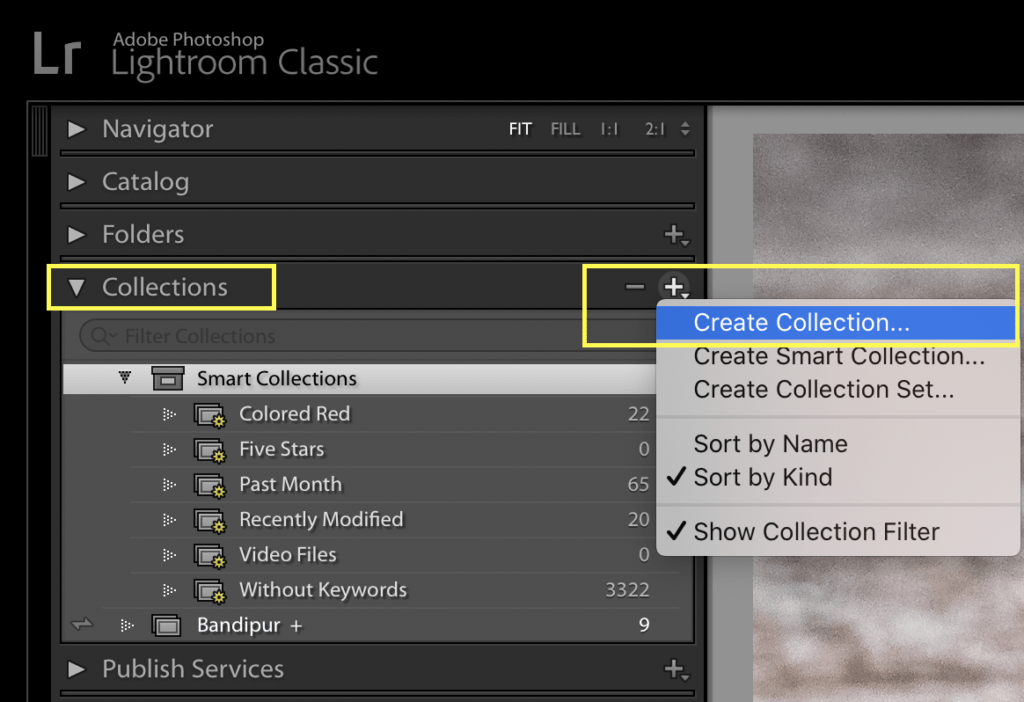
In the Library Module, under Collections module – click ‘+’ > Select ‘Create Collection’
‘Create Collection’ window will pop up.
Name: Write the specific Name for the Collection. ( e.g., Name of place, Event, Artist or person name )
Location: Under the Location tab, uncheck the option ‘Inside a Collection Set.’
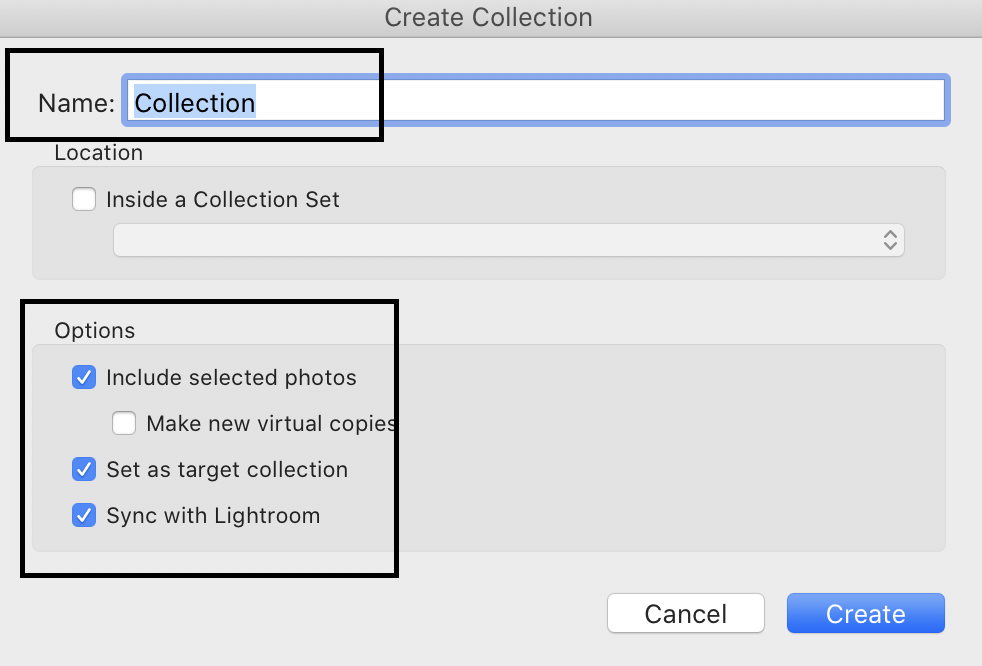
Under Options :
Check Include Selected photos.
Keep the option – ‘ Make new virtual copies’ unchecked
Check ‘Set as target collection’ ( We will be moving the images to this Collection now )
Check ‘Sync with Lightroom’ ( If you want to have this setting across devices then check this option )
Adding keywords
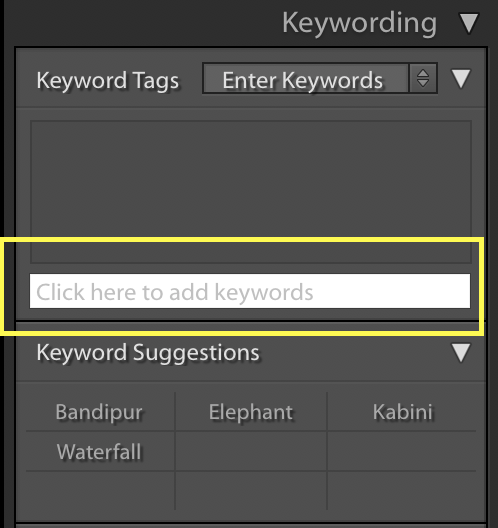
Select the imported images. Press Command or Cntrl and select the required images.
Under Keywording tab > Enter the keywords.
Keywords will be applied to the images.
To move the image to Collection, right-click and select option > Add to target collection ( or Press B )
3. Apply Painter brush tool for effective image organization
The painter brush tool is the most useful in image organization.
You can use the Painter brush tool for multiple tasks. However, we will specifically look into how you apply the keywords and the images to the target collection
Steps to apply Keywords using the painter brush tool
Under the Library module, Select the Painter brush tool.

Under the Paint Dropdown option select option ‘Keywords’
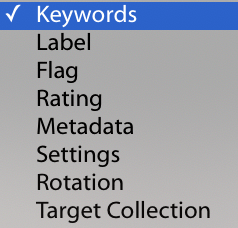

Type in the required keywords
With Painter brush selected, click on the images. Hence the keywords will be added to chosen images.
Steps to move the image to specific collections
Under the Library module, Select the Painter brush tool.
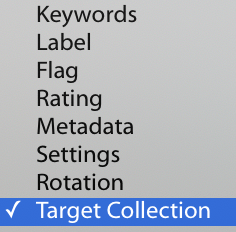

Under the paint Dropdown option, select ‘Target Collection.’
With Painter brush selected, click on the images. All the clicked images will be moved to the target collection.
You are awesome ! you have successfully organized the images into Adobe Lightroom.
Now it’s your turn!
I hope you enjoy my guide to Organising images in Adobe Lightroom.
Let me know your thoughts on the guide. If anything is missing in the guide.
Either way, let me know by leaving the comment below right now.
EXPLORE. PHOTOGRAPH. INSPIRE
JOIN OUR NEWSLETTER AND GET THE BEST ARTICLES ABOUT DIGITAL POST-PROCESSING AND PHOTOGRAPHY TECHNIQUES. NO CHARGE. NO SPAM. ONLY LOVE.
A very handy, crisp and to the point article on Lightroom Library Module. Very helpful indeed, specially the painter tool which most of us neglect or overlook.
Thanks for making the content