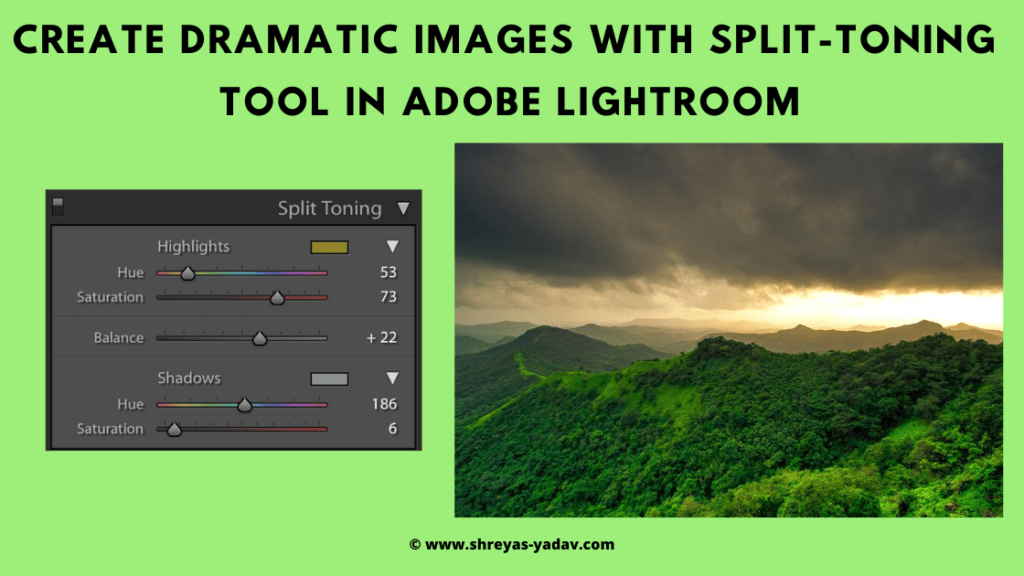
The split-Toning tool will help you to create dramatic and surreal images. In this step-by-step Adobe Lightroom guide, you will learn how to use Split- Toning Tool.
Do you want to create a dramatic effect in your images?
Are you looking for that surreal light in your landscape images?
Or do you want to create that beautiful evening light in your cityscape image?
Then, you are in the right place.
Because in this article, I am going to share with you how to use the Split-Tone tool in Lightroom. I use the Split-tone tool in my Landscape images to create a beautiful and surreal light. The Split-Tone tool will be useful to you for creating dramatic images in your pictures.
And the best part is?
Split-tone tool can be learned quickly. No matter if you are a beginner or Intermediate level photographer, you can pick up the Split-Toning tool and start creating dramatic light in your images.
And these tools are available in Adobe Lightroom 2020 and earlier versions of Lightroom as well.
Let’s Dive right in-
In this article, you will learn –
- What is Split-toning in Adobe Lightroom
- What are the different sliders in the Split-Toning tool
- How to use the sliders in the Split-toning tool
1. What is Split-toning in Adobe Lightroom?
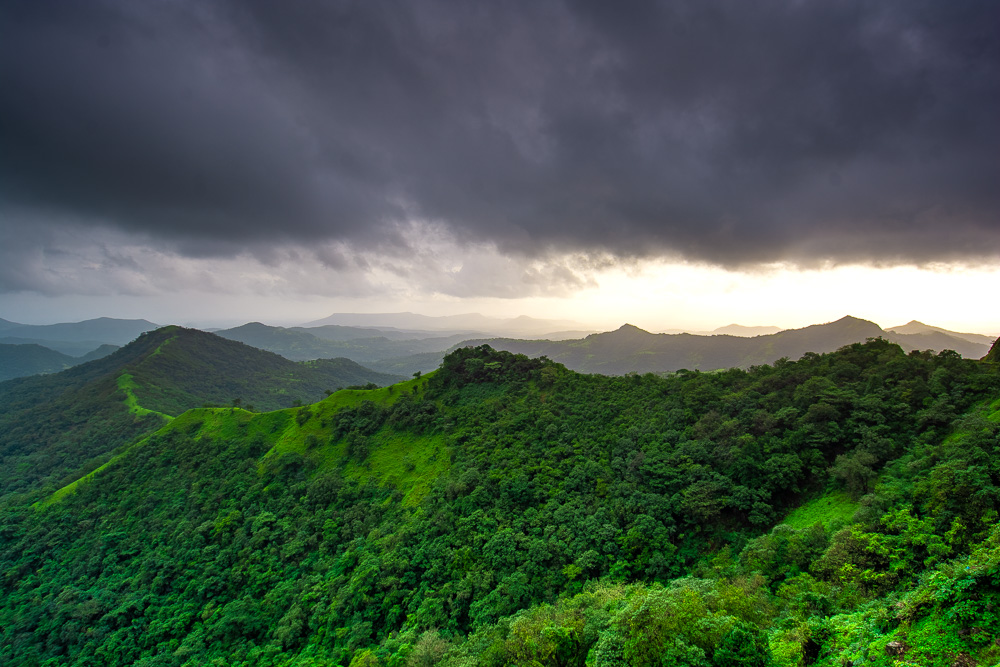
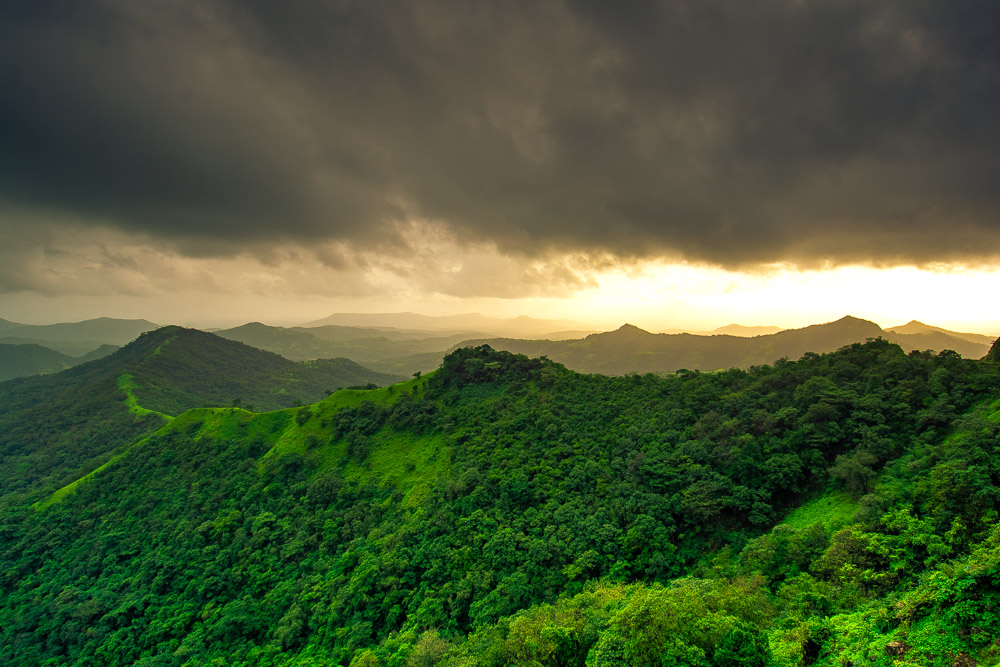
In simple terms, split toning is a process to add colors to highlights and shadows of the image. With Split-Toning, you can adjust the colors in Highlights and Shadow areas separately.
Here is an image of Sahyadri mountain ranges during the Monsoon season. While driving down the mountains, I came across this beautiful scene. Monsoon clouds were approaching the mountain with full gust. On the horizon, the sun was piercing thru the clouds. It was a surreal landscape.
In this image, I applied basic adjustments in Adobe Lightroom. However, I wanted to emphasize the warm color of the sunlight.
Similarly, I wanted to showcase the cool and calm green color of the forest.
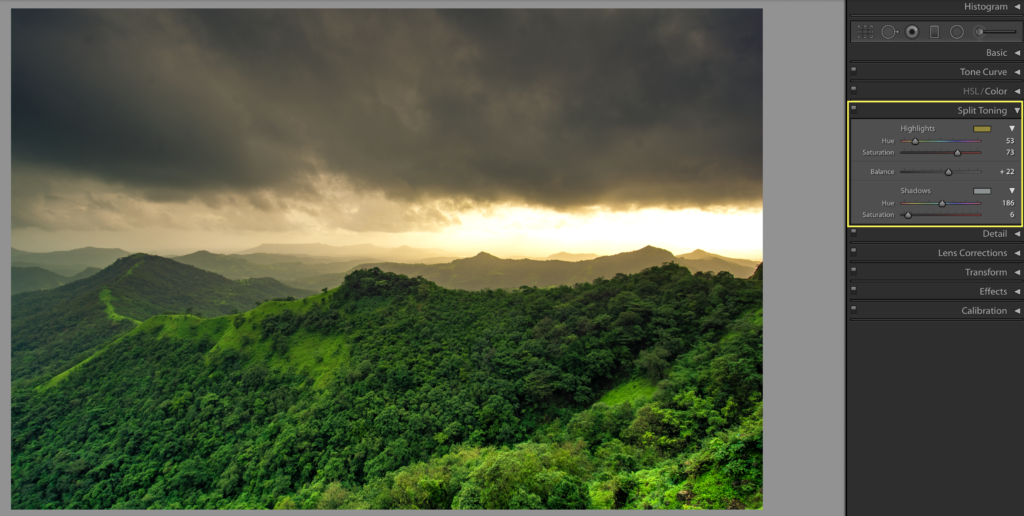
Hence, I have used split toning to add yellow-orange colors to the highlighted area. In the shadow area of the mountain and clouds, I slightly added cool colors.
2. What are the different sliders in the Split-Toning tool?
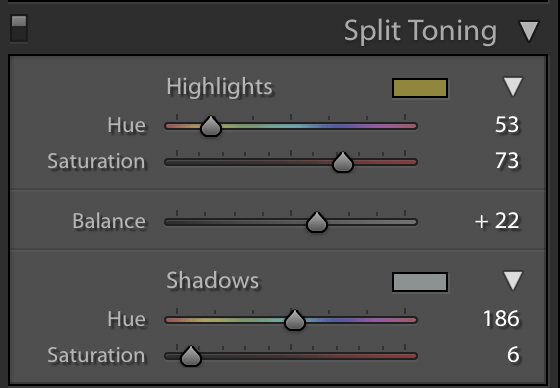
There are three sections in the Split Toning tool
- Highlights
- Hue Slider
- Saturation Slider
- Shadows
- Hue Slider
- Saturation Slider
- Balance
- Balance slider
3. How to use the sliders in the Split-toning tool
- Highlights section
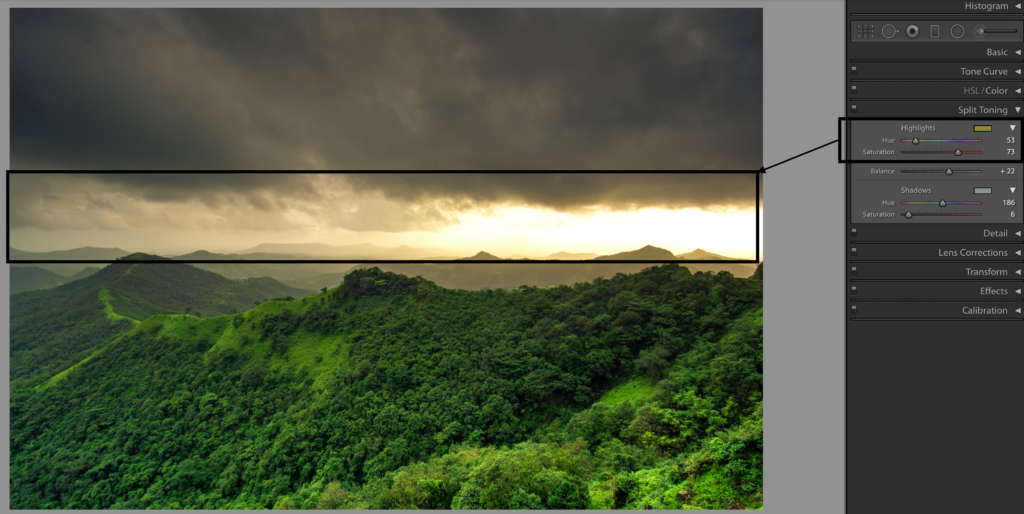
Under the Highlights slider, there are two sliders – Hue and Saturation.
With the Hue slider, you can select the color for the highlighted area. Saturation sliders will help you to control the effect of the color.
Use the Hue slider to select the color which you want to apply. You can use Hue Slider or use the color picker tool.
To check which color you are applying, press, and hold the Alt/Option key and drag the slider towards. You will notice which color you will add to highlight the area.
Drag the saturation slider toward the right to increase the intensity of the color you are adding in the Highlight area.
2. Shadow section
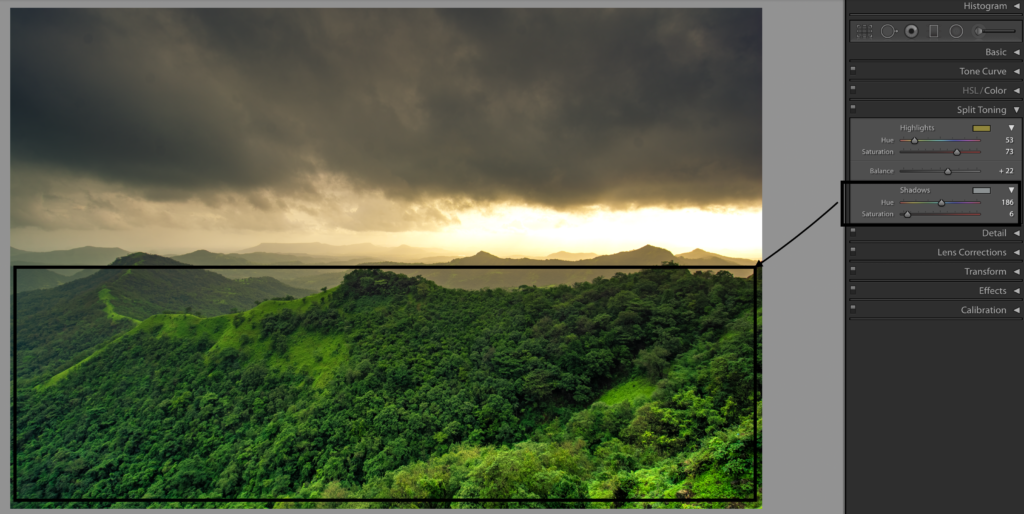
Similar to the Shadow section, there are two slider – Hue and Saturation.
Hue slider adds a specific color to the shadow areas. Whereas the Saturation slider increases or decreases the intensity of the color.
You can adjust the Hue by Hue slider, or you can use the color picker tool. Press and hold the Alt/Option key, and you will understand which color is getting added.
Also, you press and hold the Alt/Option key and drag the Saturation slider; you can see how the intensity of the color is changing.
In summary, sliders under the Highlights and Shadow area work in a similar way. However, one set of sliders affects Highlights and the other set of slider affect the shadow part.
You are going to find one interesting feature of the Split-Toning tool. It is called Balance.
Balance slider allows you to control the effect of Split toning precisely over a highlights and shadow
3. Balance slider
A balance slider helps you to define the threshold for Highlights and Shadows.
With the Balance slider, you can define which area in the image is highlighted or which area is shadows.
If you drag the Balance slider towards the extreme right, then most of the image area is considered as Highlights. Color settings of the Highlights sliders will be predominant.
Similarly, if you drag the Balance slider towards the left end, most of the image is considered a shadow area. Color settings of the Shadow sliders will be predominant.
These are Split-toning tips that you can use to create dramatic images.
Now it’s your turn!
I hope you enjoyed these tips on Split-toning.
Any thoughts on the split-toning or if anything is missing in the guide
Either way, let me know by leaving the comment below right now.
EXPLORE. PHOTOGRAPH. INSPIRE
JOIN OUR NEWSLETTER AND GET THE BEST ARTICLES ABOUT DIGITAL POST-PROCESSING AND PHOTOGRAPHY TECHNIQUES. NO CHARGE. NO SPAM. ONLY LOVE.
very useful info , thanks
Hello Mr.Rajendra Dharashivkar,
Glad to know you found this article useful. Thank you