In this Lightroom Tutorial, we will learn how to use Select Sky Easy and Quickly with Lightroom’s latest features.
I think you will agree with me when I say it’s hard to select a sky quickly
Well, it turns out you can select a sky Precisely and quickly using the latest Lightroom tools.
Let us dive right in –
Sky Selection tool in Lightroom
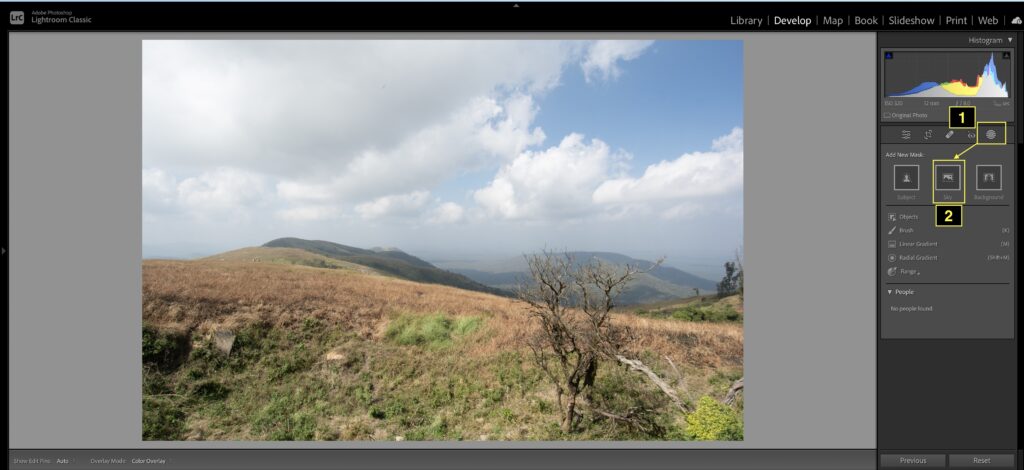
- Under the Lightroom Develop module, select the masking option.
- Click on the Select Sky icon under the option Masking > Add New Mask
- Mask Panel will appear. You can see the Sky in the image selected. Check the Show Overlay checkbox to see which area of the Sky is selected.
- You have made the initial Sky selection. You can use this Sky Selection as a good starting point.
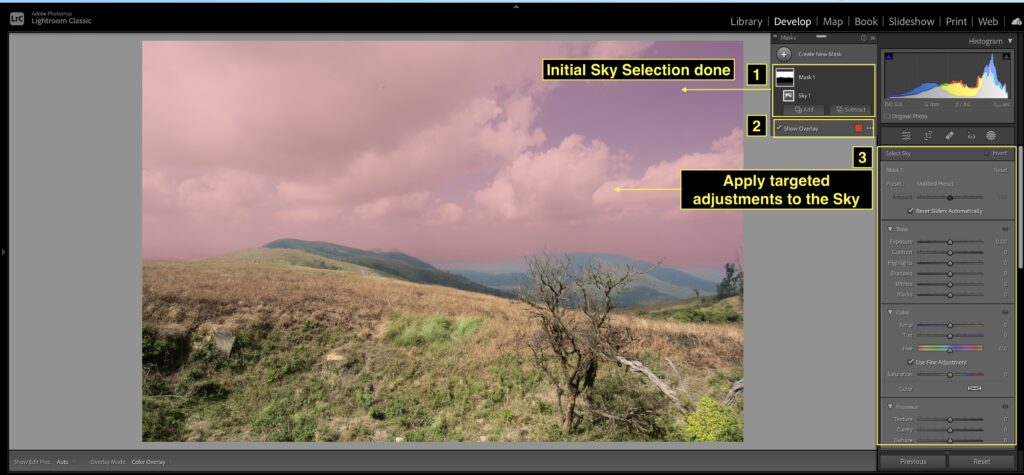
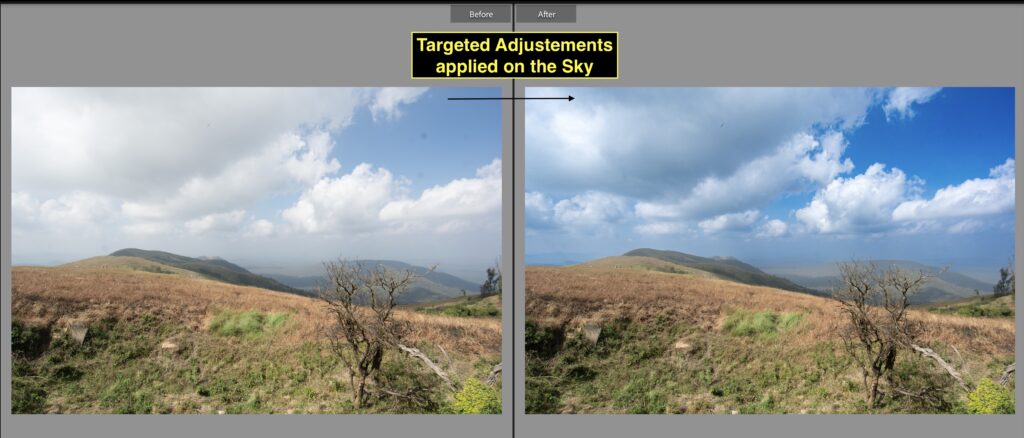
- Apply the targeted adjustments for a selected Sky.
Optional steps to refine a sky selections
- Once you make the initial Sky selection, under the Mask panel click on the selected mask.
- Below the Mask, there are 2 options- Add and Subtract
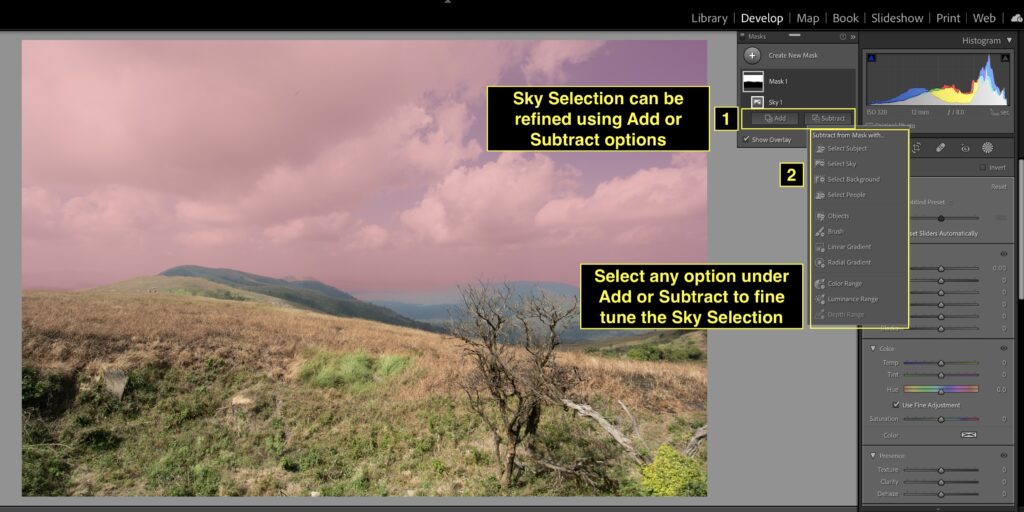
- To add more areas to the Sky selection, click on Add.
- There are multiple options to Add to the current selection.
- The brush option helps extend the selections. Select the brush option and paint over the area you want to select.
- To subtract from the selection, select the Subtract option. Select the brush and paint over the area which you don’t want in the selection.
- Out of multiple selection options, I find the Brush option to be helpful in adding or subtracting to the Sky selection.
- Feel free to try if your Sky selection demands additional selection options. It’s worth it.
Visualizing the overlay
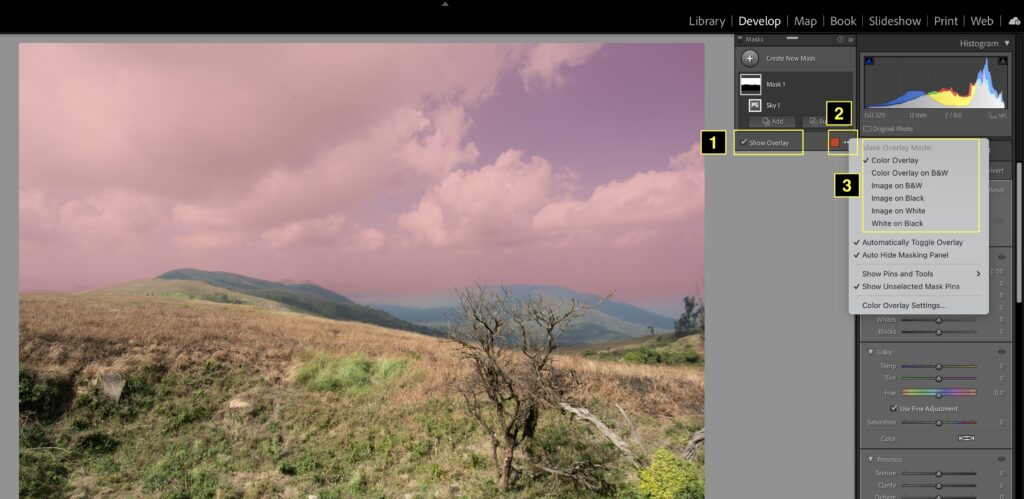
- You can visualize the selected Sky using various overlay modes.
- To visualize the selection, under the Mask check the Show overlay box.
- You can see a default overlay as Color Overlay. Now you can choose a different color for overlay. Click on the color palette and select the color of the overlay.
- Also, there are other overlay modes available. I chose color overlay or Color Overlay on B & W as I find that overlay’s easy to refine the Skyselections. You can choose which you find useful for your images.
Bonus tip to quickly make the image beautiful
- Select the Sky as mentioned in the above steps. Use Select Sky to select the Sky.
- Make Targeted adjustments to the Sky. Specifically targeted adjustments I recommend are – Black and White point, Highlight/ Shadows, Vibrance and Saturation, Clarity, Texture, Sharpness, and White Balance. Every image is different hence you can apply targeted adjustments as per the image requirement.
- The key Idea here is, to create a beautiful sky that compliments your main subject. Increase the impact of the Main subject by gently optimizing the sky.
Now it’s your turn
I hope this Lightroom tool will help you to select and edit the Sky faster and more accurately.
Now I would like to hear from you.
What type of Images will you edit with Select Sky Feature in Lightroom? Let me know by leaving a comment below.
Leave a Reply