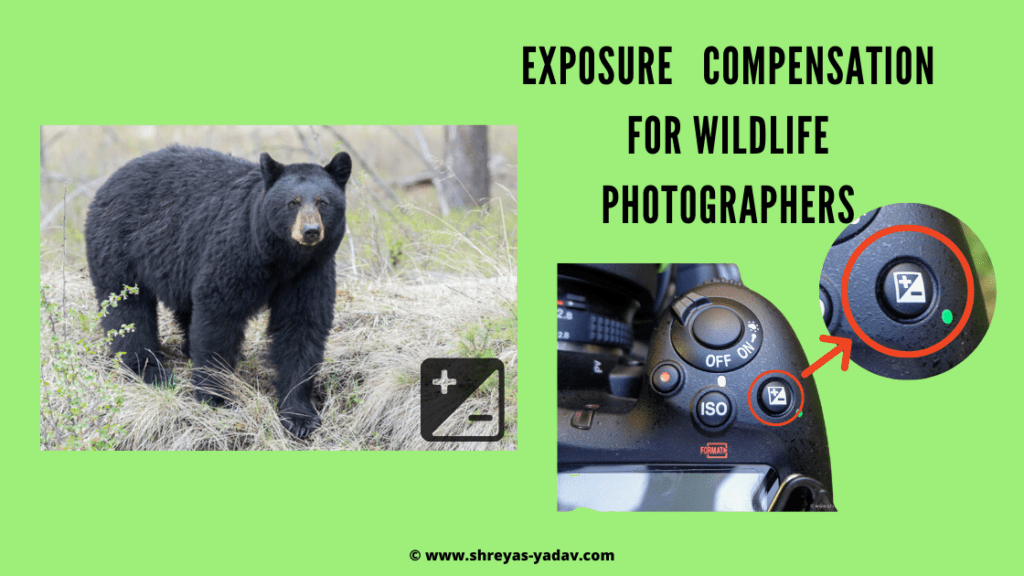
In this step-by-step guide, you will learn how to use Exposure Compensation in Wildlife photography

Do you wonder why your Wildlife images are underexposed or overexposed?
Do you want to capture correctly exposed images of Birds and Wildlife?
Then you are in the right place?
Because in this article, you will learn how to use the exposure compensation button to get perfect exposure to your Wildlife images?
After implementing the steps described in this article, you can start creating well-exposed images of Wildlife and Birds.
And the best part is,
Exposure compensation techniques described in this article work great with all types of DSLR and Mirrorless cameras. The methods described in this article work great with Entry level, mid-level, and advanced level cameras.
Let’s dive right in,
Here are the steps you are going to learn in this post –
- How does your camera meter work
- What is Exposure Compensation
- How to use Exposure Compensation in real-world Wildlife scenarios
- How to use Exposure Compensation in Aperture priority mode
1. How do your camera meter works

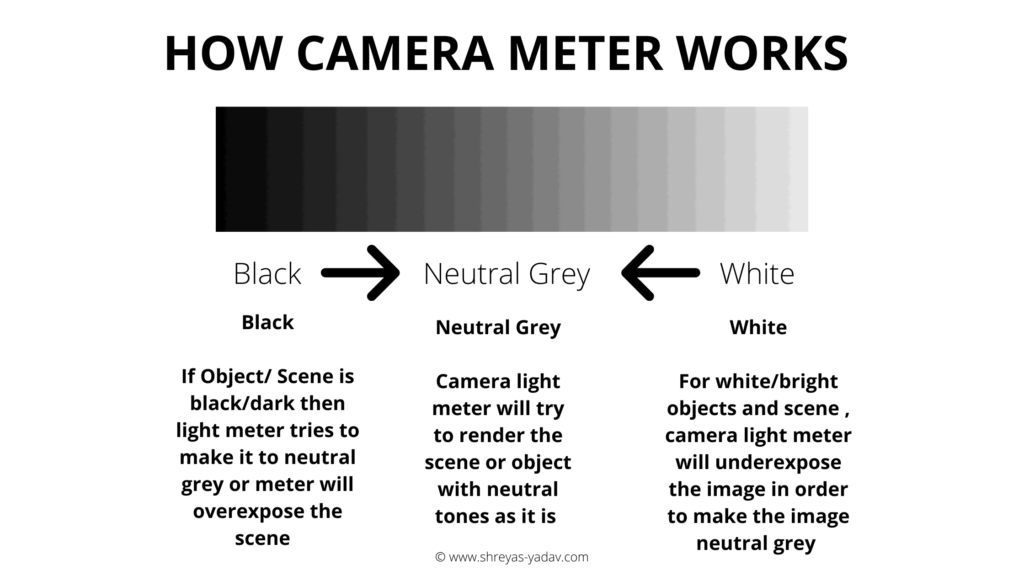
- Light meter in your Camera measures the light.
- Based on the measured light, the camera meter will try to adjust the exposure
- Refer above diagram –
- If Light meter reads bright light levels, it will bring it to neutral grey light levels.
- If the Light meter reads dark light level, it will try to bring the light levels to Neutral grey
- In summary, a camera light meter will try to bring the light levels to neutral grey
2. What is Exposure compensation
- Camera light meter will try to bring light levels to Neutral grey
- Camera meter tries to make everything neutral grey. Hence, you will get overexposed or underexposed images. This effect is more prominent with White ( Bright ), and Black ( Dark ) colored Wildlife.
- Exposure compensation is the method by which you can compensate for the exposure level adjusted by the camera
- Exposure compensation will help you to capture well-exposed wildlife images by adjusting ( or compensating ) the exposure levels.
- Use the exposure compensation button on your cameras. In some cameras, you can find Exposure compensation inside the camera menu. This button is indicated by symbol +/-
Now we will learn how to Exposure compensation works in real-life scenarios of Wildlife Photography.
3. How to use Exposure Compensation in real-world Wildlife scenarios

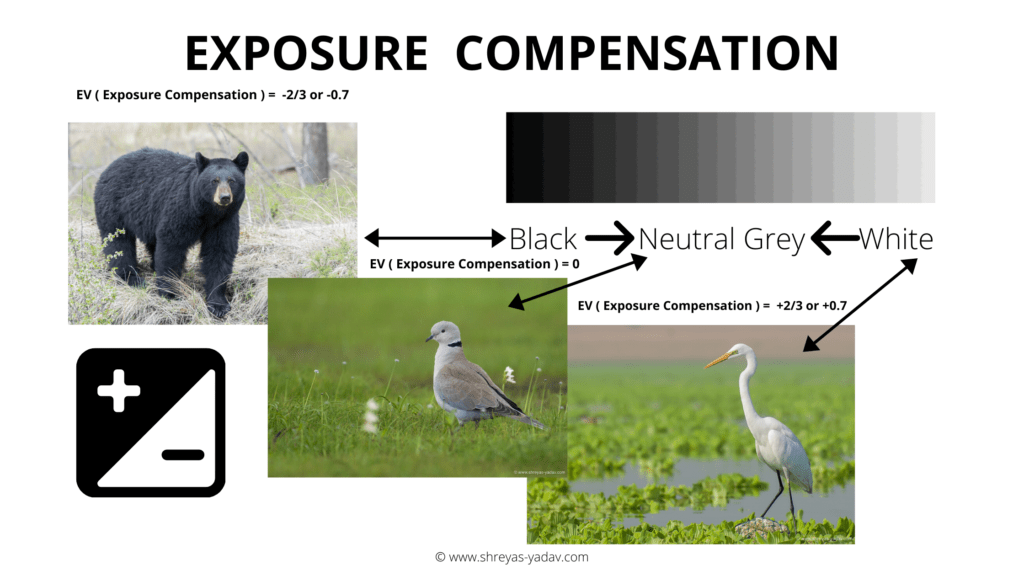
- The first image is of a Black bear on the left. Camera’s light meter will see dark tones on the black bear.
- Based on the Light meter’s functionality, the camera will try to get neutral grey levels.
- It will make the Black bear appear a bit overexposed, and the background will be overexposed prominently.
- To expose the scene as I saw, I used Exposure compensation. ( I used Aperture Priority )
- I underexposed the image by 0.7 or ⅔ ( Exposure Compensation = -0.7 or -⅔ )
- Hence the Black bear and the background got well exposed.
- On the other side, take a look at Bird Egret on the right.
- The overall scene and the bird is bright. Hence Camera tried to make it neutral grey.
- Because of this, the image would have been underexposed.
- Therefore I used Exposure compensation of + 0.7 or +⅔ to expose the bird and background as closely as possible to the real scene ( I used Aperture Priority )
- Now, take a look at Image of Dove at the Center.
- The Dove bird is of grey colors, and also it is an overcast day
- Hence To achieve similar exposure levels, I don’t have to apply for any exposure compensation. As the overall exposure levels are within the neutral grey area of the Camera meter, hence the Camera exposed the scene accurately.
Now, you know what exposure compensation is and how it works – Let’s learn how you can use exposure compensation while photographing an image of a Wildlife or Bird.
4. How to use Exposure Compensation in Aperture priority mode
Case 1: Dark Coloured object or Dark Light Levels
- Use Aperture Priority mode. Select an Aperture suitable to the scene. Use ISO as per the scene ( Do not use Auto ISO )
- The Camera will automatically set the Shutter Speed
- Use the Matrix metering mode. ( In the Matrix metering, the Camera evaluates the whole scene ). Spot metering and Center weighted matrix also work well. However, I recommend that you start with Matrix ( or Evaluative ) metering first. Once you get control over Exposure compensation, then use spot or Center weighted metering modes.
- Take a picture without any exposure compensation. The image will be a bit overexposed.
- Now, since this is dark object underexpose the image by -0.3 , -0.7 or – 1 ( or ( -⅓ , -⅔ , -1 )
- For applying for the exposure compensation, press the Exposure compensation button ( +/- ) and rotate the dial on the back. ( Or refer your camera manual on how to use exposure compensation button )
- Now evaluate the images. You will notice the Exposure compensated image gives you better Exposure as compared to the image without exposure compensation
Case 2: Bright coloured object or Bright Light Levels
- Use Aperture Priority mode. Select an Aperture suitable to the scene. Use ISO as per the scene ( Do not use Auto ISO )
- The camera will automatically set the Shutter Speed
- Use the Matrix metering mode. ( In the Matrix metering, the Camera evaluates the whole scene ). Spot metering and Center-weighted matrix also work well. However, I recommend that you start with Matrix ( or Evaluative ) metering first. Once you get control over Exposure compensation, then use spot or Center-weighted metering modes.
- Take a picture without any exposure compensation. The image will be a bit underexposed.
- Now, since this is a bright object overexpose the image by +0.3 , +0.7 or +1 ( or ( +⅓ , +⅔ , +1 )
- To apply for exposure compensation, press the Exposure compensation button ( +/- ) and rotate the dial on the back. ( Or refer your camera manual on how to use exposure compensation button )
- Now evaluate the images. You will notice the Exposure compensated image gives you better exposure than the image without exposure compensation.
Note –
- Exposure compensation works well with Aperture or Shutter priority mode.
- However, in most of the Wildlife or Bird image, you will be using Aperture Priority
- While using Manual exposure mode, for controlling the Exposure you can change ISO, Aperture, and Shutter speed. In the Manual exposure mode, you may not need the Exposure compensation button
- Start using Exposure compensation with Matrix or Evaluative metering. Once you get used to the Exposure compensation method, you can use it with other metering modes.
- While using Exposure compensation in Aperture priority mode, turn off the Auto ISO feature. Instead, use ISO value suitable for the scene.
That is all for now! This is how you can use Exposure compensation for Wildlife and Birds Images.
Now it’s your turn!
I hope you enjoyed tips on exposure compensation for Wildlife photography.
Let me know your thoughts on these tips or If anything is missing.
Either way, let me know by leaving the comment below right now.
EXPLORE. PHOTOGRAPH. INSPIRE
JOIN OUR NEWSLETTER AND GET THE BEST ARTICLES ABOUT DIGITAL POST-PROCESSING AND PHOTOGRAPHY TECHNIQUES. NO CHARGE. NO SPAM. ONLY LOVE.
Very clear and very attractive article. Blessings and Warm Regards. All Good Wishes to do more articles and videos for the betterment of Nature & Wildlife Photography Field. I Love your Wildlife articles a Lot. I am learning a Lot from your Good self. Warm Regards.