In this article, you will Learn how to create Presets in Adobe Lightroom. Presets will help you make consistent image adjustments quickly.

Do you want to develop your preset style?
Do you want to create beautiful effects in your images quickly?
Or you want to save your Image Post Processing time.
Well, then you are in the right place. This article will show you the exact steps to create your own presets in Adobe Lightroom.
The steps described In this article will help you to create your preset style. This article will also help you to make consistent edits in your images with significantly less time.
Let’s dive right in.
Here are the steps you will learn in this post
1. Creating Preset in Adobe Lightroom Classic
- Open an image in Adobe Lightroom Classic
- Select the Develop Module to edit the image
- Once the image is open under the Develop module, Make the Global and Local Adjustments
- Here are basic Global Adjustment
- Crop
- White balance
- Black and White point
- Shadows and Highlights
- Vibrance and Saturation
- Noise reduction
- Sharpening
Learn how to make effective Global Adjustment in your Images here
- Make targeted adjustments using the tools in Adobe Lightroom
- Graduated Filter
- Radial Filter
- Adjustment Brush
- HSL Slider – Hue, Saturation and Luminance slider ( For targeted color adjustment )
Learn how to make effective Targeted Adjustment in your Images here
- Once you have made the Global and Local adjustments, it’s time to create a Preset
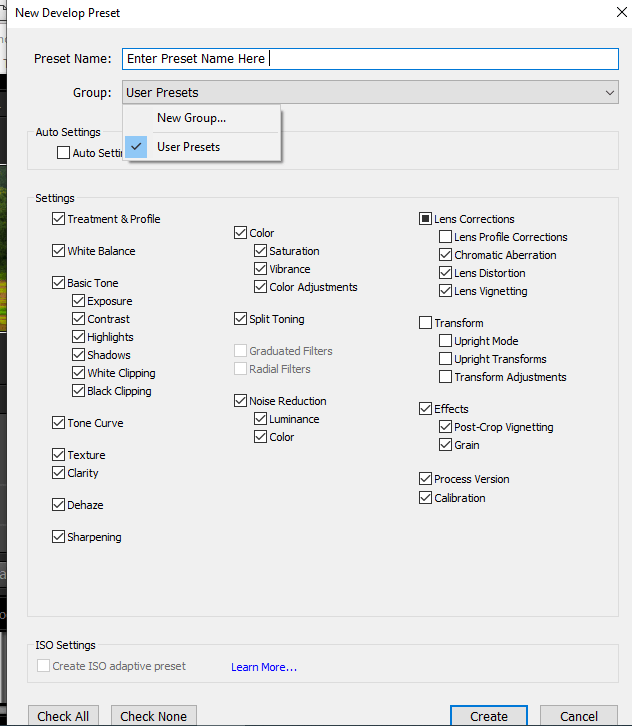
- Under Develop Module > Presets > Create Presets. New Develop Presets window will appear

- Enter the Preset Name. Create a Group for the Preset. Also, you can Select a Group as User Presets. Then click on Create.

- Bingo! You have created a Your Own Preset in Adobe Lightroom
- Now its time to Apply the Preset, which you have just created.
2. Applying the Preset in Adobe Lightroom
You can apply the Presets in the develop module, or you can use the Presets while importing images.
Here are the steps to apply the Presets while importing images.
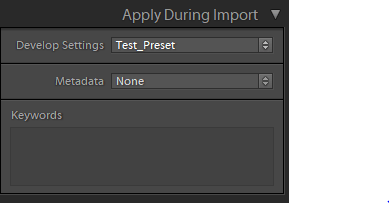
- While you are importing the photos in the Import module, head over to the Apply During Import Panel.

- Under the Develop Settings, select the Preset you have created. ( Apply During Import > Develop Settings > Select the required Preset )
- Applying the Presets during the Import process can save you a significant amount of time. You can create multiple Presets for different types of Images.
Now, Let’s see how you can apply the Presets in a Develop module.

- Open an image in a Develop module.
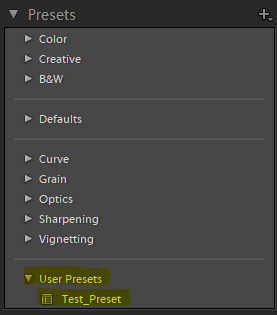
- Under a Preset Panel, select the User Presets.
- Under User Preset, select the Preset which you have created
- The Preset will be applied to your image in the Develop module.
Awesome! You have just created your Preset and applied it to your images.
Presets will help you to make consistent image editing in a relatively quick time.
Now it’s your turn!
I hope you find these tips helpful.
How do you create Presets in Lightroom or Any thoughts on this article?
Either Way, Let me know by leaving a comment below right now.
EXPLORE. PHOTOGRAPH. INSPIRE
JOIN OUR NEWSLETTER AND GET THE BEST ARTICLES ABOUT DIGITAL POST-PROCESSING AND PHOTOGRAPHY TECHNIQUES. NO CHARGE. NO SPAM. ONLY LOVE.
Leave a Reply