Lens Blur in Adobe Lightroom: In this article, you will learn How to use the New AI-powered Lens Blur ( Early Access ) option to Improve Your Post Processing Workflow
You can create smooth blurry backgrounds and foregrounds with the Lens Blur feature. Also, you can add beautiful bokeh to your images.
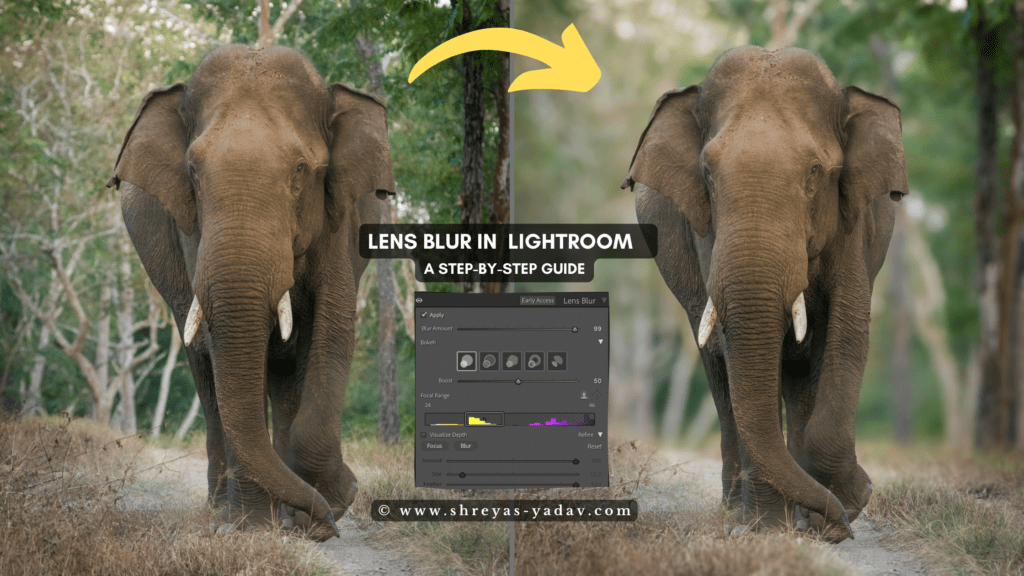
If you are a Product, Portrait, Wildlife, or Nature photographer, you are going to love the Latest feature launched by Adobe Lightroom in their recent release.
The New AI-powered Lens Blur ( Early Access ) feature will help you to create smooth blurr backgrounds. Blur backgrounds will add depth to the image and add Punch to your images.
Suppose you are thinking that AI will post-process your Images – NO! AI will not post-process your image. You will have all the controls and creativity of your image.
However, the AI-based Lens Blur ( Early Access) tool will make your post-processing workflow easier and faster. Also, it will make the foreground and background blur quick and easy.
I have started using the Lens Blur ( Early Access ) tool while post-processing the images. I must tell you that, it is saving my time. And the results are quite good.
And, I want you to try this tool to create smooth and blur background and foreground. This means less time in front of the computer and more free time for Photography.
In this article, you will learn about the Lens Blur ( Early Access ) tool and how you can use it to post-process your images effectively.
Let’s dive right in:
Lens Blur Tool ( Early Access)
- How the Lens Blur Tool Works
- Controls and Sliders in the Lens Blur Tool
- How to Use the Lens Blur Tool – an Example
How the Lens Blur Tool Works
You can use the Lens Blur tool to Apply the effect of Optical blur and Bokeh in your images.
Also, you can apply and control the blur in the Foreground and background of the image easily.
Lens Blur tool uses a Depth map in the image to distinguish between the foreground, the main object, and the background. Once the depth map detects different depth levels, the Lens blur tool can apply the Blur effect selectively to specific Depth ranges.
Controls and Sliders in the Lens Blur Tool
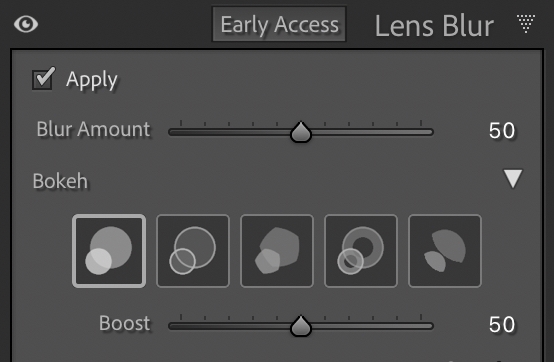
Blur Amount: Blur Amount Sliders controls the intensity of the Lens Blur effect. The higher the Blur amount – you will see a prominent Lens blur in an image.
Bokeh: You can apply different types of Bokeh Effects, suitable to the image.
Available Bokeh effects: Circle, Bubble, 5-Blade, Ring, and Cat Eye.
Boost: Boost Slider can be used to increase or decrease the intensity of the Bokeh Effect that you have selected.
Focal Range: This is a slider where the real magic happens. The focal range shows different Depth levels in the image. It is a graphical (kind of Bar chart) representation of various depth levels. It includes areas of the image that are in focus and out of focus.
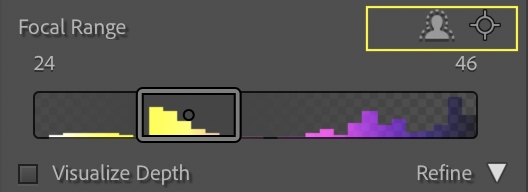
Here you can select the Specific Focal range where you want to apply the Blur effect.
There are 3 ways you apply select the focal range to be blurred.
- Adjust the Slider on the focal range by dragging the Slider left or right
- Select the Subject focus icon and the blur effect will be applied to areas about the AI-detected subject
- Point/Area Focus: Select a specific point or area on the image. And then adjust the Focal range manually.
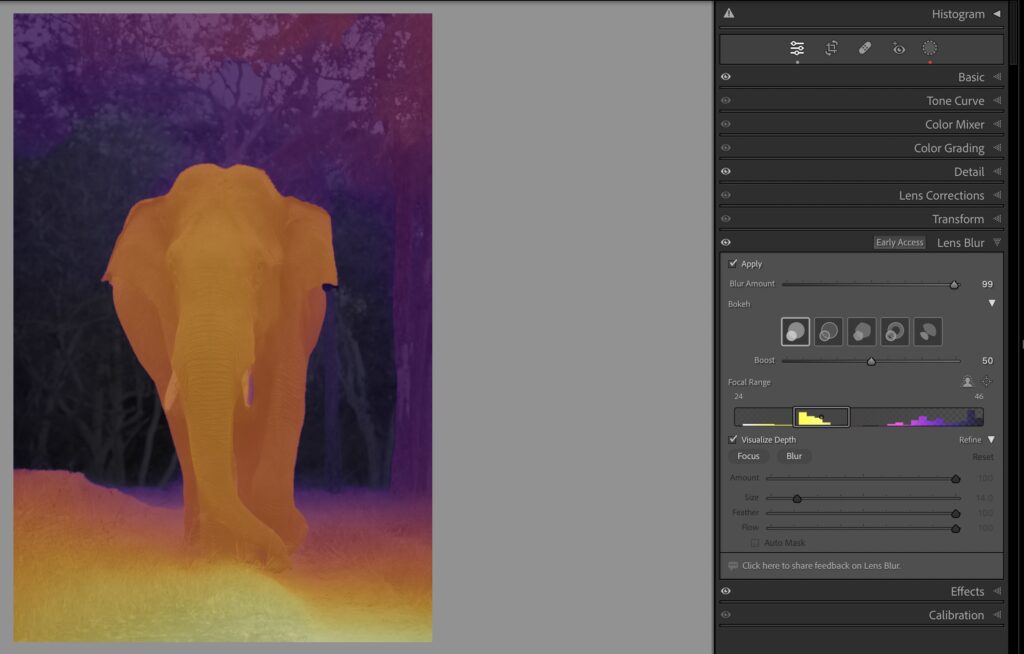
Visualise depth: Check the Visualize depth checkbox. You will see the different depth levels ( Focal ranges ) in different colors ( Warm and cool color tones ). It is a good tool to see which areas are in focus and which are out of focus. This tool can help you to apply the Lens Blur Effect more accurately.
Refine: You can refine the depth map using this option.
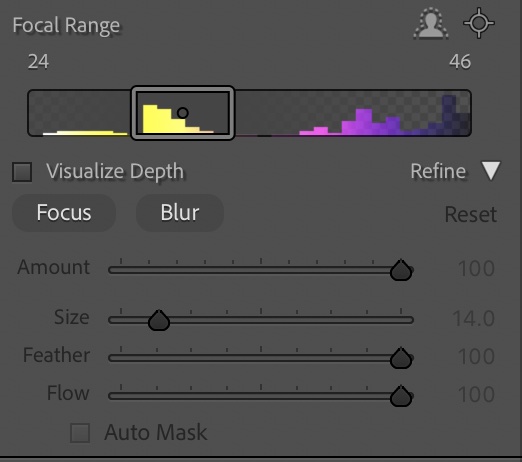
Refine comes with the Focus and Blur option.
If you select the Focus and paint ( or brush ) over the areas that you still want to keep in focus, the areas will remain in focus ( Which means they will not be blurred )
Note: The focus option does not mean, the areas that are out of focus in the original image will get into the right focus. It is just an option to exclude certain focussed areas without getting Lens Blur applied.
The second option is Blur – You can paint ( or brush) over the areas in the image to apply the Lens Blur.
To Control the Lens Blur with the Refine Option, there are additional sliders that will help you to fine-tune the Lens Blur.
These Additional Sliders are Amount, Size, Feather, and Flow.
Now Let’s learn how to apply Lens blur to an image
How to Use the Lens Blur Tool
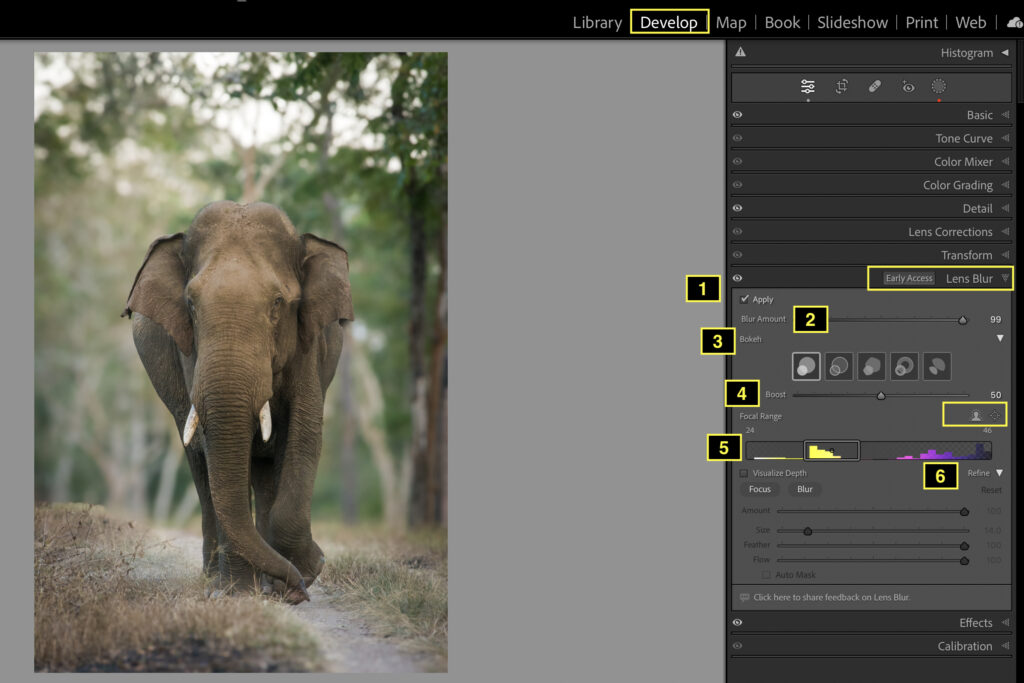
- Under the Develop Model, select the Lens Blur ( Early Access ) option > Click ‘Apply’
- Select the Blur amount. I would Start with 50 and then adjust based on the image preview.
- Select the Bokeh Effect suitable to your image. Circle and Bubble Bokeh effect I find useful for most of my images.
- Check the image preview and Adjust the Boost slider to control the Intensity of the Bokeh Effect. If required also adjust Blur Amount.
- Set the Focal Range based on the Subject Focus or Point/Area Focus option. I use Subject Focus in most of the cases and then Adjust the Focal range accordingly. You can apply either of the methods suitable to your image. Once you select the Subject Focus or Point/Area focus option adjust the Focal range manually in order to fine-tune the focal range
- In images where the subject has a clear distinction between foreground, Main subject, and Background – Lens Blur is applied effectively.
- In case there is less distinction between foreground, subject, and background then use the refine option to apply the Lens Blur option.
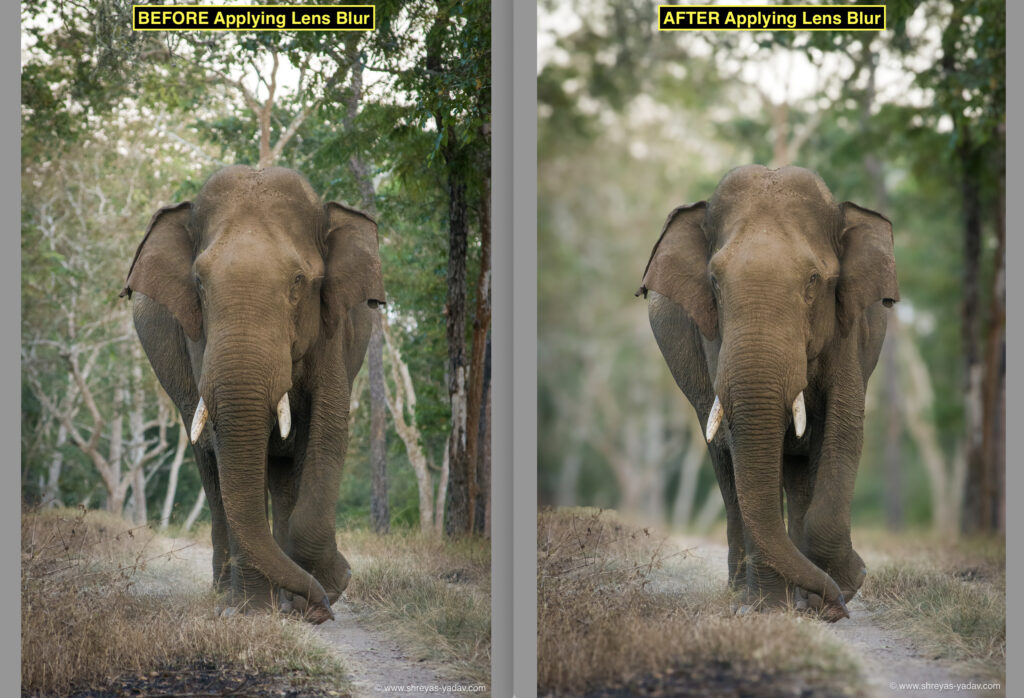
- Here are the images: One Before applying the Lens blur and another after applying the Lens Blur.
Now it’s your turn
Do you find this Lens Blur Tutorial helpful? Do you have any questions related to the Lens Blur Tool? Either way, let me know in the comments below
Yes it’s nice tool Shreyas. I am sure many people using it . I have noticed that alt is slow downing my windows system… but in Mac it works faster. So mostly I use adobe RAW for faster processing from photoshop….