Lumix FZ300 How to Set up a Camera: A Step-by-Step Guide
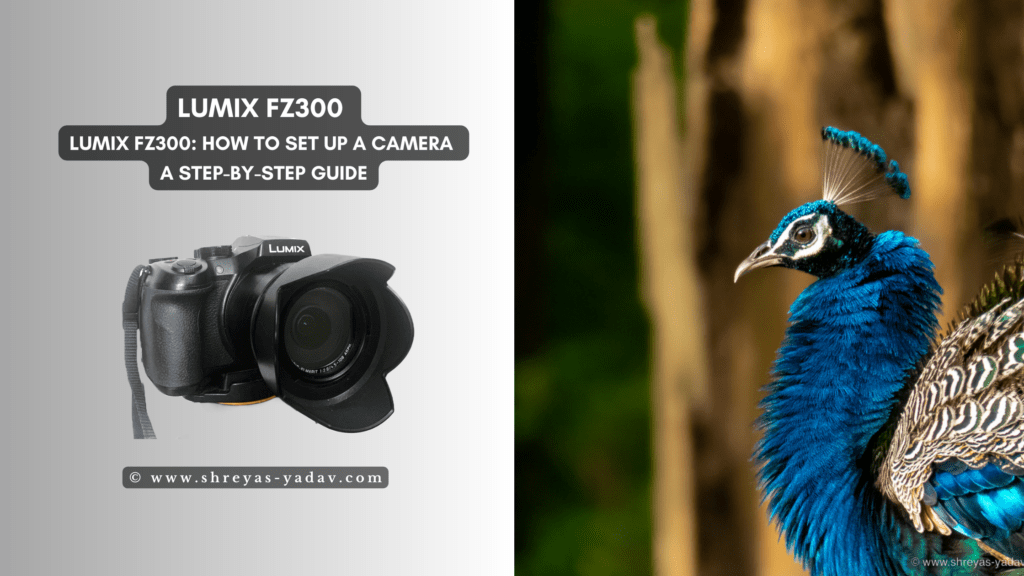
Got your new Lumix FZ300 camera? Excited to shoot stunning images and videos? Of course yes!
But where should I start? How to setup my Lumix FZ300 camera? What are the essential settings I should start with?
Does this sound similar to you?
Well, I have one good news for you. Today in this step-by-step guide I am going show you how to set up Lumix FZ300 camera. You will also learn what are the essential steps to setup the camera.
After following this step-by-step guide, you will be able to setup essential Lumix FZ300 camera settings quickly. And you will be ready to capture beautiful images and Videos.
The best part is, these essential steps have helped me to setup the Lumix FZ300 Camera quickly. And I am sure this step-by-step guide will help you to setup your Lumix FZ300 camera quickly and easily.
Here are essential steps to setup a Lumix FZ300 Camera
Check out a Lumix FZ300 Camera Review
Lumix FZ300: How to Setup a Camera
- Insert a charged battery and memory card
- Setup basic information ( Date, Time Language, etc )
- Image type, Image quality, Color Space and PhotoStyle
- Setting up focus modes and focus area
- Check on White balance, ISO, Exposure compensation, and metering
- Setting up exposure modes
- Setup image burst mode
- Next steps – Image download and post-processing
Insert a charged battery and memory card
Sounds obvious but sometime we forget. Your Lumix FZ300 camera comes with a battery and charger. Charge the battery completely and insert in the camera.


Along with battery, your camera comes with a memory card ( Or you may have to buy it separately ) . For Lumix FZ300 SD Cards are compatible. I use 64GB Sandisk SD card. It works Great. Also, Sandisk 64GB SD card is good for me to record videos and images for 2 to 3 days.


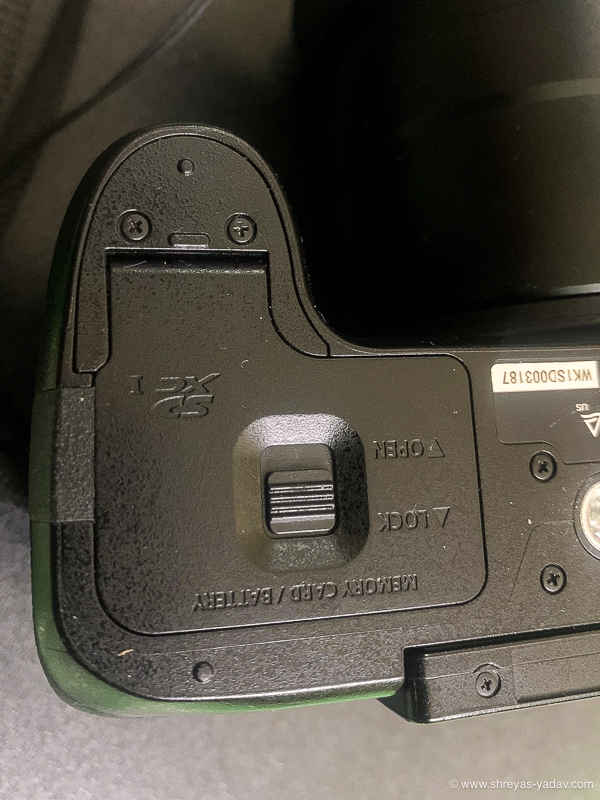
Insert the compatible card in the camera.
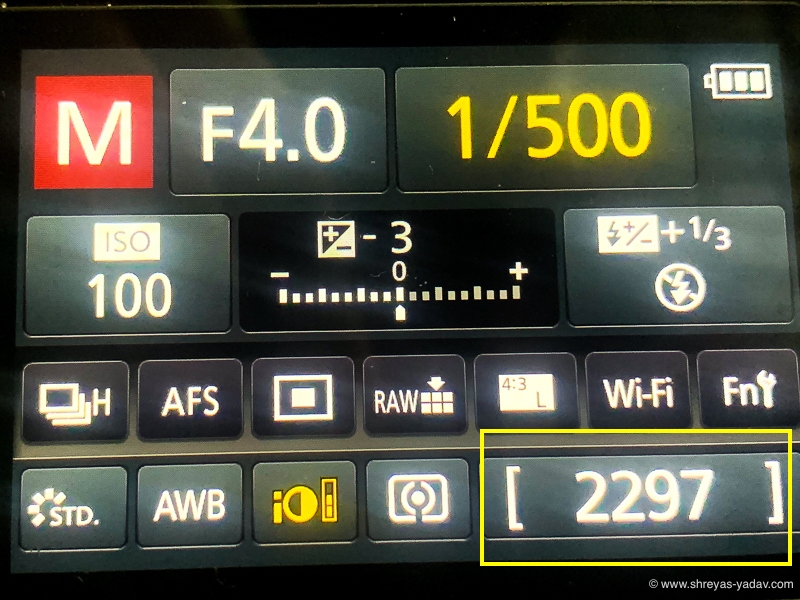
Turn on the camera. On the display you will see how charge is left on the battery. Also image numbers. It indicates approximately how many images the card can store. Turn off the camera.


Lens for Lumix FZ300
As Lumix FZ300 is bridge camera it come with a built in Lens. Lens Focal length is 25-600 mm ( 35mm equivalent ) with maximum aperture of f/2.8
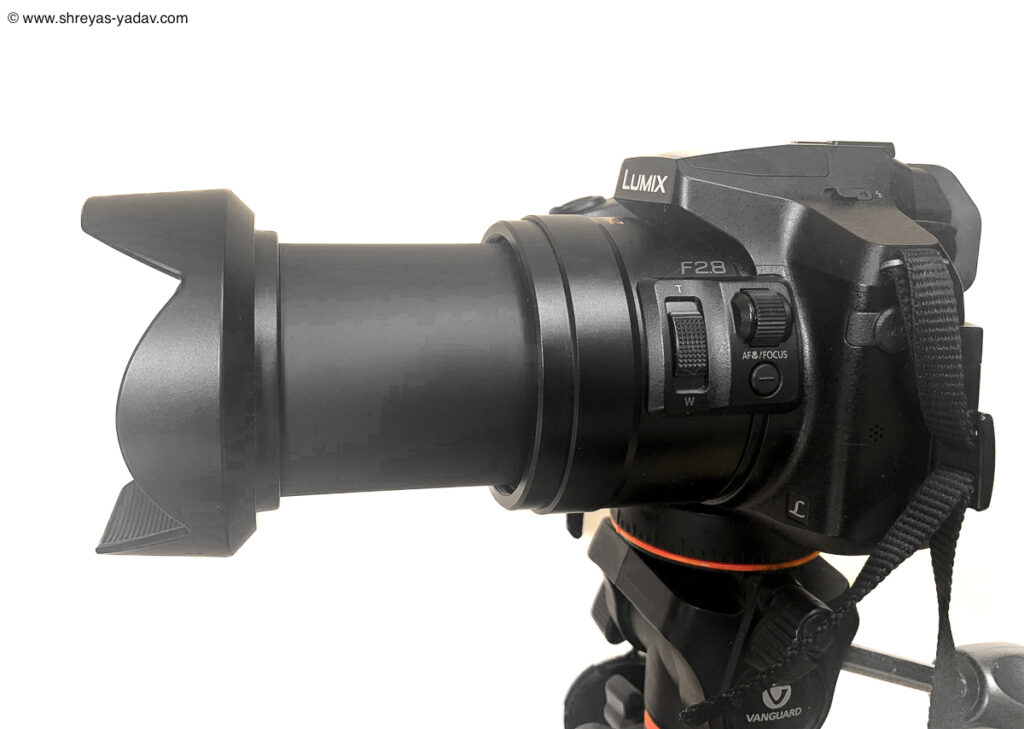
Before turning ON the camera, attach the Lens hood. ( it provides some degree of protection to the front lens element )
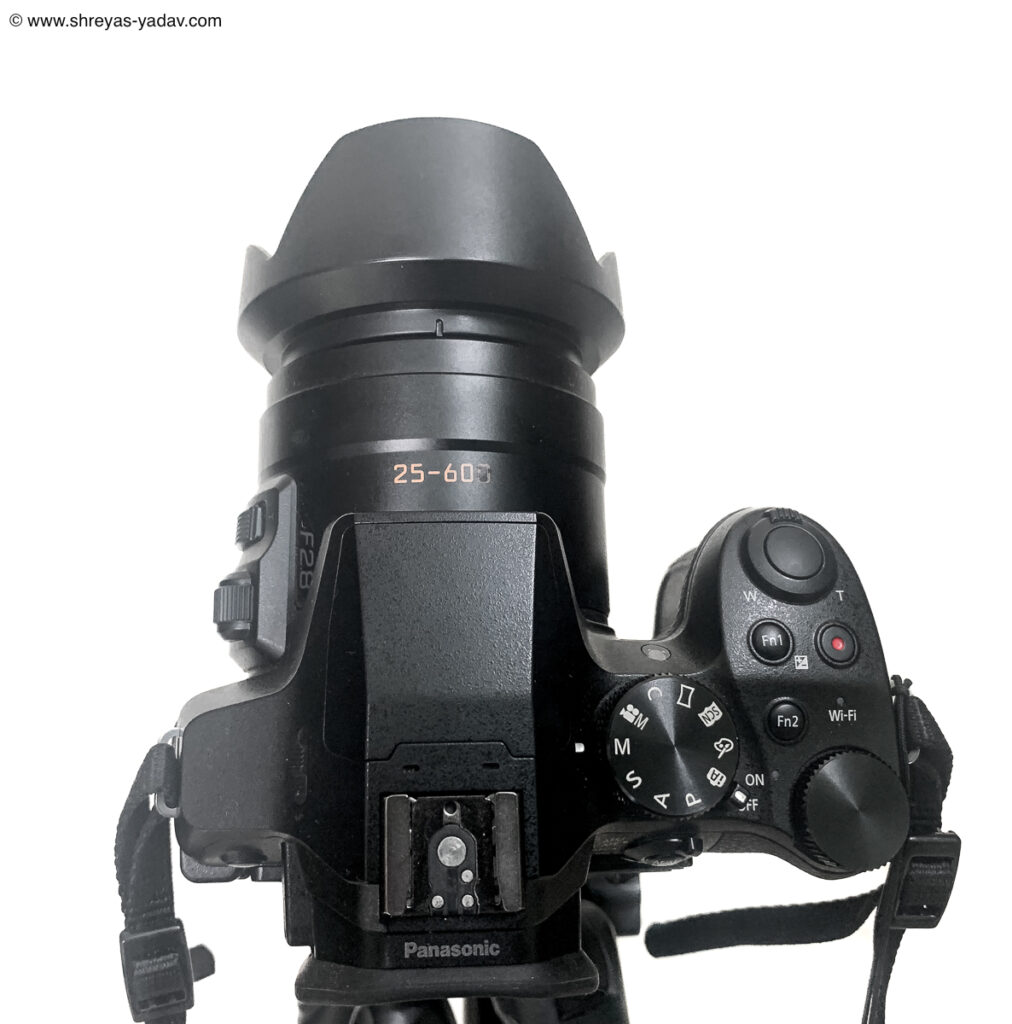
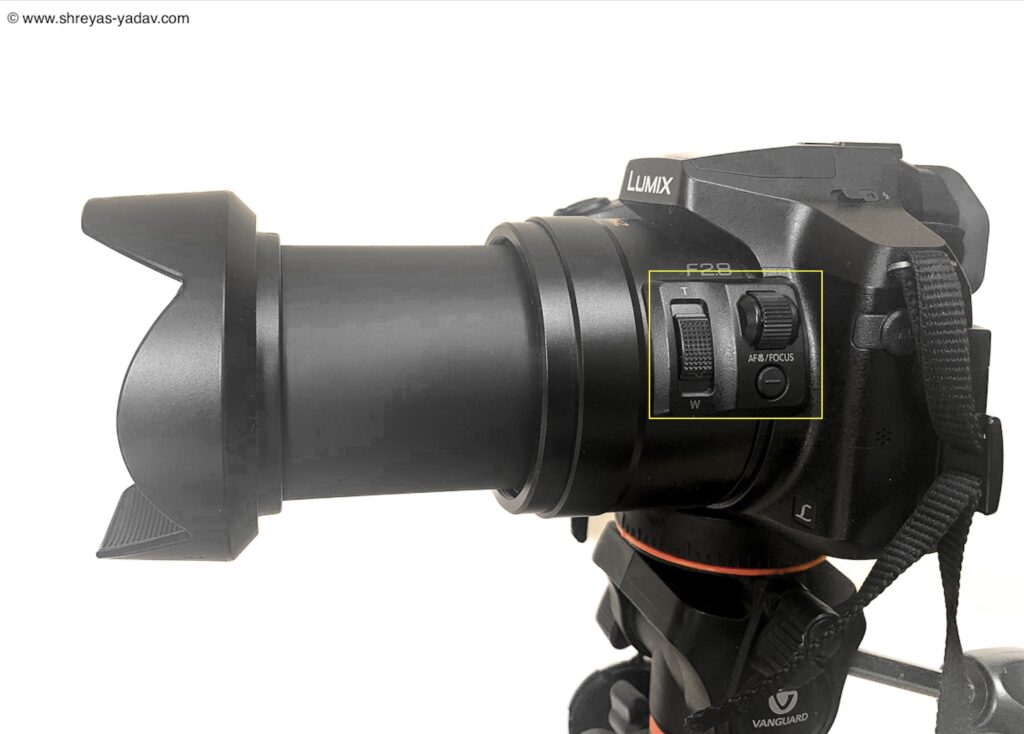
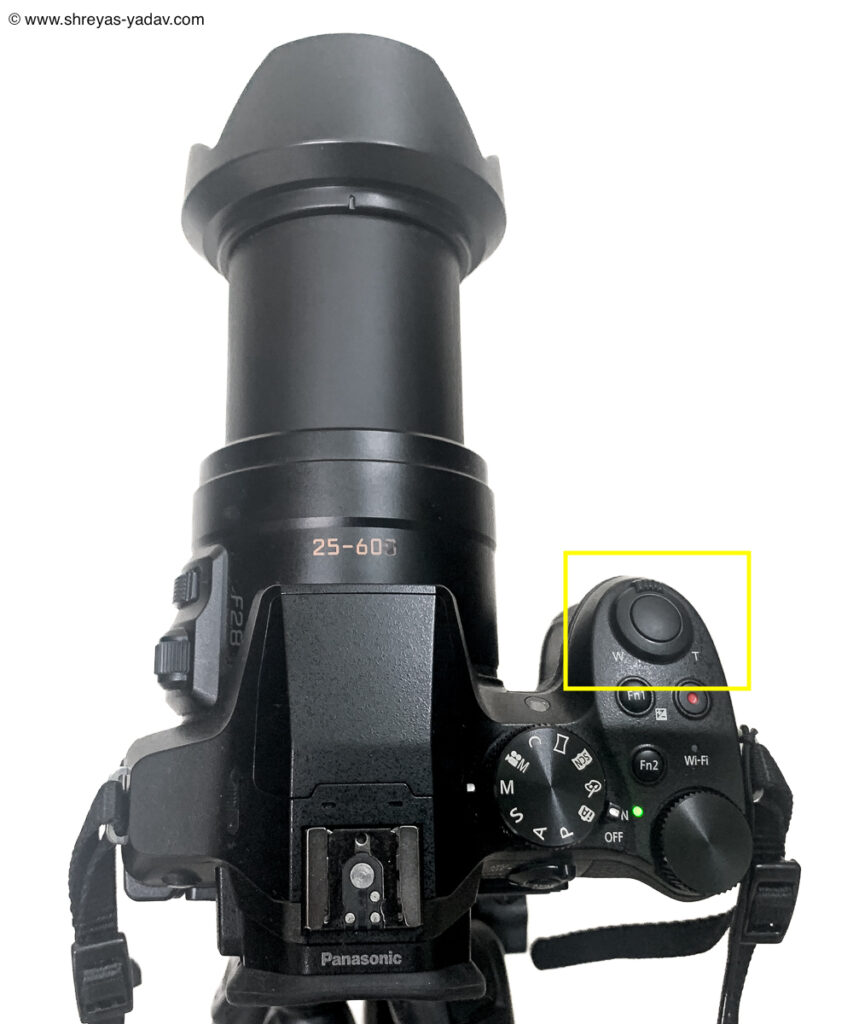
As you turn ON The camera, Lens will protrude. You can zoom in/out the lens by using Zoom level on Lens or on the Camera ( Marked as W and T )
Setup basic information ( Date, Time and Language etc )
As you turn on the camera first time, you wil be asked to setup date and time. Hence setup Date, time . Select language preference.
Along with the images you will be able see date and time.
Press Menu/Set Button > Setup > Language > Select the Language


Press Menu/Set Button > Setup > Clock Set > Set Date and Time


Image type, Image quality, Color Space and PhotoStyle
I recommend you set the image type to RAW. Capturing images in RAW will help you to better optimize the image in post-processing software. However if you dont want to post process the images then setup the Image type as JPEG. But I highly recommend select the image type as a RAW. You can also setup as RAW + JPEG. It means you will be able to capture RAW as well as JPEG images.
Press Menu/Set Button > Rec > Quality > Select Raw and Jpeg option


Image size is mainly applicable for JPEG images. Select Images size as ‘Large’
Press Menu/Set Button > Rec >Picture Size > Set a Picture size as L


As you will be shooting RAW images hence select ADOBE RGB color profile. Incase you choose to select JPEG only then select sRGB as a color profile.
Adobe RGB color profile contains wide gamut of the colors as that of sRGB.
Press Menu/Set Button > Rec > Color Space > Set color space as Adobe RGB


Also Set the Aspect ratio as 4:3 or 3:2
Press Menu/Set Button > Rec > Aspect Ratio > 4:3 ( or you can choose 3:2 )

Set up the Photostyle to Standard
Press Menu/Set Button > Rec > Photo Style > Set Photo Style as STD ( Standard )

Setting up focus modes and focus area
To capture sharp image accurate focus is essetial. Focus modes and focus area selection will help you to aquire sharp focus on the object.
By selecting focus mode You will tell the camera how to focus – Single, continuous or manual. With Single focus, focus will be locked when you half press the shutter release button. As you release the shutter release button focus will be lost. If a camera or object moves then focus will be lost. Single focus ( AF-S ) mode is useful for steady objects.
If the object is moving, then select focus mode as Continuos mode. ( AF-C ). As long as you keep the shutter release button half pressed, camera will try to acquire the focus. If the objects is moving fast continuous mode is useful.
Manul focus mode allows you to focus manually. You have to rotate the focus ring on the lens to manually focus.
Lumix Fz300 Comes with 3 focus modes
- AFS/AFF – Autofocus Single / Autofocus Flexibe
- AFS – Autofocus Continuous
- MF – Manual Focus
You can select the Focus mode by the mode selector dial on the back of the Camera

To start with set your camera’s focus mode to Single ( AFS )
Setting up focus area Mode
As you have told your camera HOW to focus, now it is time to tell your camera WHERE to focus.
Focus area mode selection will direct Lumix FZ300 where to focus.
Here are the focus area modes in the Lumix FZ300 camera –
- Face/Eye Detection
- Tracking
- 49-Area
- Free ( Custom Multi )
- 1 – Area
- Pinpoint
Each Focus area mode have its own uses. And Having the flexibility to select different AF Area mode in the the Camera is always good.
But to keep it simple, we will set up the AF Area mode based on most used AF Area mode which is 1 – Area.
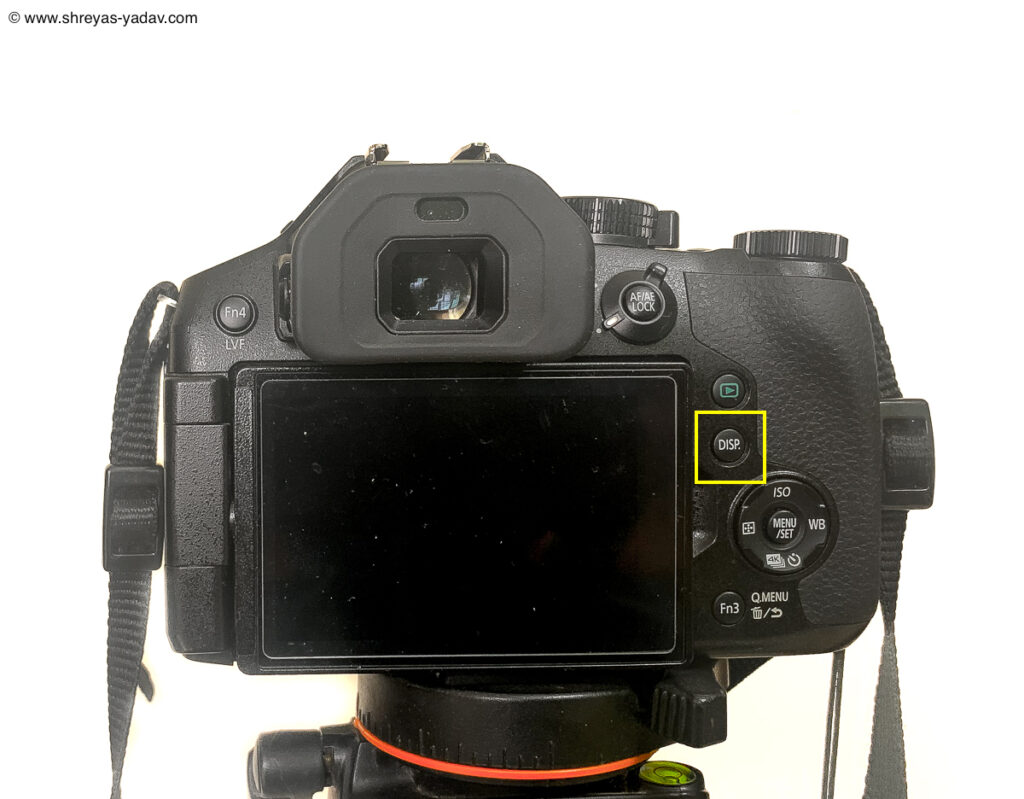
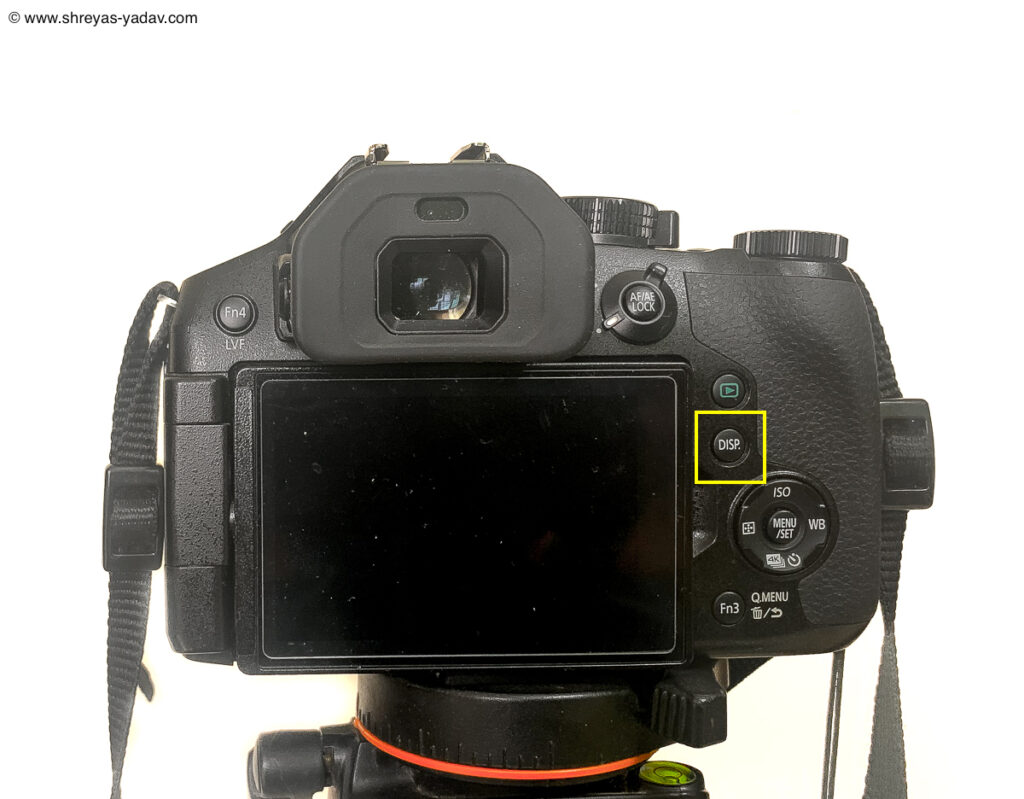
To select the 1-Area AF Area mode , press the DISP button till you see below screen

Using the Touch screen Select the AFS and then Select the 1-Area focus area mode. Refer below image


Hen select the AF Area option on the screen. By pinch of the fingers adjust the Area of the Focus ( Larger or smaller ) and select Set option. Refer below image.

And you are ready to go.
Camer will focus where you direct the 1 Area focus Area position. Also You can change the position of the Focus are by touch screen or Below button. ( refer the below image .
When you are starting off, set the focus area to Single. Single area focus will help you to focus at the single point. Your camera will acquire focus precisely.
Setup exposure mode
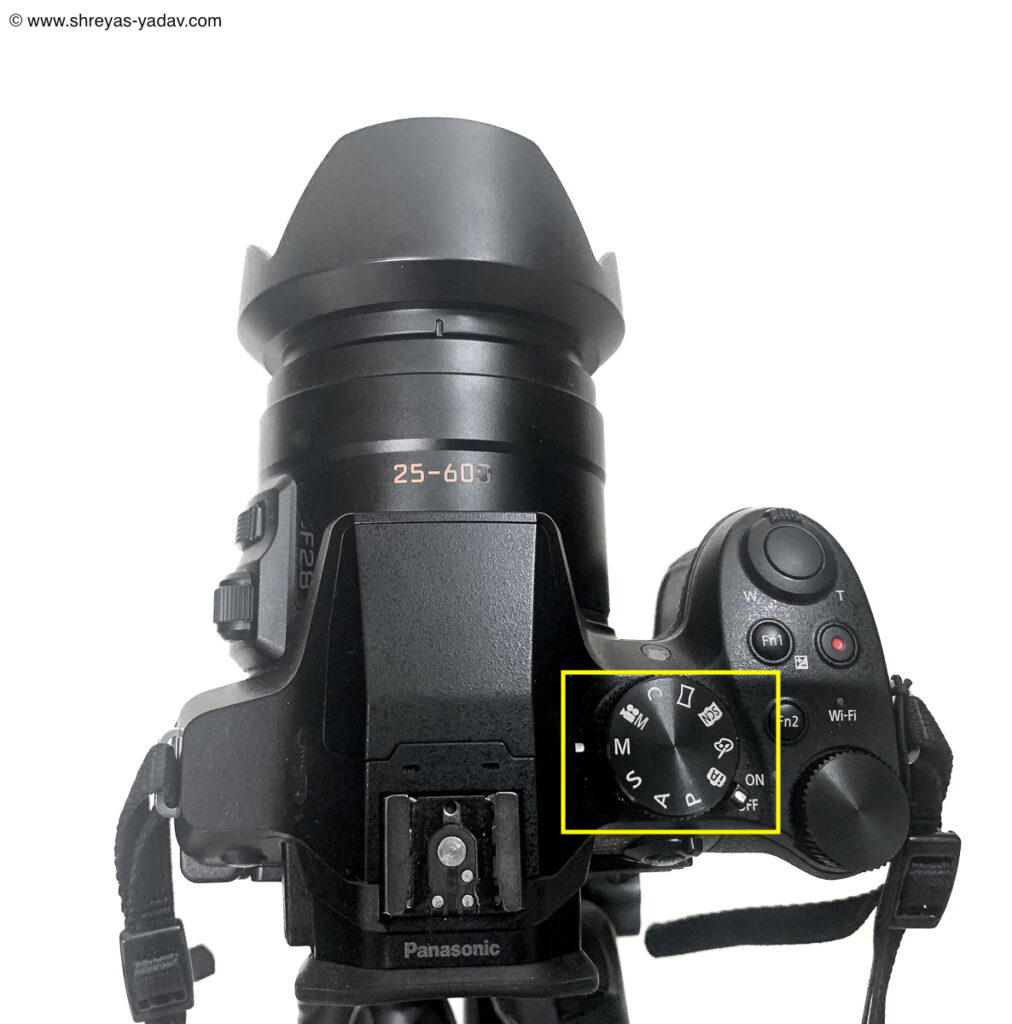
Camera has four primary exposure modes.
- Aperture Priority ( A )
- Shutter Priority ( S )
- Manual ( M )
- Programmed Auto ( P )
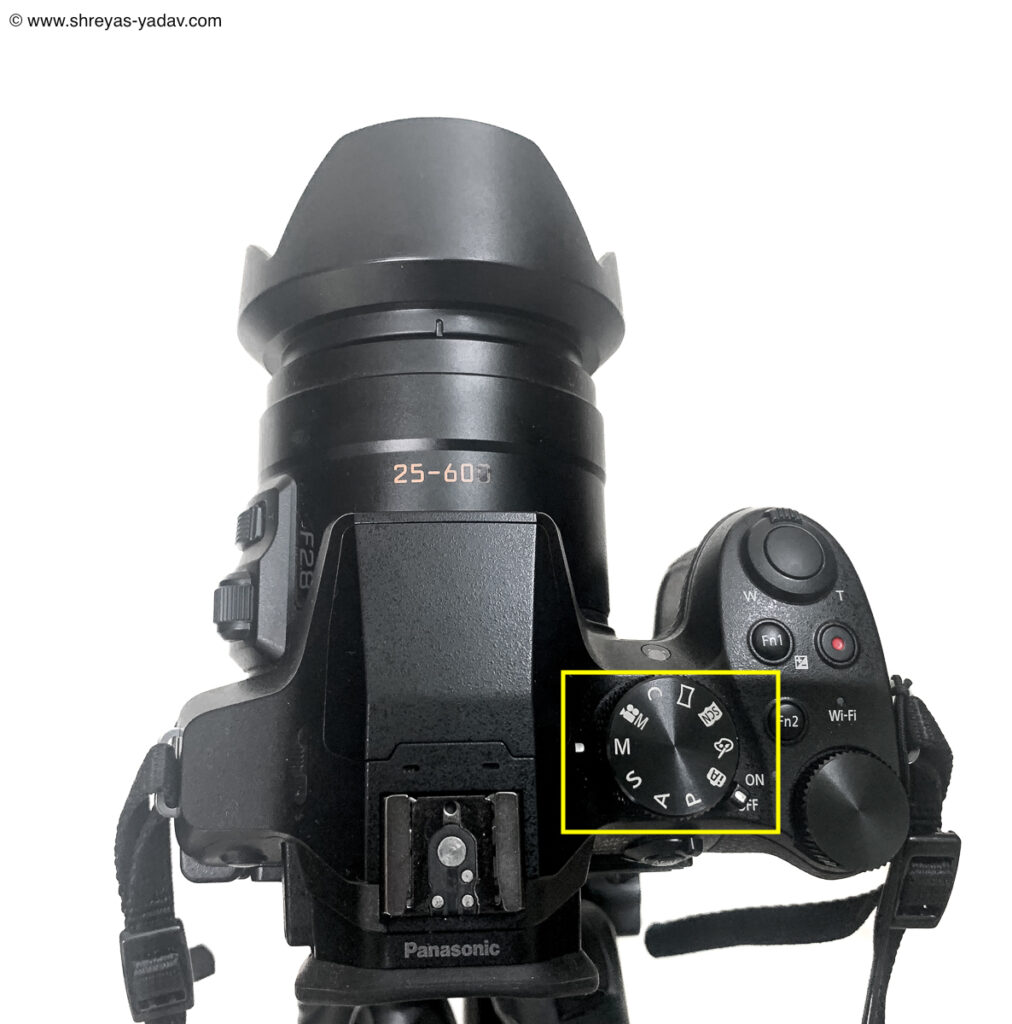
In the Aperture priority mode, you select the lens aperture . Based on light conditions camera will set the shutter speed.
Shutter priority help you to set the shutter speed. Camera will select the aperture.
For the manual mode, you have to set both Lens aperture and shutter speed.
Programmed auto mode is bit simillar to auto mode but you do have some control over the shutter and aperture. However you cannot precisely control shutter and aperture using programmed auto mode.
With Aperture, you can control the light and depth of field ( Area of focus ). Hence it is recommended that you use aperture priority in most of the cases.
Aperture priority will help you to control both light and depth of field. It will help you to understand how much light you need and which area should be in the focus. Using aperture priority will help you to understand effect of light.
I highly recommend you start with Aperture priority. Practice changing the aperture and checking the images. After taking practice shots you will be able to use better. This will help you to artistically capture the light . It will also help you to control the depth of field.
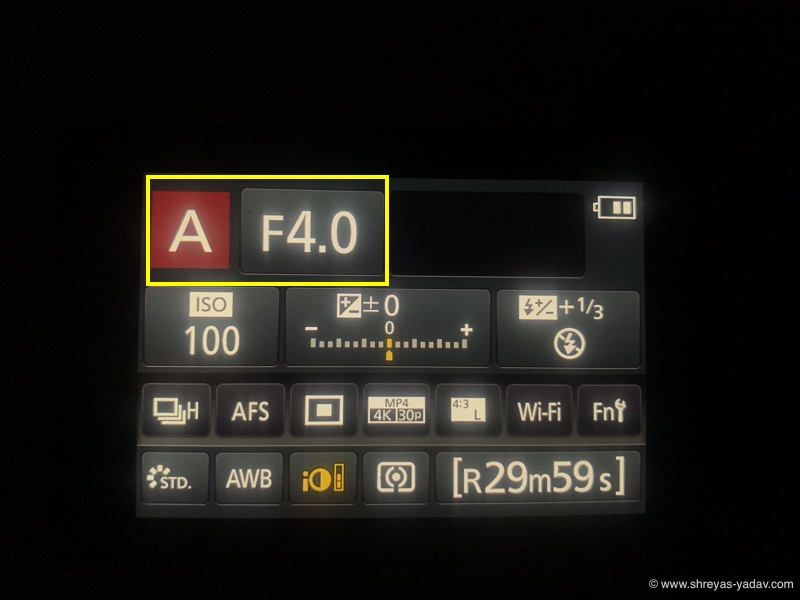
To Select the Aperture Priority rotate the Exposure mode dial. And once you select the Aperture Priority you will see ‘A’ on the Display Screen.
To change the Aperture rotate the Dial as indicated in the below image.
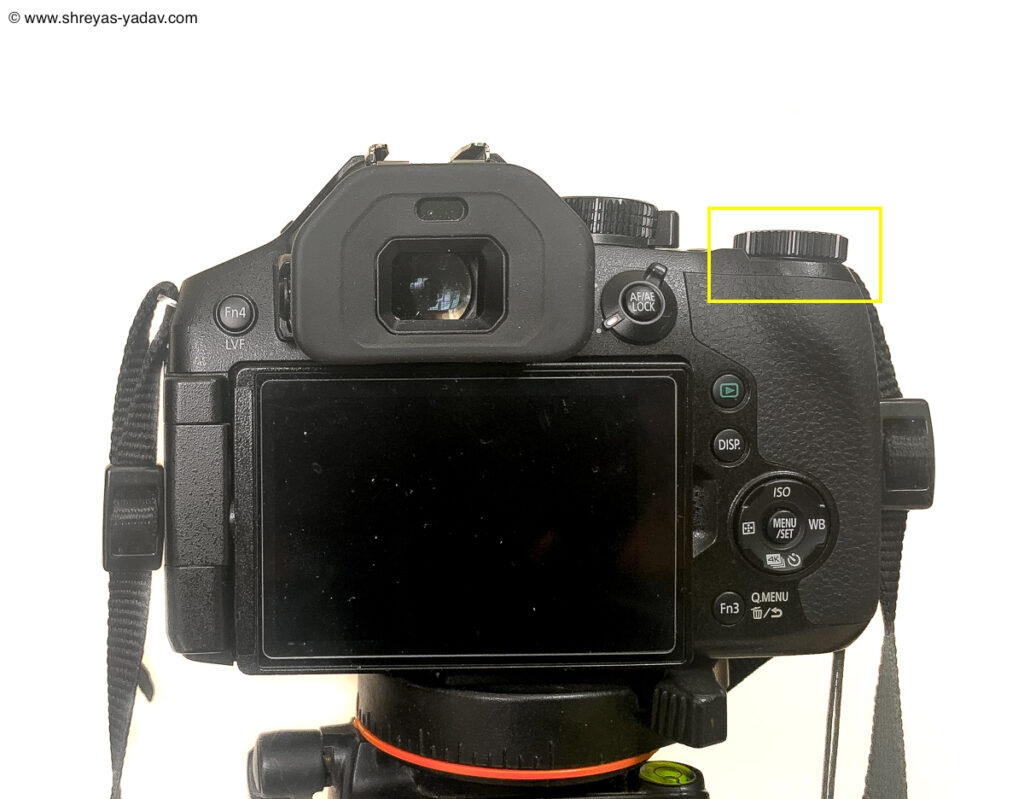
I have seen good results in terms of Image quality and colors , while the aperture is in the range of f/2.8 to f/5.6.
Bonus Tip –
Lumix FZ300 can make your photography experience awesome with Manual mode as well. Manual Mode may sound completed but it is not. Here I will share some tips so that you can use Manual Mode effectively.
- Select the Manual ( M ) mode
- Set the ISO to AUTO ISO. And ISO Limit of 400 or 800 ( Dont go beyond ISO 800 )
- Set the Aperture in the Range of f/2.8 to f/5.6
- Set the Shutter speed as per light, object movement and action you want freeze.
Typically you can set the Shutter speed from 1/100 s to 1/1000s .It will work for most of the scenes.
- To toggle between aperture and shutter press the FN1 button on the top. And once you select Aerture or Shutter you can change it by rotating the dial.
- Practice this mode for sometime and you will start crancking out well exposed images with above mentioned tip.

Check on White balance, ISO , Exposure compensation and metering
White balance –
White balance helps you to control the color temperatures. For a warmer setting image will have a yellowish color cast. On the other hand, a cooler setting image will have a bluish color cast. In most of the images you don’t want any color casts.
Auto white balance option helps here. Lumix FZ300 is good at setting up Auto white balance.
There are multiple presets for white balance such as Auto, Sunlight, cloudy and few more.
Set your camera to Auto white balance option.
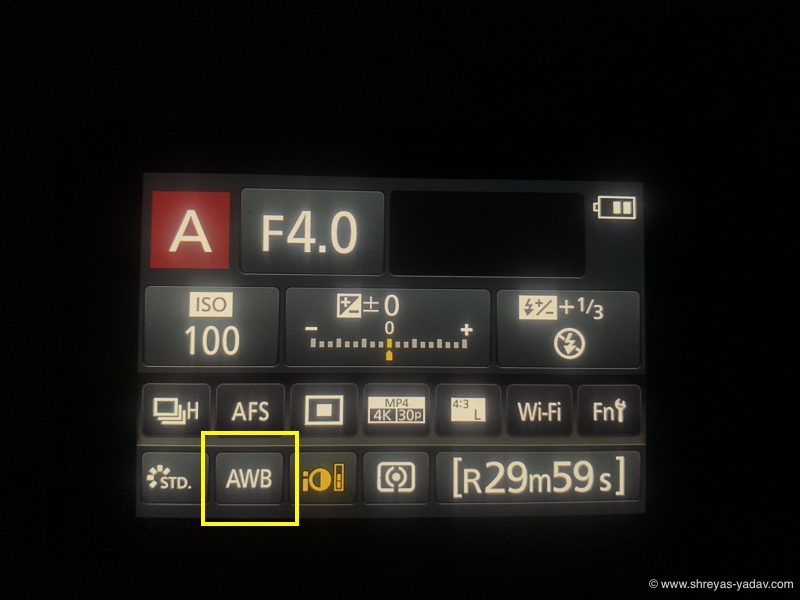
Press DISP button on the camera. On the the screen there is option to select the white balance. Select the AWB (Auto White Balance ) using a touch screen.

ISO –
ISO will determine the image quality. Lower values of ISO will give better dynamic range for the images. On the other hand higher ISO values will help you to capture images in low light situations.
For good light conditions lower ISO values ( ISO 200 , ISO 400 ) are good . In the low light situation higher ISO values might be required ( ISO 800 ).
There are multiple ways to change the ISO on Lumix Fz300. Here is one the simple ways I found to change the ISO.
Keep pressing DISP button till you see below Screen.
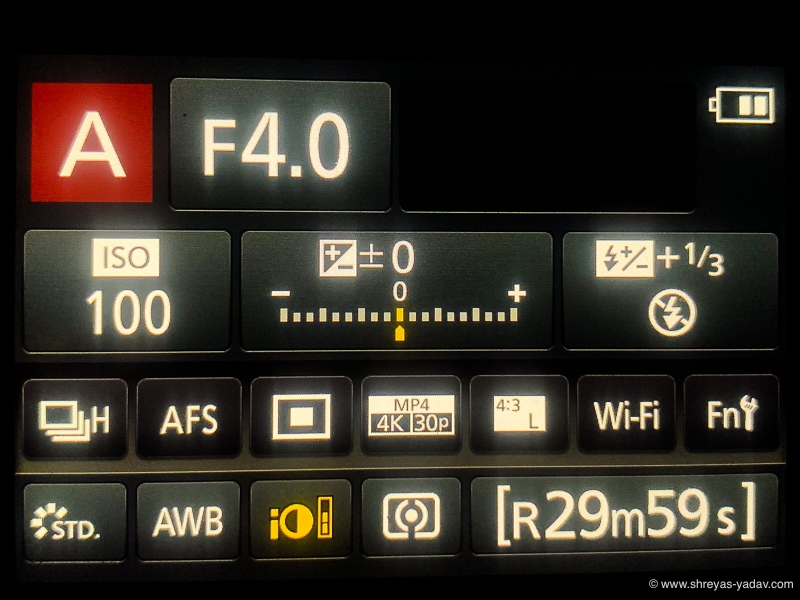
Select ISO Option on the touch screen. Select ISO in the Range of ISO 100 to 400 to start with.
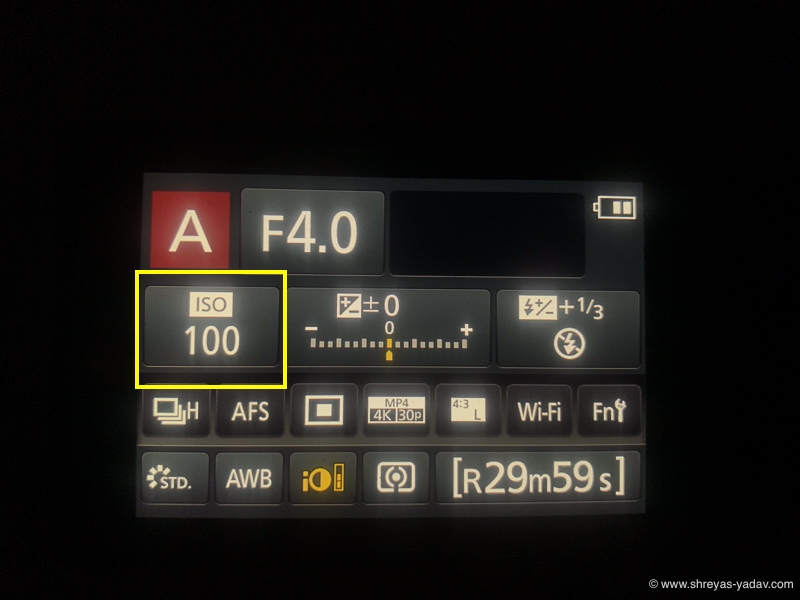
Once you selected the ISO , Select SET on the Touch screen

Exposure compensation –
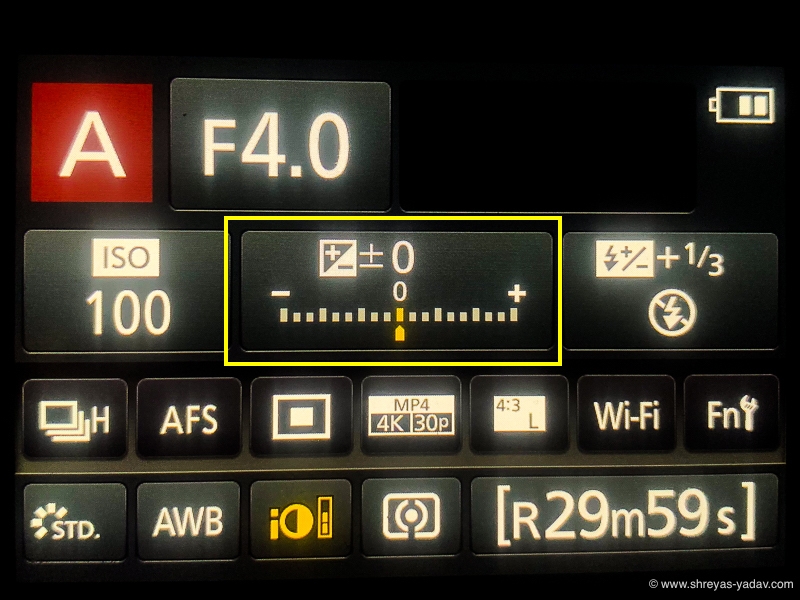
Exposure compensation will help you to compensate for the exposure. You can set it positive or negative values. Exposure compensation is a bit of an advanced exposure setup. To Start with lets set the Exposure Compensation to 0 ( zero )
As you are in Aperture Priority Mode, keep pressing the DISP button till you see below screen.
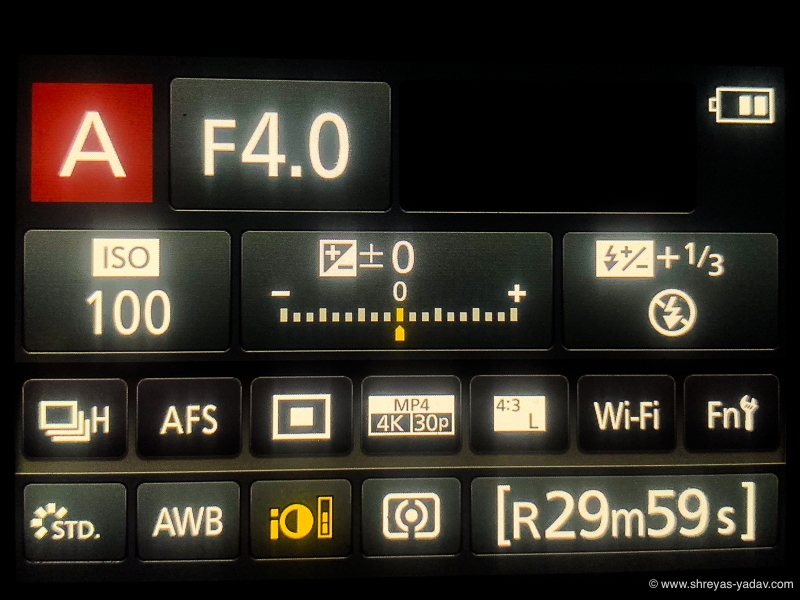
Then select the Exposure compensation using a touch screen. And Set it to zero ( 0 ) . Refer below image.

Metering –
Metering option helps camera in evaluating and setting up the exposure levels.
Spot metering – Camera evaluates the exposure based on a single spot ( It can be same as the focus point you choose.
Center weighted metering – Camera evaluates the exposure based on center point
Multi Metering – Camera looks at the whole scene and evaluates the exposure based on the complete scene
Set the camera to Multi-metering as it works good in most of the photographic situations.
To select the metering, keep pressing the DISP Button till you see below screen
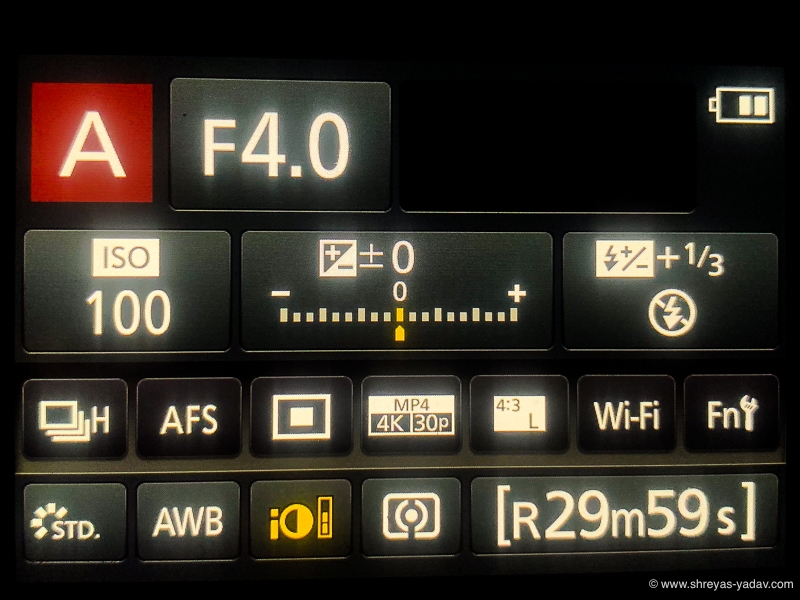
Select the metering option using Touch screen. And then select the Multi Metering.
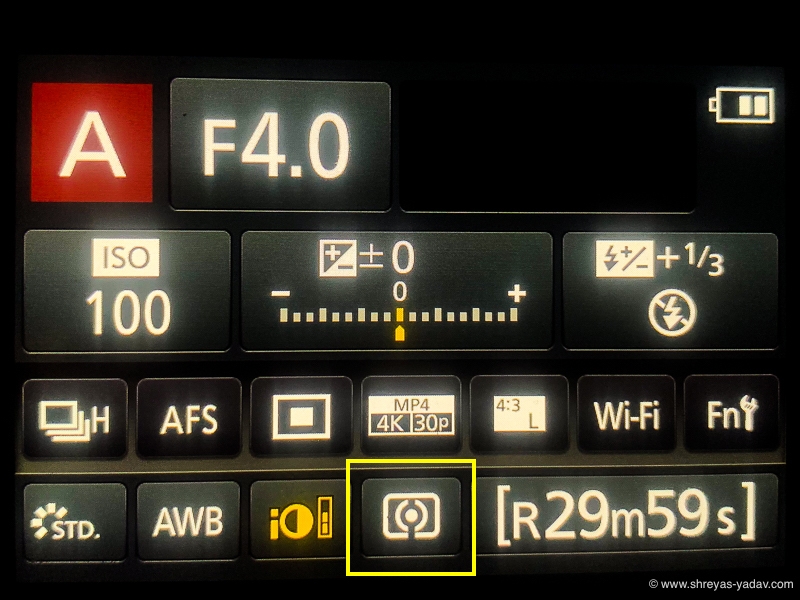

Also you can setup the Metering as mentioned below –
Press Menu/Set Button > Rec > Metering Mode > Select Multi-Metering
Setup Burst Rate
You can click single image or multiple images in a click. In Lumix FZ300 there is an option to record multiple image in a click. There are three option for the burst rate : L, M, H . With L option the burst rate is lower. On the other side, with H option Burst rate will be higher.
Here are steps to set the Burst Rate
Press Menu/Set Button > Rec > Burst Rate > Select L /M or H.
Or Alternatevely you can
Press the DISP Button till you see below screen.

Select the Burst rate using a touch screen.


You are now ready with your new camera to click awesome images. Capture some beautiful pictures and comeback. Its time to download them to your computer and optimize them.
Next steps – Image download and post processing
Image download – Remove the memory card from the camera and insert into the card reader. Copy the images to you computer. Make sure you back up the images in atleast one additional external hardrive.
After you can backed up the Image and video data, insert the card back in the Camera.
Now its time to make the camera ready for your next adventure. Lets Format the Card.
To Format the card
Press Menu/Set Button > Setup > Format > Delete all the Data from Memory Card > Yes .


As we discussed earlier recharge the camera battery and Insert it into the Camera. You are all set for your next photography trip.
Let’s make that image pop up by post-processing it in Adobe Lightroom. Here are the techniques for you to effectively optimize the images.
Congratulations! You made your new Lumix FZ300 camera ready to capture beautiful pictures.
It’s time to share beautiful images with your friends and family. Happy clicking!
Now it’s your turn
Have you set up your camera as per the above-mentioned steps? Do you have any questions about setting up your new Lumix FZ300 camera? Let me know in the comments below
Leave a Reply