Wildlife photography is an adventurous journey. When you start wildlife photography, you will be looking for things like – which is the best camera for wildlife photography, what are the wildlife photography books to read. Most importantly what are the wildlife photography settings and wildlife photography tips that you should apply to take the best wildlife images.
Well…topics to learn are overwhelming. To simplify, we will learn wildlife photography step by step. Let’s get started with Wildlife photography guide. In this photography guide, we will learn the top 10 fundamental tips to enhance your wildlife photography skills. No matter if you are a beginner or semi-pro wildlife photographer, this wildlife photography guide will tremendously help you to take a better wildlife image and enjoy a journey of wildlife photography.
I will share with you, my personal story when I started my voyage as a wildlife photographer –
It the was the summer of 2007 when I headed towards India’s most celebrated Tiger reserve – ‘Bandhavgarh National Park’. Since this was my first visit to Bandhavgarh Tiger reserve, I was full of excitement and enthusiasm. Yes, even today as well I am super excited when I travel to National park and Tiger reserve 🙂 ! I packed my camera bag with Nikon FM2 Camera, Nikkor 80-200 lens and about dozens of Velvia 200 camera rolls with sparkles in my eyes 🙂
In the Bandhavgarh Tiger Reserve, I had a great sighting of a legendary dominant male tiger named B2. The forest of Bandhavgarh was teeming with wildlife! I was so excited in capturing images of Tigers, Deers, sambar, and langurs that I forgot a camera roll comes with only 36 images, phew! I blew off all my Velvia film roles and I was happy to get sooo many images from Bandhavgarh.
I came back to my hometown dancing and dreaming about “my once in a lifetime trip !”
I rushed to photo-studio. Photo-studio developed and printed the images which I captured during the trip. I looked at those images… and I could n’t believe that these are the images which I captured.
Pictures were awful … some images were too dark or too bright, some photos were appearing blur and out of focus and some images appeared very uninteresting even though rest things were ok.
Holy crap! What to do now ? I talked to myself. I missed all the best images from Bandhavgarh Tiger reserve. Hell yes – it was all gone.
Sounds similar to your own experience?
If Yes – Hey No sweat ! I will help you thru enhancing your wildlife photography skills. Based on my field experience in wildlife photography for over a decade, I have summarized Top 10 fundamental wildlife photography tips which I use personally. I promise you with confidence that if you practice and apply these techniques for your wildlife photography – the quality of your wildlife images will massively improve !
If you haven’t had a same experience as me, still these tips will be helpful and handy for your next wildlife photography expedition!
So, lets dive right into it –
Top 10 Wildlife photography tips :
Always shoot in RAW image format
It’s all about SHARP EYES!
Get down to the EYE level of the wildlife
Use a steady support such as Tripod or a beanbag
Focus your Focus!
Image composition is key to have great visual impact
Watch out the background- the background is as important as your main object
Fast shutter speed is your best friend to get sharp images
Expose the image to the right side of the histogram
Capture the natural behavior and habitat of the wildlife – it is a g reat way to showcase natural history
1. Always shoot in RAW image format
Now a days most of the D-SLR and compact mirror less cameras come with RAW image format. RAW image format records the scene not as an image (.jpeg) but as a digital file.
Since an image is captured as a digital file there is a huge possibility for improvements while post-processing the image. You will get following advantages of shooting RAW over jpeg during the post processing step
- Image details in underexposed and overexposed areas can be recovered to a great extent
- Major image fine-tuning such as White balance, color corrections, saturation adjustment, contrast and brightness are possible
- Image sharpening in RAW format is highly effective and non-destructive as compared to .jpeg format
- Images captured in low light and high ISO such as 1600,3200 or 6400 are prone to noise. Noise reduction in RAW format helps to clean up the image noise ( Both color and contrast noise ) to a significant level
There are endless possibilities when you process RAW images. But above mentioned steps are usually sufficient when you do wildlife photography. I personally use all of the above steps during my post processing workflow. ( We will discuss about Photo processing in another article )
I highly recommend you to start shooting in RAW format. Once you start processing your RAW format images – you will start exploring bigger opportunities in post processing step. This will definitely help you in producing beautiful final image.
Initially you may find larger file size of RAW images and less FPS-Frames per second ( Less as compared to jpeg format) as a compromise. But once you start shooting the RAW images you will realize this compromise is totally worth it !
I will give you a real world example. I had an exciting encounter with Leopard In Dandeli wildlife sanctuary during late evening time. Leopard gave me just a thirty seconds to click the image. I Was able to capture 3 images during that time. Below image is the best image I could get.
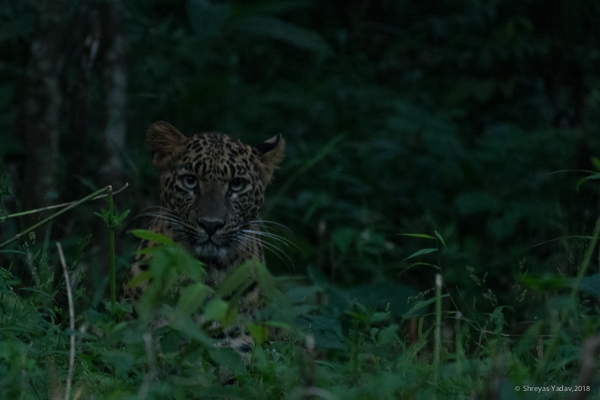
You can see the originally captured image. As it was almost dark the image is underexposed and dark. As I have set ISO to higher value such as ISO 2500 image noise was high. The colors of the leopard were dull and dark. As I have captured the image in RAW format I was able to recover the details.
You will see in the second image how precisely I was able to recover it – thanks to RAW format. I was able to recover the dark tones and colors. I did noise reduction on the image and optimized the sharpness of the leopard. Here is beautiful elusive leopard looking straight into your eyes even in challenging light conditions !
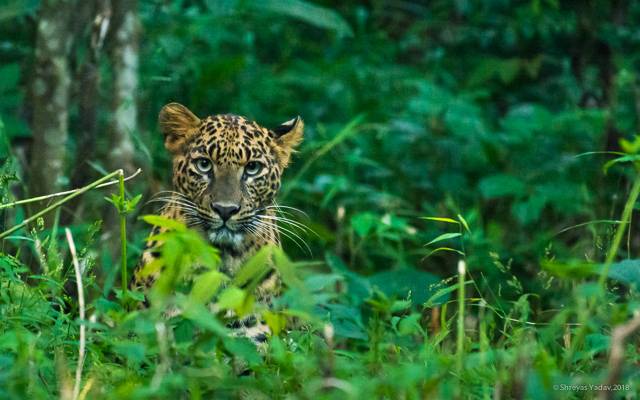
Shooting in the RAW format vs jpeg format will be a real game changer for you !
Check out : Adobe Lightroom Tips for post processing Wildlife Images
2. It’s all about SHARP EYES!
Expression in the EYES of the wildlife make a direct relationship with you. Your wildlife images will come alive when you capture the the eyes well exposed and sharp.
There are three critical points to photograph sharp eyes
- Acquiring precise focus
- Aperture
- Image exposure
Let’s look into each point below –
Acquire sharp focus on the eyes. If wildlife is out in the open then back button auto focus is extremely helpful. If the wildlife is behind the trees or grass then focusing eyes can become trickier. I switch to manual focus and focus on the eyes manually. In the clutter because of busy foreground and low light, sometime lens auto focus struggles to acquire focus on the eyes.
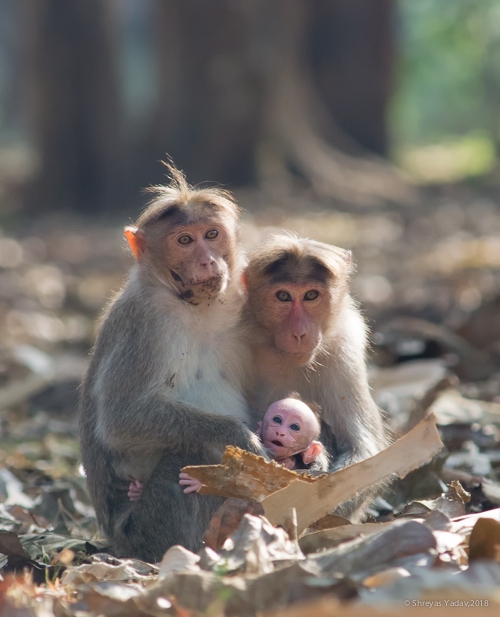
In case your camera doesn’t support back button auto focus still you can perfectly focus the eyes using single point auto focus mode.
Lens aperture and depth of field – Capturing sharp eyes requires fine control on the depth of field. If the depth of field is too shallow then eyes can be out of focus. Depth of field is primarily controlled by controlling Lens aperture and lens focal length. In most of the cases aperture values of f/5.6 to f/8 are generally useful to capture sharp eyes.
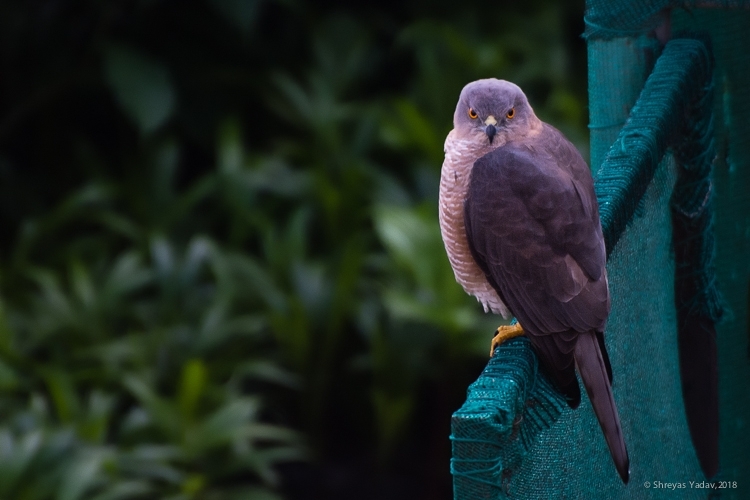
Exposure is critical when you capture eyes. There is chance that eyes will be underexposed or covered with shadows. Expose the eyes in such a way that catch light in the eyes is visible when image is captured. A bit positive exposure compensation such as +⅓ or +1/7 will be helpful to capturing the details in the eyes.
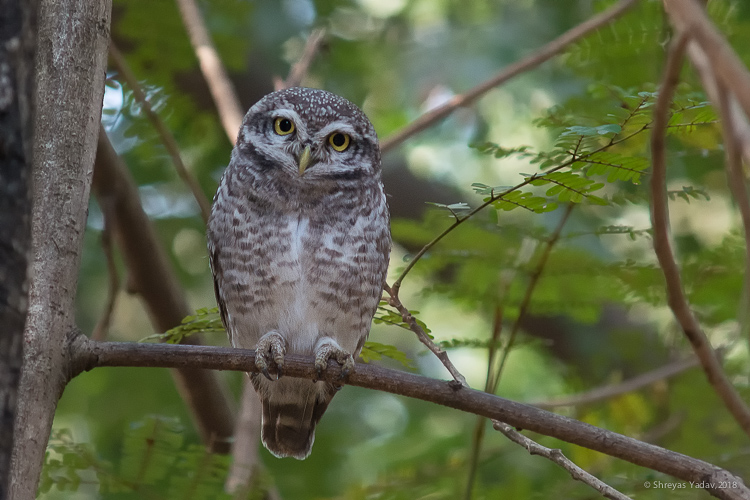
Next time when you photograph wildlife or birds keep an eye on the EYE .
This is a short and stunning photo tip for you –
Focus, control the depth of field and expose the EYES, your wildlife images will come alive !
3.Get down to the EYE level of the wildlife
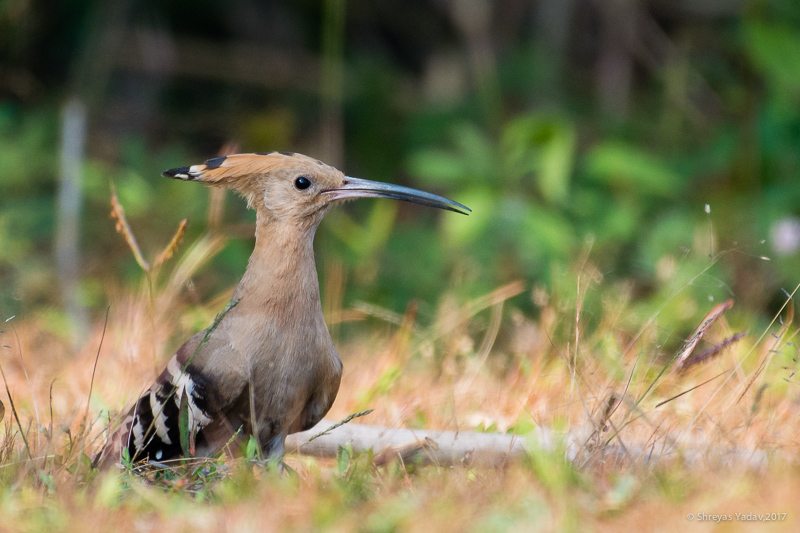
After the Sharp eyes, next fundamental technique is getting down to eye level of the wildlife.
Getting down to the eye level of the wildlife changes the perspective of the image. It takes viewer straight into the world of a creature. To establish strong connect between viewer and wildlife , attaining eye level of the wildlife is very critical.
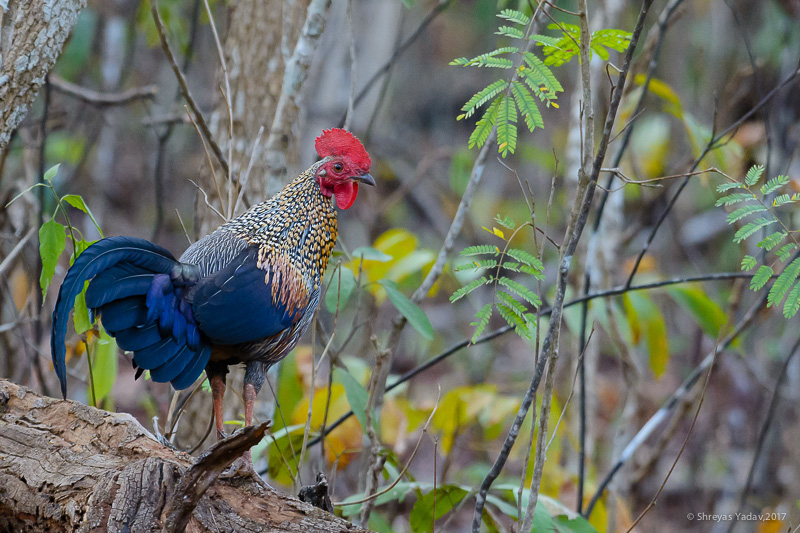
Here is how you implement this technique –
- When you are photographing from safari vehicle you have to change your position and move a bit (up/down – left/right) to achieve the eye level of the wildlife such as Tiger or Leopard.
- If you are photographing birds in the water you have to lie down on the ground. If lying down on the ground is not providing right eye level of the bird then you have enter into the water. (Note – Be sure to check whether it is safe to enter the water and also wear appropriate waterproof clothing . Be watchful of depth and flow of the water, snakes or rocks inside the water. Be safe ! )
- While you are photographing from the ground either lying down on the ground or lowering your eye level by positioning yourself on your knees will help you to achieve the eye level of the bird or animal.
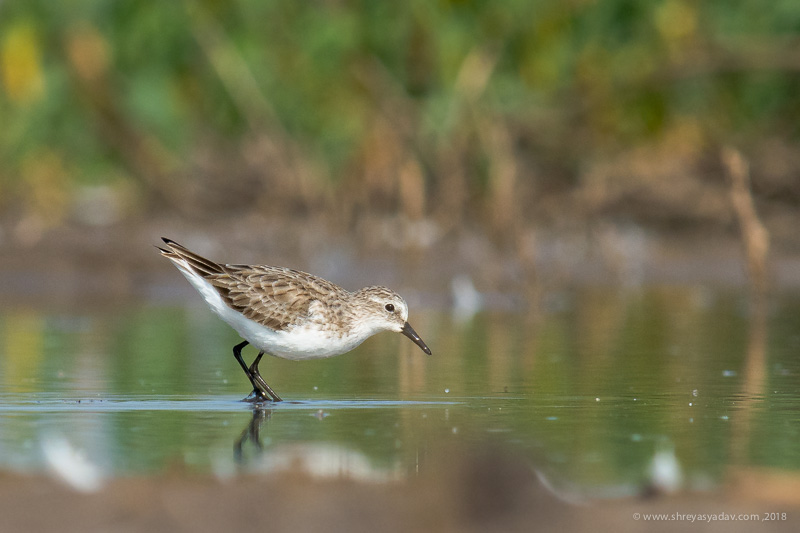
Adjust your photographic position in order to attain the eye level of a wildlife and make a photograph. Your wildlife image will tell a story !
4. Use a steady support such as Tripod or a beanbag
When you do wildlife photography – most of the times you will be using long lenses. Poor light conditions can slow down your camera’s shutter speed. Vibrations either from your vehicle, wind or your lens hand holding technique can contribute to out of focus or a blurry images.
Result – you miss that great moment in the nature !
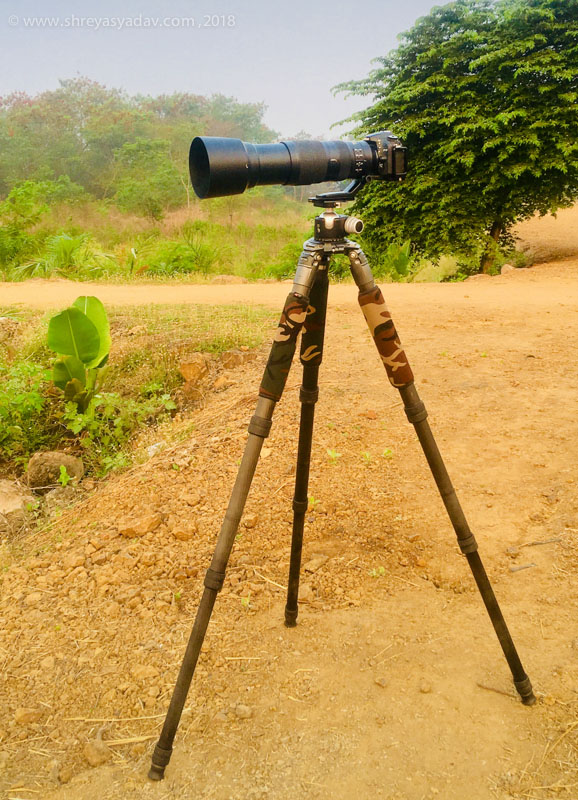
Using beanbag or a tripod while photographing bird or animal will help you to capture the moment with best possible image quality.
With the steady support you can capture image in low light and at slower shutter speed. Focusing is accurate and precise when done using steady support. Since steady support will help to capture images at lower ISO values, hence the base image quality will be optimized.
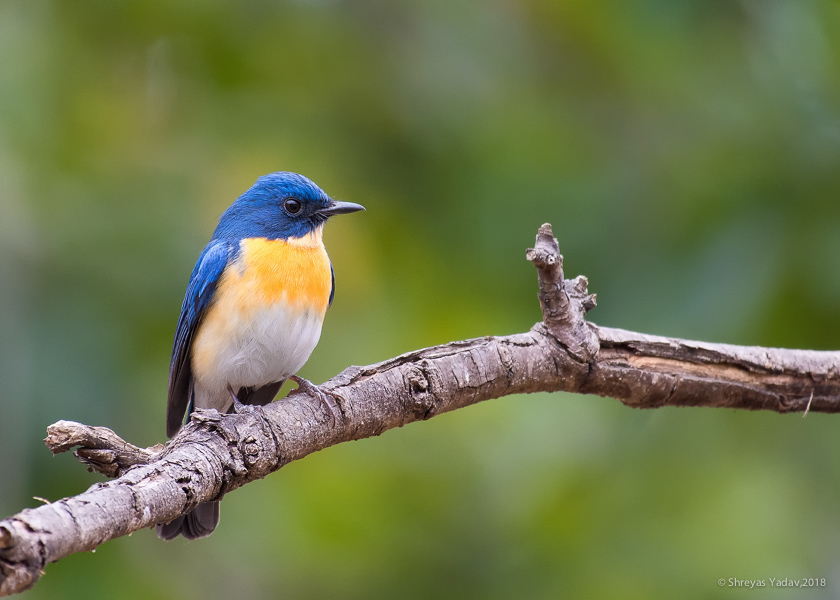
If you are photographing from the safari vehicle, then bean bag is most useful and versatile type of support. It allows you to move freely inside the vehicle. Camera and lens position can also be quickly adjusted while using bean bag.
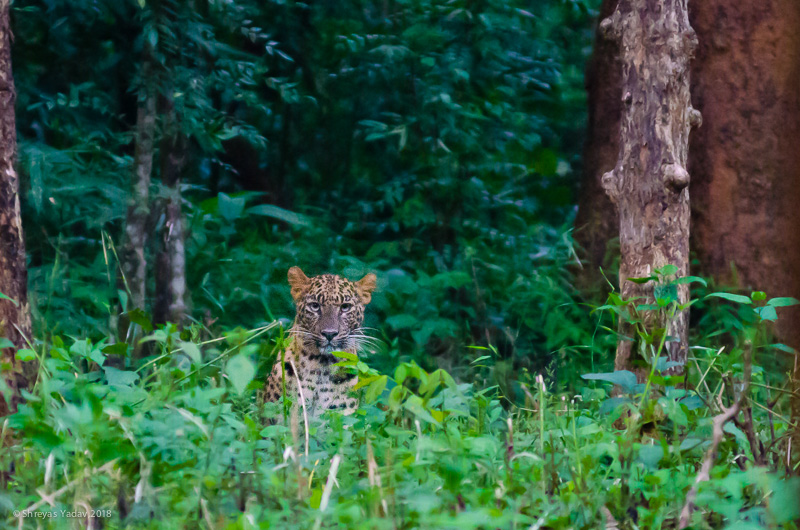
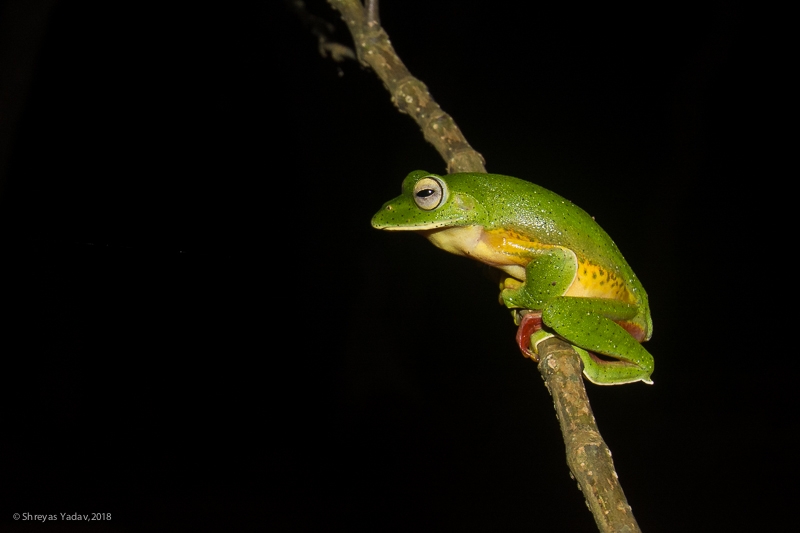
While photographing from the ground for the objects such as birds, mammals or micro images of snakes, frogs and butterflies then tripod support is way to go. Tripod provides very stable and sturdy support while you capture the image. With tripod you will be easily able to shoot at different angles. As your camera gear is mounted on the tripod it relieves the pain of hand holding. This will save your energy. You will be able to photograph for a longer duration and with utmost focus.
5.Focus your Focus!
No matter how beautiful and magnificent Tiger is, no matter how beautiful there are magical diffused sunlight and no matter how superb camera gear I have – if the image is not in the perfect focus I have to toss that image in thrash! No, I can’t do anything in post-processing as well to fix the focus errors I did while capturing the original image.
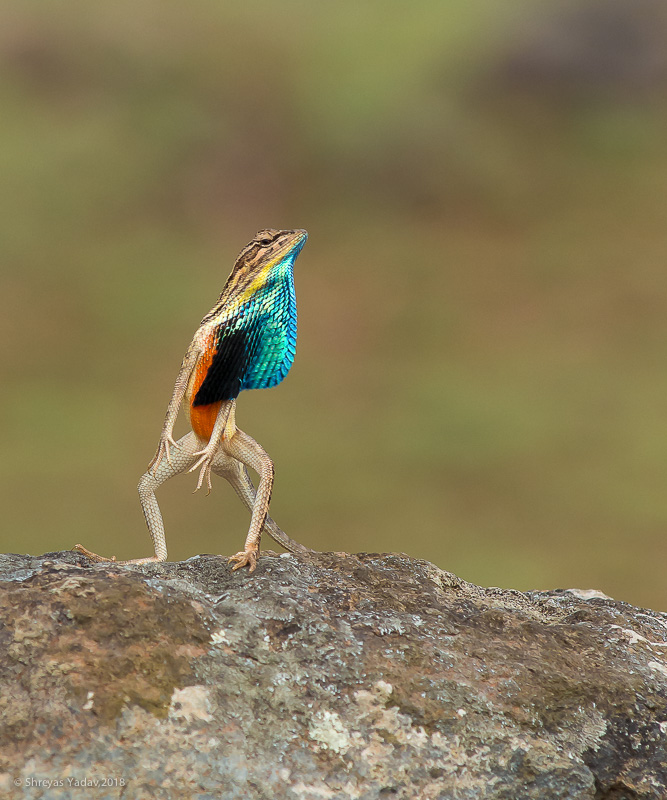
Acquiring perfect focus while you capture image is the most important technique in wildlife photography. If the object and you both are not moving then Single point autofocus will be useful.
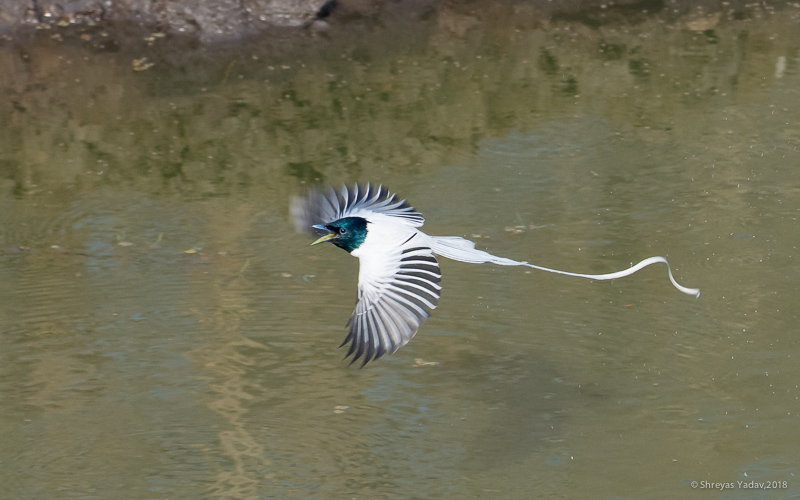
A continuous autofocus will come handy when either photographer ( you ) or object ( such as a bird ) is moving.
I use back button auto focus button in most of my wildlife images. It allows me to take advantage of both focus modes such as single autofocus and continuous autofocus with a click of one button. We will learn step by step guide on how to set up and focus images using back button auto focus button in another article.
If there is a tricky focusing situation such as low light and busy foreground, in this case, I use complete manual focus. With manual focus, I can focus quickly and accurately.
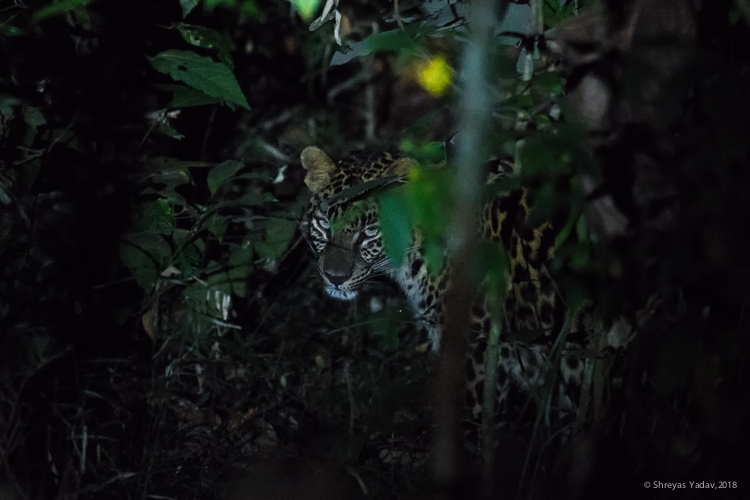
Evaluate your object and situation. Then, choose single auto-focus ( AF-S ) or continuous autofocus mode (AF-C).
Remember, for now – FOCUS YOUR FOCUS! Capture the wildlife after acquiring sharp focus and your images will have a deeper impact on the viewers. They will be connected to your wildlife images.
6. Image composition is key to have great visual impact
A composition is the arrangement of a visual element in the photograph. A strong composition is all about, eliminating the unnecessary objects and including only relevant strong elements in the Image. In order to make an image composition with an impact on a viewer, simplify the image as much as you can.
Simplicity will make your wildlife image powerful! While composing the wildlife images I ensure the following critical points. As you apply these image composition techniques, you will enhance your wildlife images –
- Light
- Placement of the visual objects
- Simplify
a. Light
Light is a fundamental element of any photograph. In most of the wildlife photography scenarios, we have to deal with natural light. Natural light comprises of 4 critical types – Front lighting, Side lighting, backlighting and diffused sunlight.
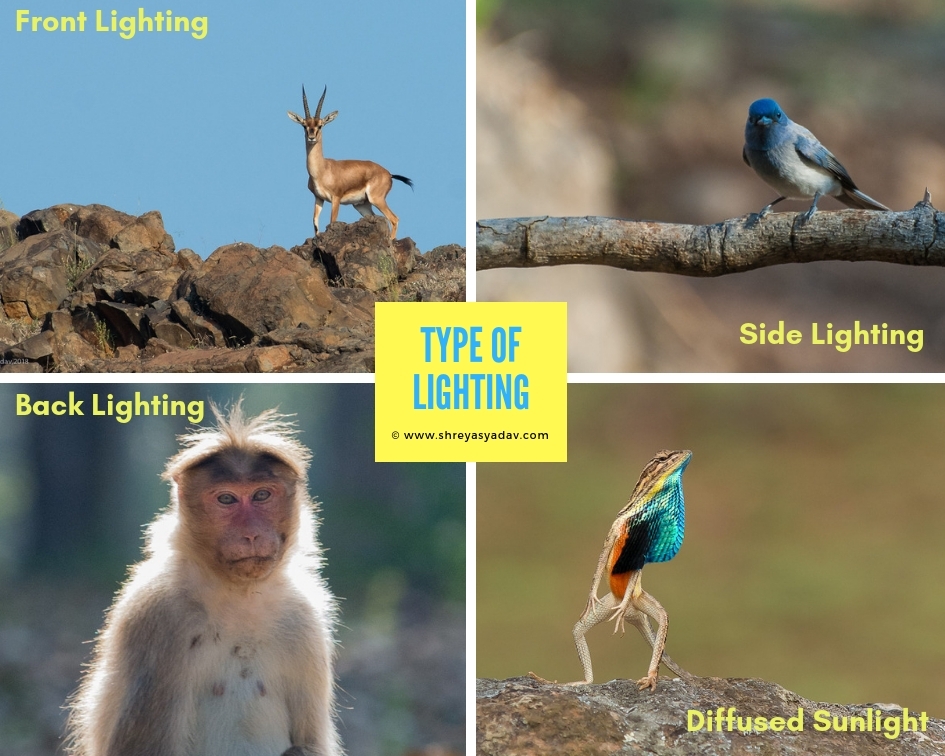
b.Front lighting is useful for capturing a detailed image of the wildlife. Since wildlife is directly exposed to sunlight, the image looks flat. Front lighting is useful only in a few cases where you want to capture wildlife images showing the details, but in most of the scenarios, the front light is best to avoid. Light during late morning and afternoon will result in front lighting condition.
c.Side lighting creates a beautiful balance of highlights and shadows. Side lighting helps to capture wildlife images with the effect of lights and dark areas. Side lighting adds depth to the image. Early morning or late evening are the best to achieve side lighting.
When the main object such as wildlife is in between you ( a photographer ) and a light source – then there is a great deal of opportunity to capture backlit images. Images of hairy animals or feathery birds are great objects to capture a backlit image. Again early morning or late evening are good times for backlit photography.
And here comes my favorite and rare one – Diffused sunlight. Diffused sunlight occurs during cloudy weather. You will love this type of light because of evenness of the light, no harsh highlight or shadows and I get crisp and contrasty images. To capture wildlife portrait and behavior I find diffused light helpful.
Placement of the visual elements
The arrangement of visual elements is a base of the strong composition. Before pressing that shutter, you should think of
- What exactly I liked about this scene – Example – Reflection of the bird in the water
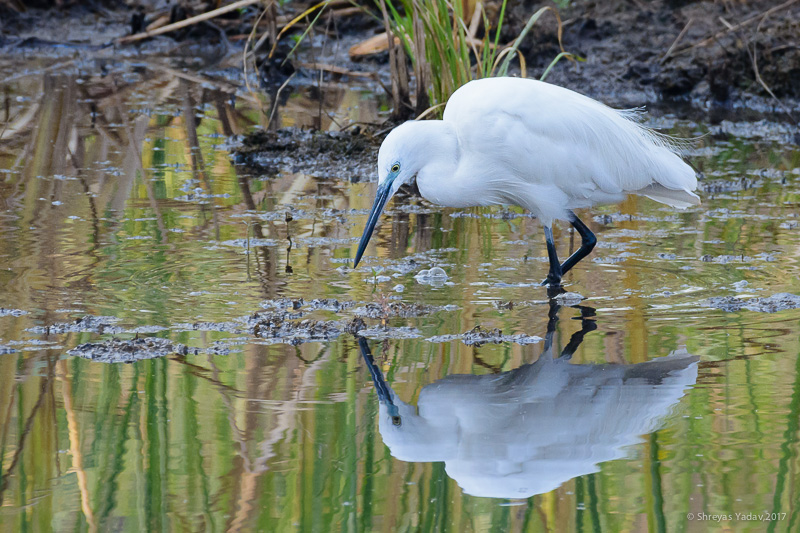
- What type of light is available and how I can use it by changing my position in order to get a perfect image of the bird and reflection
- Based on the natural habitat and main object, should I use vertical composition or should I opt for horizontal composition
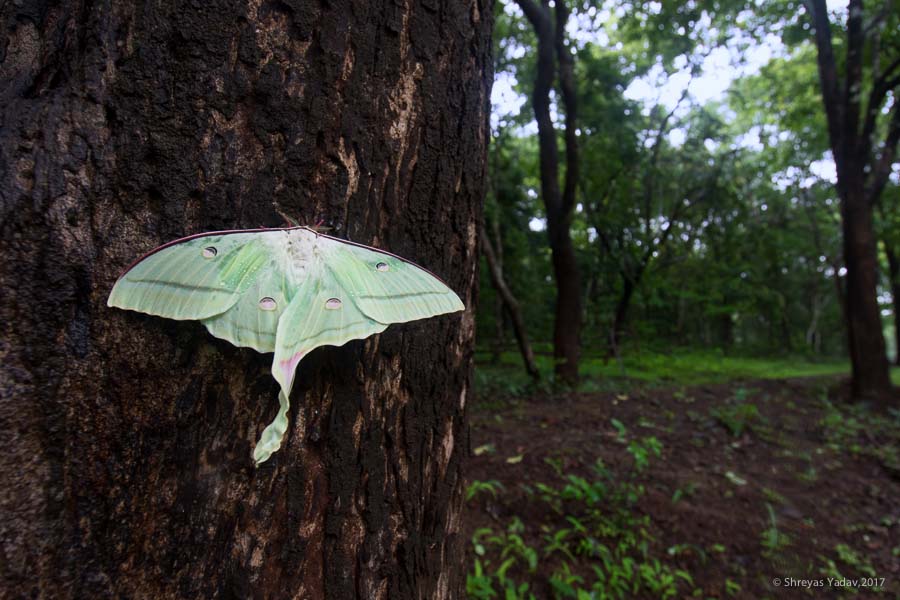
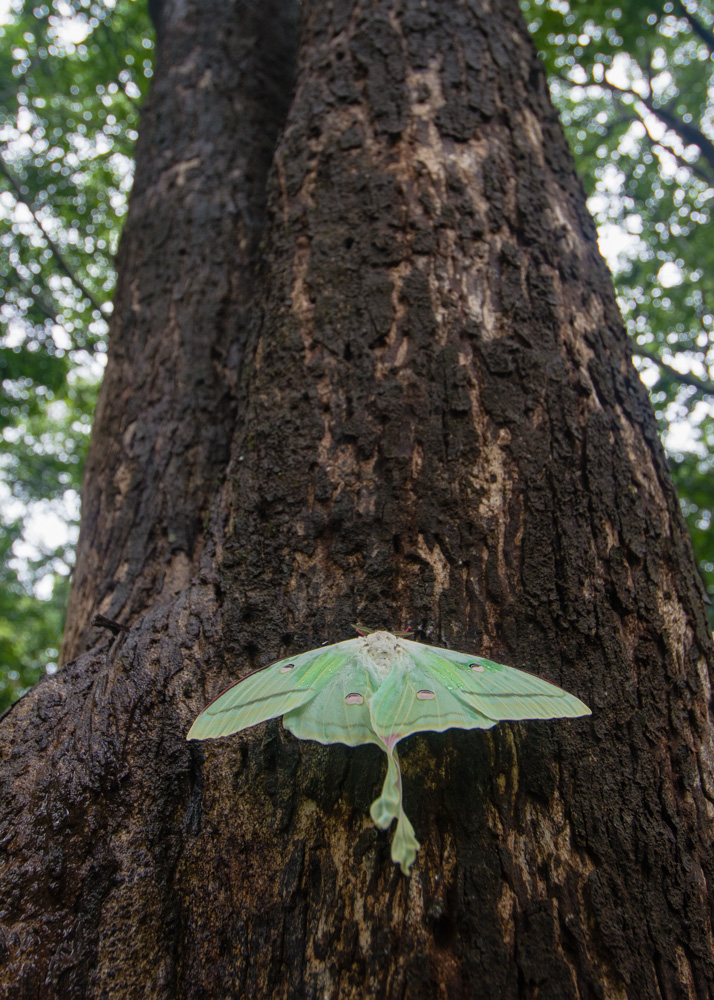
- How should I position the main object in the photo frame? The position of the main object should be such that there is some space in the photograph where the wildlife is looking at. This space is also called as negative space. If a wildlife is looking at the right side of the photo frame, a right side of the image should not be squeezed. Instead, a negative space must be used on the right side of a wildlife. Example – While photographing bird flight, there should be more negative space in the direction of the flight.
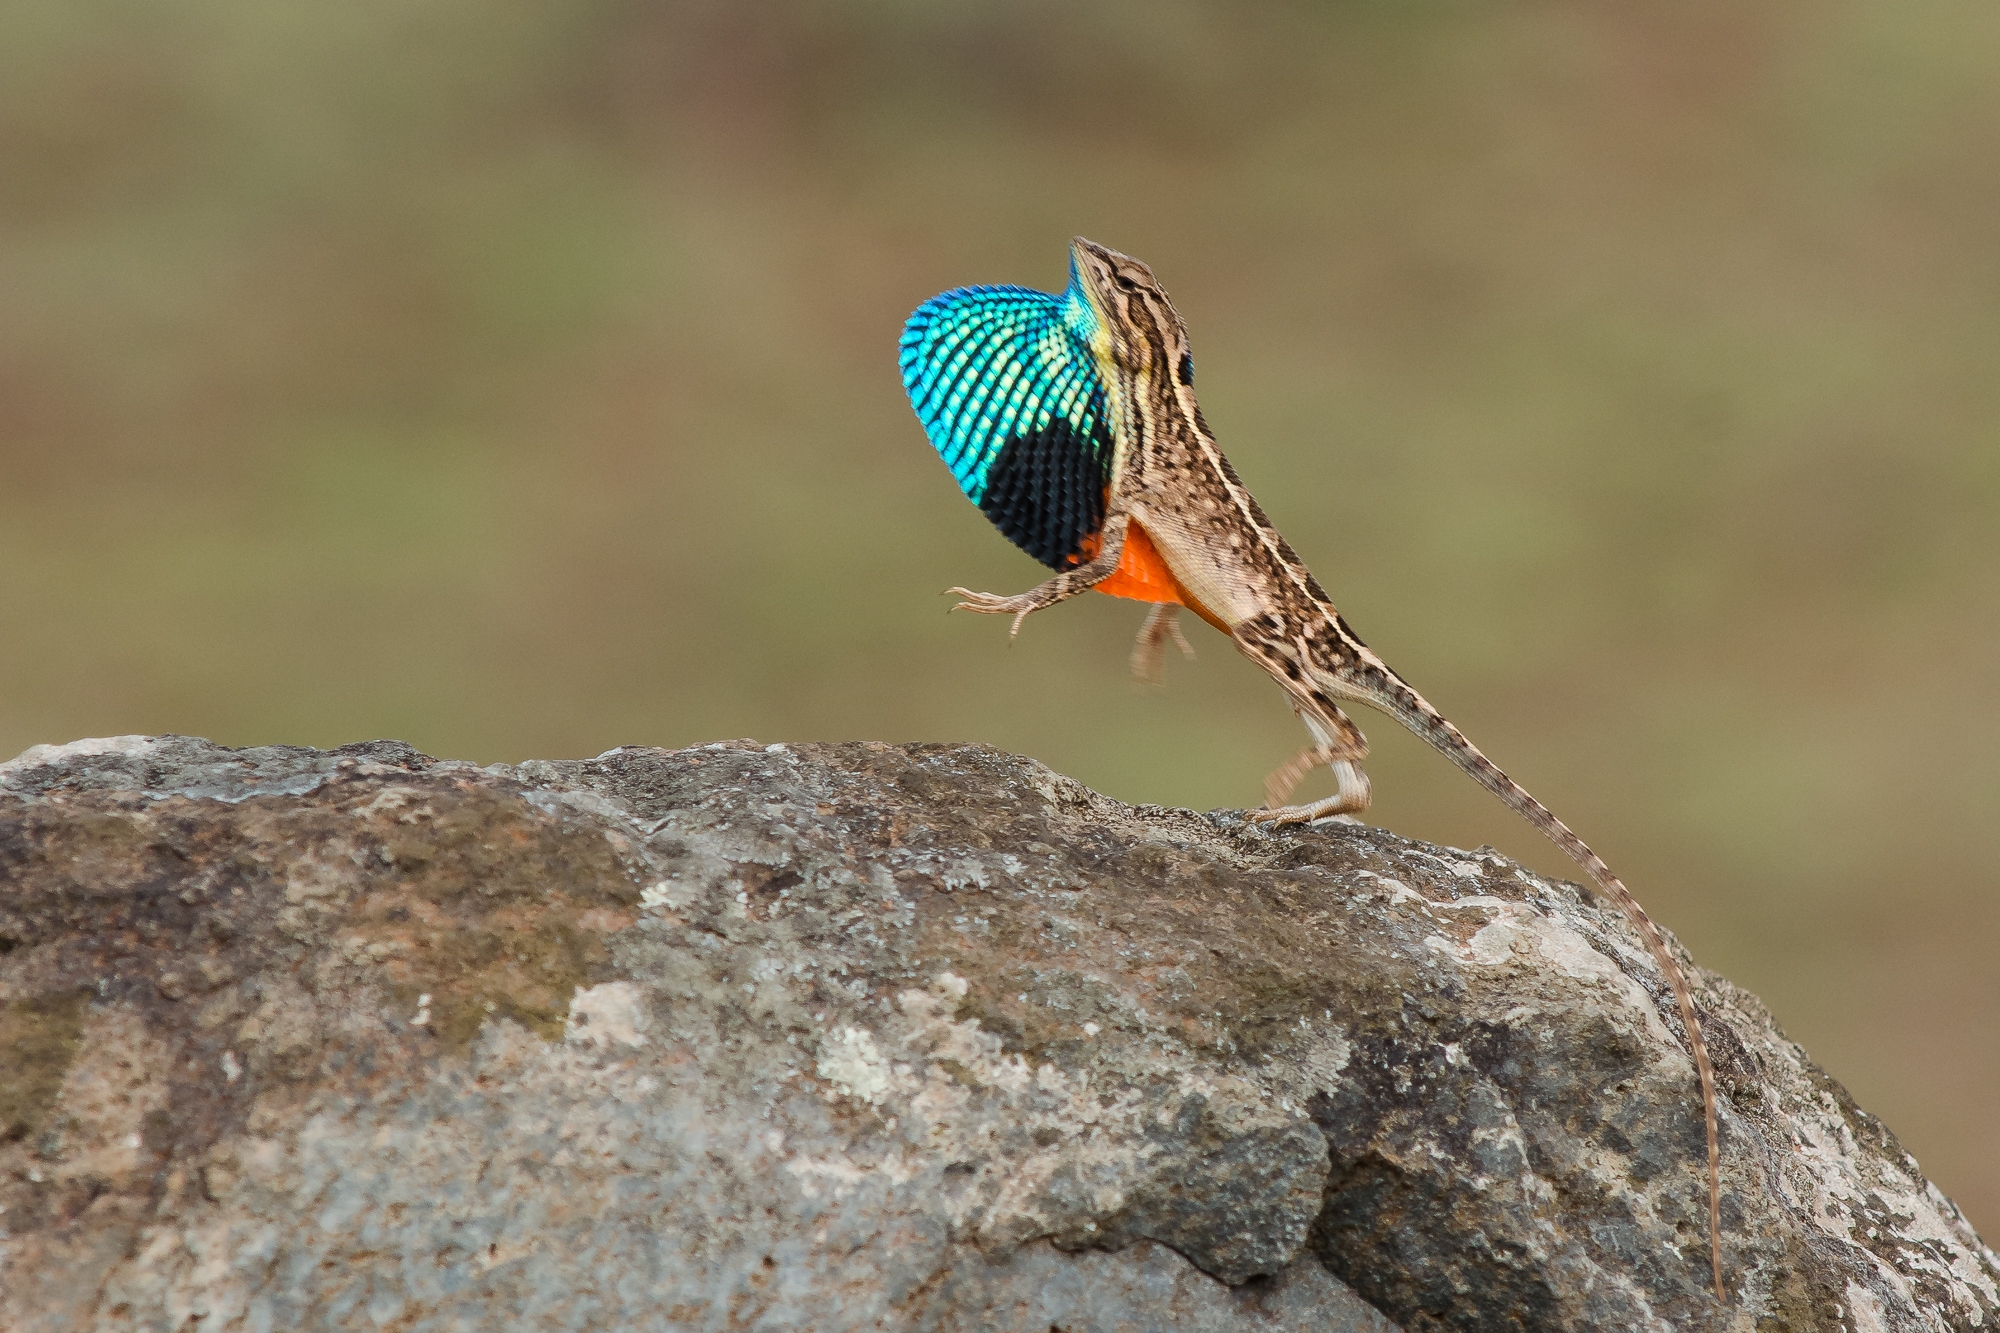
- Use the classic rule of thirds. Divide the image into 9 equal parts by using equidistant horizontal and vertical lines. Arrange the main object in a photograph at one of the intersection. ( Many cameras come with this feature where you can add gridline while looking from the viewfinder. This is extremely helpful while composing the image ) . Most of the wildlife photography composition will demand this classic rule.
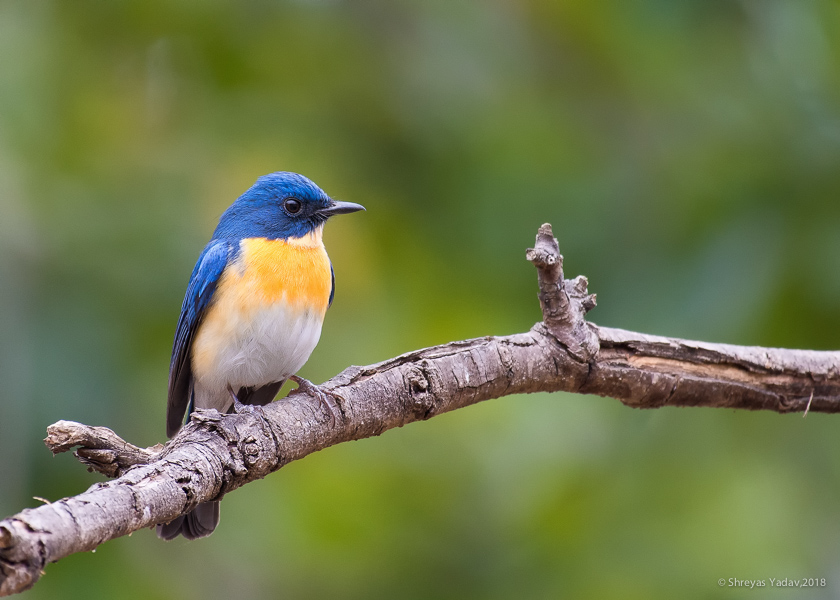
- However, there are exceptions. When the main object appears powerful when it is located at the center of the image. Example- Birds, Portrait of the big cats and big mammals such as an elephant
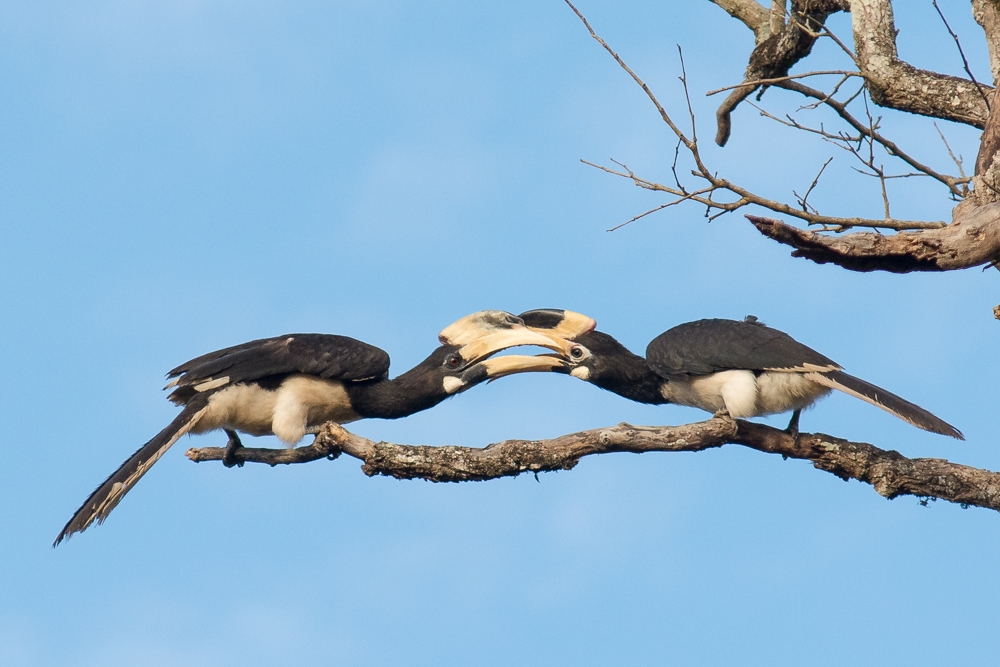
- Can I compose my image symmetrically with respect to a vertical or horizontal center line of the image or asymmetric composition is more compelling?
Once you start thinking of the above-mentioned points before capturing an image, you will develop it as a second nature. Your thinking time and response time will be faster. You will not only capture the image but you will MAKE an ICONIC IMAGE which will tell a visual story to a viewer!
Simplify
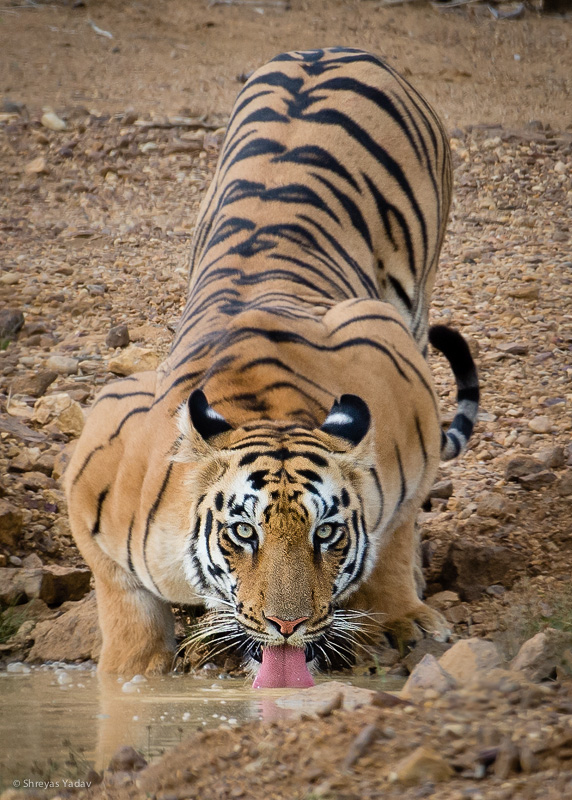
Best wildlife image is not the image with a lot of visual elements added in the frame but including few critical and necessary element which will make the composition powerful.
Think of what you liked about the scene. Is it a portrait of the wildlife, flight of the bird or a behavior of the wildlife. Now include the visual elements which are relevant. Remove all the unnecessary elements or distractions from the image in the best possible way. Distractions can be leaves, dry twigs in the foreground or a background. Unnatural elements such as a fence, light pole, and wires from the background.
It is hard to remove the distractions in the image when you are excited to click a moment in nature. But once you start simplifying a wildlife image, quality of your wildlife image will skyrocket.
7. Watchout the background- background is as important as your main object
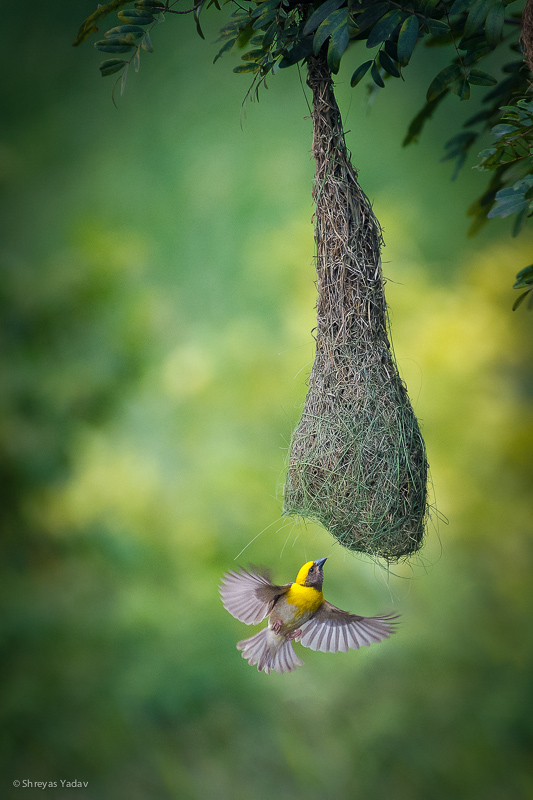
Images with distracting or dull backgrounds can make a beautiful picture look awful. We keep wondering even though my object ( it may be bird, animal, flower or person ) is so awesome and still why the image looks so gross. Take a look at the background of the image and you will find an answer. To help you folks in choosing the best possible background, I have two images of Roller bird from my trip to Tadoba. Let’s dive right into it –
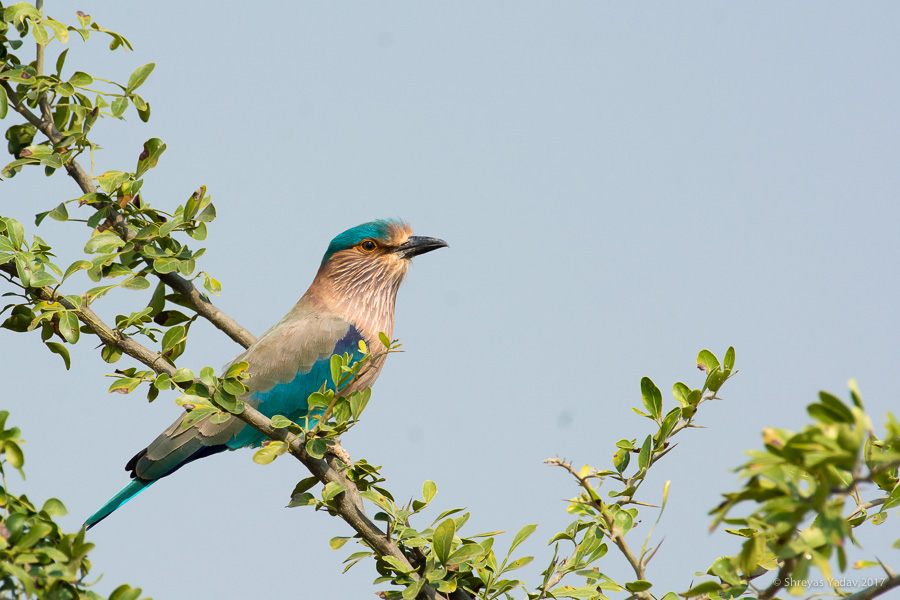
- The first image on the top is of the Roller perched beautifully, a bit higher than the eye level. I captured this image using Nikon D7100 and Nikon 200-500 f/5.6 lens handhold from seating position in the gypsy ( Image details are – Aperture f/8 and Shutter speed 1/1250 s). Since there was a clear winter blue sky in the background, blue colored Roller doesn’t really stand out against the dull blue sky even though the focus is sharp and colors are vibrant.
- Let’s take a look at the second image on the bottom. Since I was not happy with the dull background and observed some trees at a distance, I decided to make an image in standing position. As soon as my position was changed the whole perspective changed. We can clearly see in the second picture – Image of the same Roller on the same perch with green background ( from trees ) and partial blue background ( from the sky) ( also called as dual background ) is beautiful than the previous one with an added punch to it. Blue roller nicely stands out on green colored creamy background, Image looks more lively and vivid than the previous image. This image is captured with Nikon D7100 and Nikon 200-500 f/5.6 lens handheld from standing position in the gypsy ( Image details are – Aperture f/8 and Shutter speed 1/1250 s). Notice that even image details such as aperture and shutter speeds are identical for both the images.
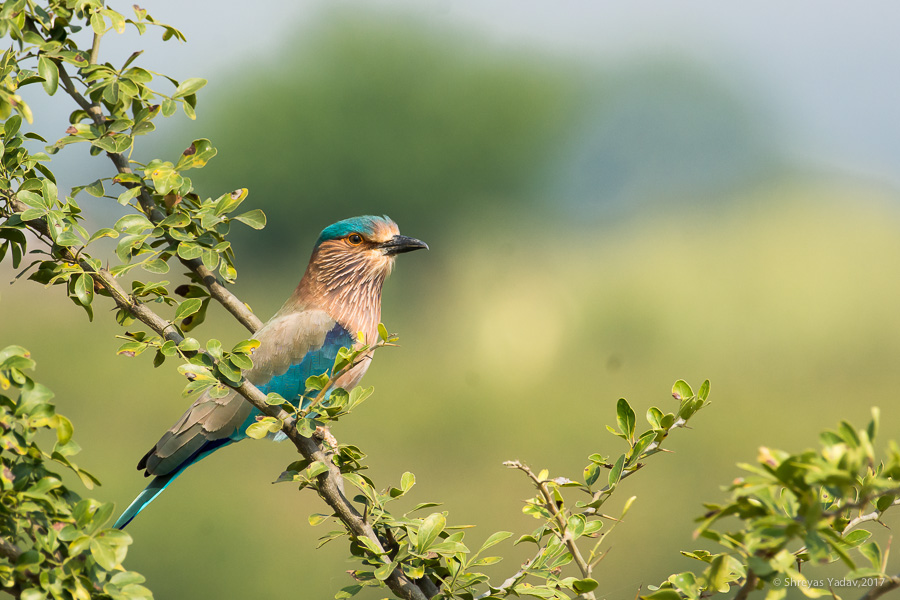
Here are quick tips for you –
- While clicking image always watch out for the image background
- Avoid busy, cluttered and dull backgrounds by changing your photography position (whenever possible)
- Changing photography position means- looking at your object by raising or lowering your eye/camera level, moving towards left or right and looking at the object
These are few simple but effective tips which will definitely enhance your images to the next level.
8. Fast shutter speed is your best friend to get sharp images
Wildlife action happens in a split of a second. These are the unique moments in wildlife photography. Wildlife action such as kingfisher catching a fish, a peacock in flight, playful moments of the tigress and cub or intimate moments of parakeets. Making stunning wildlife images is about capturing those rare wildlife moments.
In order to freeze the action, shutter speed should be high enough.
Following are some of the examples where fast shutter speed is required
- Eye-contact of the animal which has an expression
- Flight of the bird with food or nesting material in the beak
- Hunting sequence in the wildlife, birds or microfauna
- Playful moments of the wildlife such as tigress and cubs, monkeys and deer
- List goes on
The general rule of thumb is – If you are hand holding the lens with focal length as 500 mm on a full frame camera ( FX format), the shutter speed should be set to 1/500 s ( At least )
Also if you are using focal length 500 mm on a crop sensor camera ( DX format), then a shutter speed of 1/750 s is required to freeze the action.
These are general guidelines. But based on my experience in the field usually, the shutter speed required will be 1.5 times or 2 times of shutter speed mentioned above.
Let’s re-evaluate above-mentioned cases –
- Case # 1: If you are hand holding the lens with focal length as 500 mm on a full frame camera ( FX format), the shutter speed should be set to 1/750 s or 1/1000 s ( i.e 1.5 times or 2 times of the 500 mm )
- Case # 2: Also if you are using focal length 500 mm on a crop sensor camera ( DX format), then effective focal length ( or a field of view ) will be equivalent to 750 mm. In this case, shutter speed of 1/1100 s or 1/1500 s is required to freeze the action.
Above mentioned technique is a general guideline. They are effectively applicable when you handhold the lens during photography.
There are exceptions to this rule when steady support is used. Turning Vibration reduction (VR) or Image stabilization (IS) ON can help to get sharp images even when using relatively slow shutter speed.
Bottom line is in order to photograph the wildlife action, higher shutter speed is required.
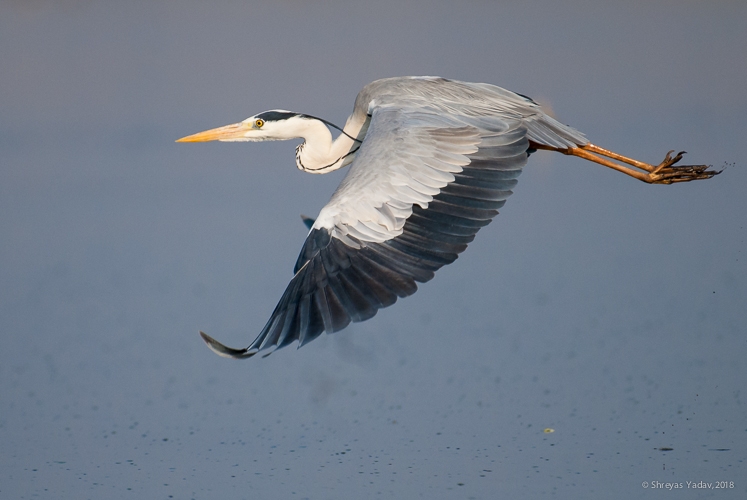
Here is an image of Grey Heron in flight – captured in Bhigwan lake, India. I was navigating thru the lake using a fisherman boat. Natural sunlight was excellent. Nikon 200-500 lens was mounted on DX format camera. ( Effective focal length at 500 mm is 750 mm ) . Shutter speed for to capture Heron flight shot is 2 times the effective focal length i.e 1/1500 s.
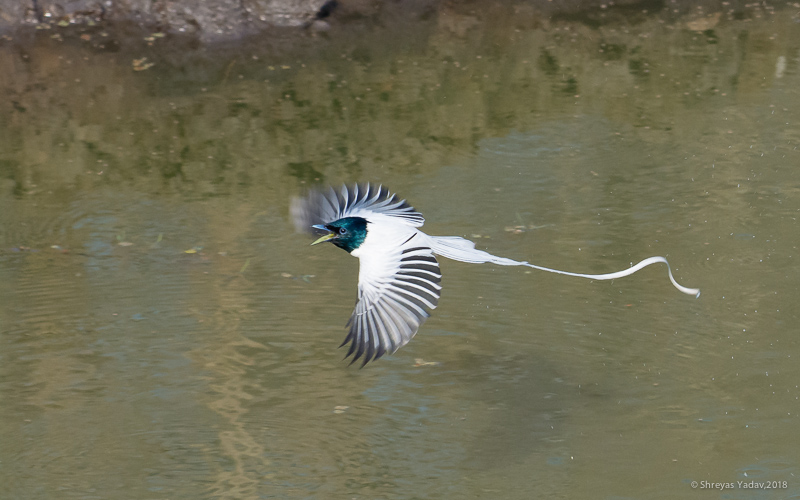
This is an image of Male Asian Paradise-flycatcher who was diving into the waterhole of Dandeli Wildlife Sanctuary. A diving action of flycatcher was swift. I wanted to capture the flight of flycatcher along with his elegant long tail. A focal length of 200 mm was used ( Nikon 200-500 f/5.6 lens ) and camera used is DX format camera ( Nikon D7100 ). Effective focal length will become 300 mm. In order to freeze the flight action, shutter speed required should be 1.5 or 2 times as that of focal length ( In this case it should be 1/450 s or 1/600 s). I have selected bit higher shutter speed of 1/800 s and here is a flight of a flycatcher.
9. Expose the image to the right side of the histogram
A histogram is a topic which kept me haunting during my early days with photography. It seemed too much complicated. You may have experienced the same.
But here is a good news for you – Histogram is a powerful tool to evaluate and make decisions to improve your image quality. You will learn about this powerful concept in a simple way. I will be walking you thru a step-by-step procedure on how to use Histogram to check and improve your wildlife images.
- What is a Histogram
- How to evaluate wildlife image in the histogram
- Why expose the image on the right side of the Histogram
- How to expose the image on the right side of the Histogram
- Exceptions – Silhouette image, Images with light and shadows, Images which are dominated by dark tones, Images where behavior and light is important than details of the image
1. What is a Histogram
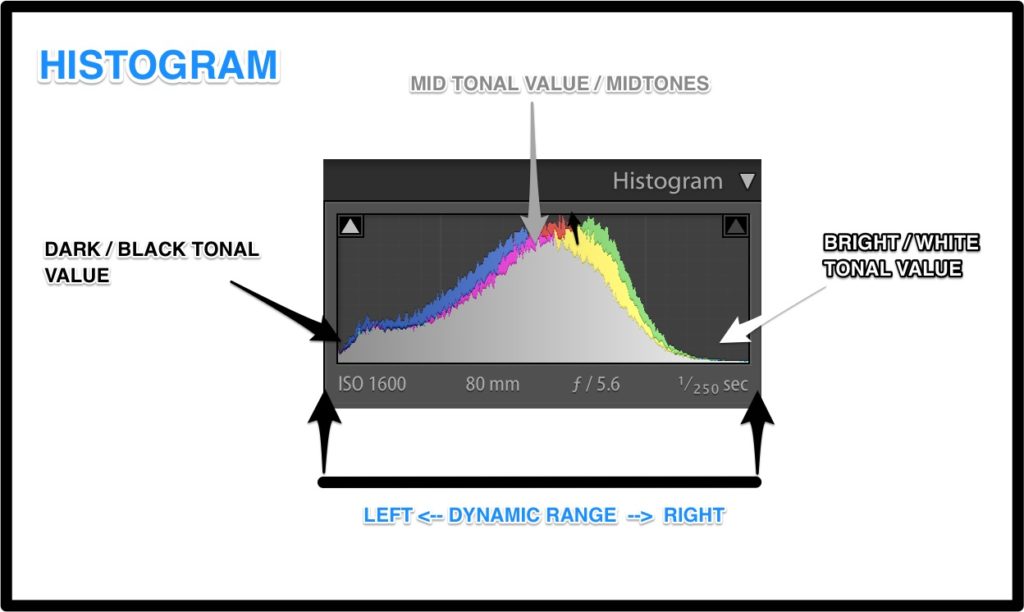
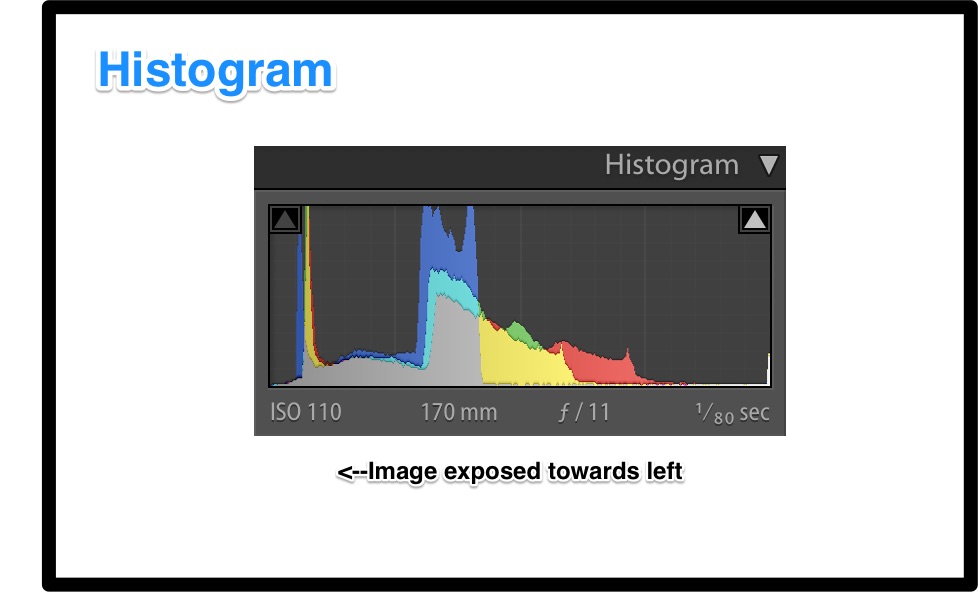
A digital camera has a specific dynamic range. Dynamic range is the range of tonal values from dark to bright. For a given image, Histogram is the graphical representation of a tonal values spread across the dynamic range of the camera.
Here is an example of a Histogram. The left side of the histogram contains dark ( Black tonal ) values, whereas the right side has bright ( White tonal ) values. Mid-tones or neutral tonal values are located in the middle of the histogram.
2. How to evaluate wildlife image in the histogram
After you have captured the image, while image review – you can check out the histogram on the camera screen.
If you see some of the pixels which are going out on the right side of the histogram it indicates that part of the image is too bright or overexposed.
In a similar way if there are pixels which are going out on the left side of the histogram it indicates that some of the pixels are underexposed and they are too dark to be captured by Camera’s dynamic range.
Images with most of the pixels lying in between the tonal values from dark to bright will not have an area of overexposed or underexposed parts. These type of images are easy to recover, process and optimize in post-processing workflow.
3. Why expose the image on the right side of the histogram
A dynamic range of the camera is divided into 5 equal columns. When tonal values of an image are on the right side of the histogram – say in the first 3 columns then skin, fur, feather and eyes of the wildlife are sharp, well detailed and perfectly exposed.
Hence in order to capture details of the wildlife, birds, and microfauna – exposing to the right of the histogram is essential.
4. How to expose the image on the right side of the histogram
The most common way the Image is exposed to the right side of the histogram using the exposure compensation button ( while using Aperture priority mode). Also while using Manual exposure mode this can be achieved.
- In the Aperture priority mode select the suitable ISO ( ISO 400, 800 or 1000 ) and aperture (f/4, f/5.6 or f/8) for the scene. After the camera has metered the scene by Matrix metering ( for Nikon ) and exposure is locked, then press the Exposure compensation button and turn the main command dial so the exposure compensation will ⅓ or ⅔ ( or 0.3 and 0.7 ) on the positive side. The exposure compensation value will look like +⅓ or +2/7 ( or +0.3 and +0.7). This is how an image will be exposed to the right side of the histogram
- While using manual exposure mode set up the desired ISO. After the ISO is set to expose the image by adjusting aperture and shutter speed. Once the image is exposed to the neutral, you can see 0 value on the metering line. Now either reduce the shutter speed by one or two stops or open the aperture by one or two stops. Example if you original Shutter speed is 1/500 and aperture is f/8 then new values can be – shutter speed as 1/400 or aperture as a f/5.6. If changing shutter speed and aperture is not suitable for the scene then ISO value needs to increase by one or two stops (example: if ISO is set to 400 then new ISO will be ISO 800 )
- For the given scene if all 3 parameters such as ISO, Shutter speed and Aperture are set manually and cannot be changed because of scene requirement, in that case, exposure compensation button can be used as mentioned in step 1.
5. Exceptions – Silhouette image, Images with light and shadows, Images which are dominated by dark tones, Images where behavior and light is important than details of the image
- Exposing the image to the right of the histogram will enhance the details and sharpness of the wildlife. But on the other hand, there are wildlife images or scenes which requires a unique type of exposure. Well! this is the time when you break the rule of ‘Expose to the right’
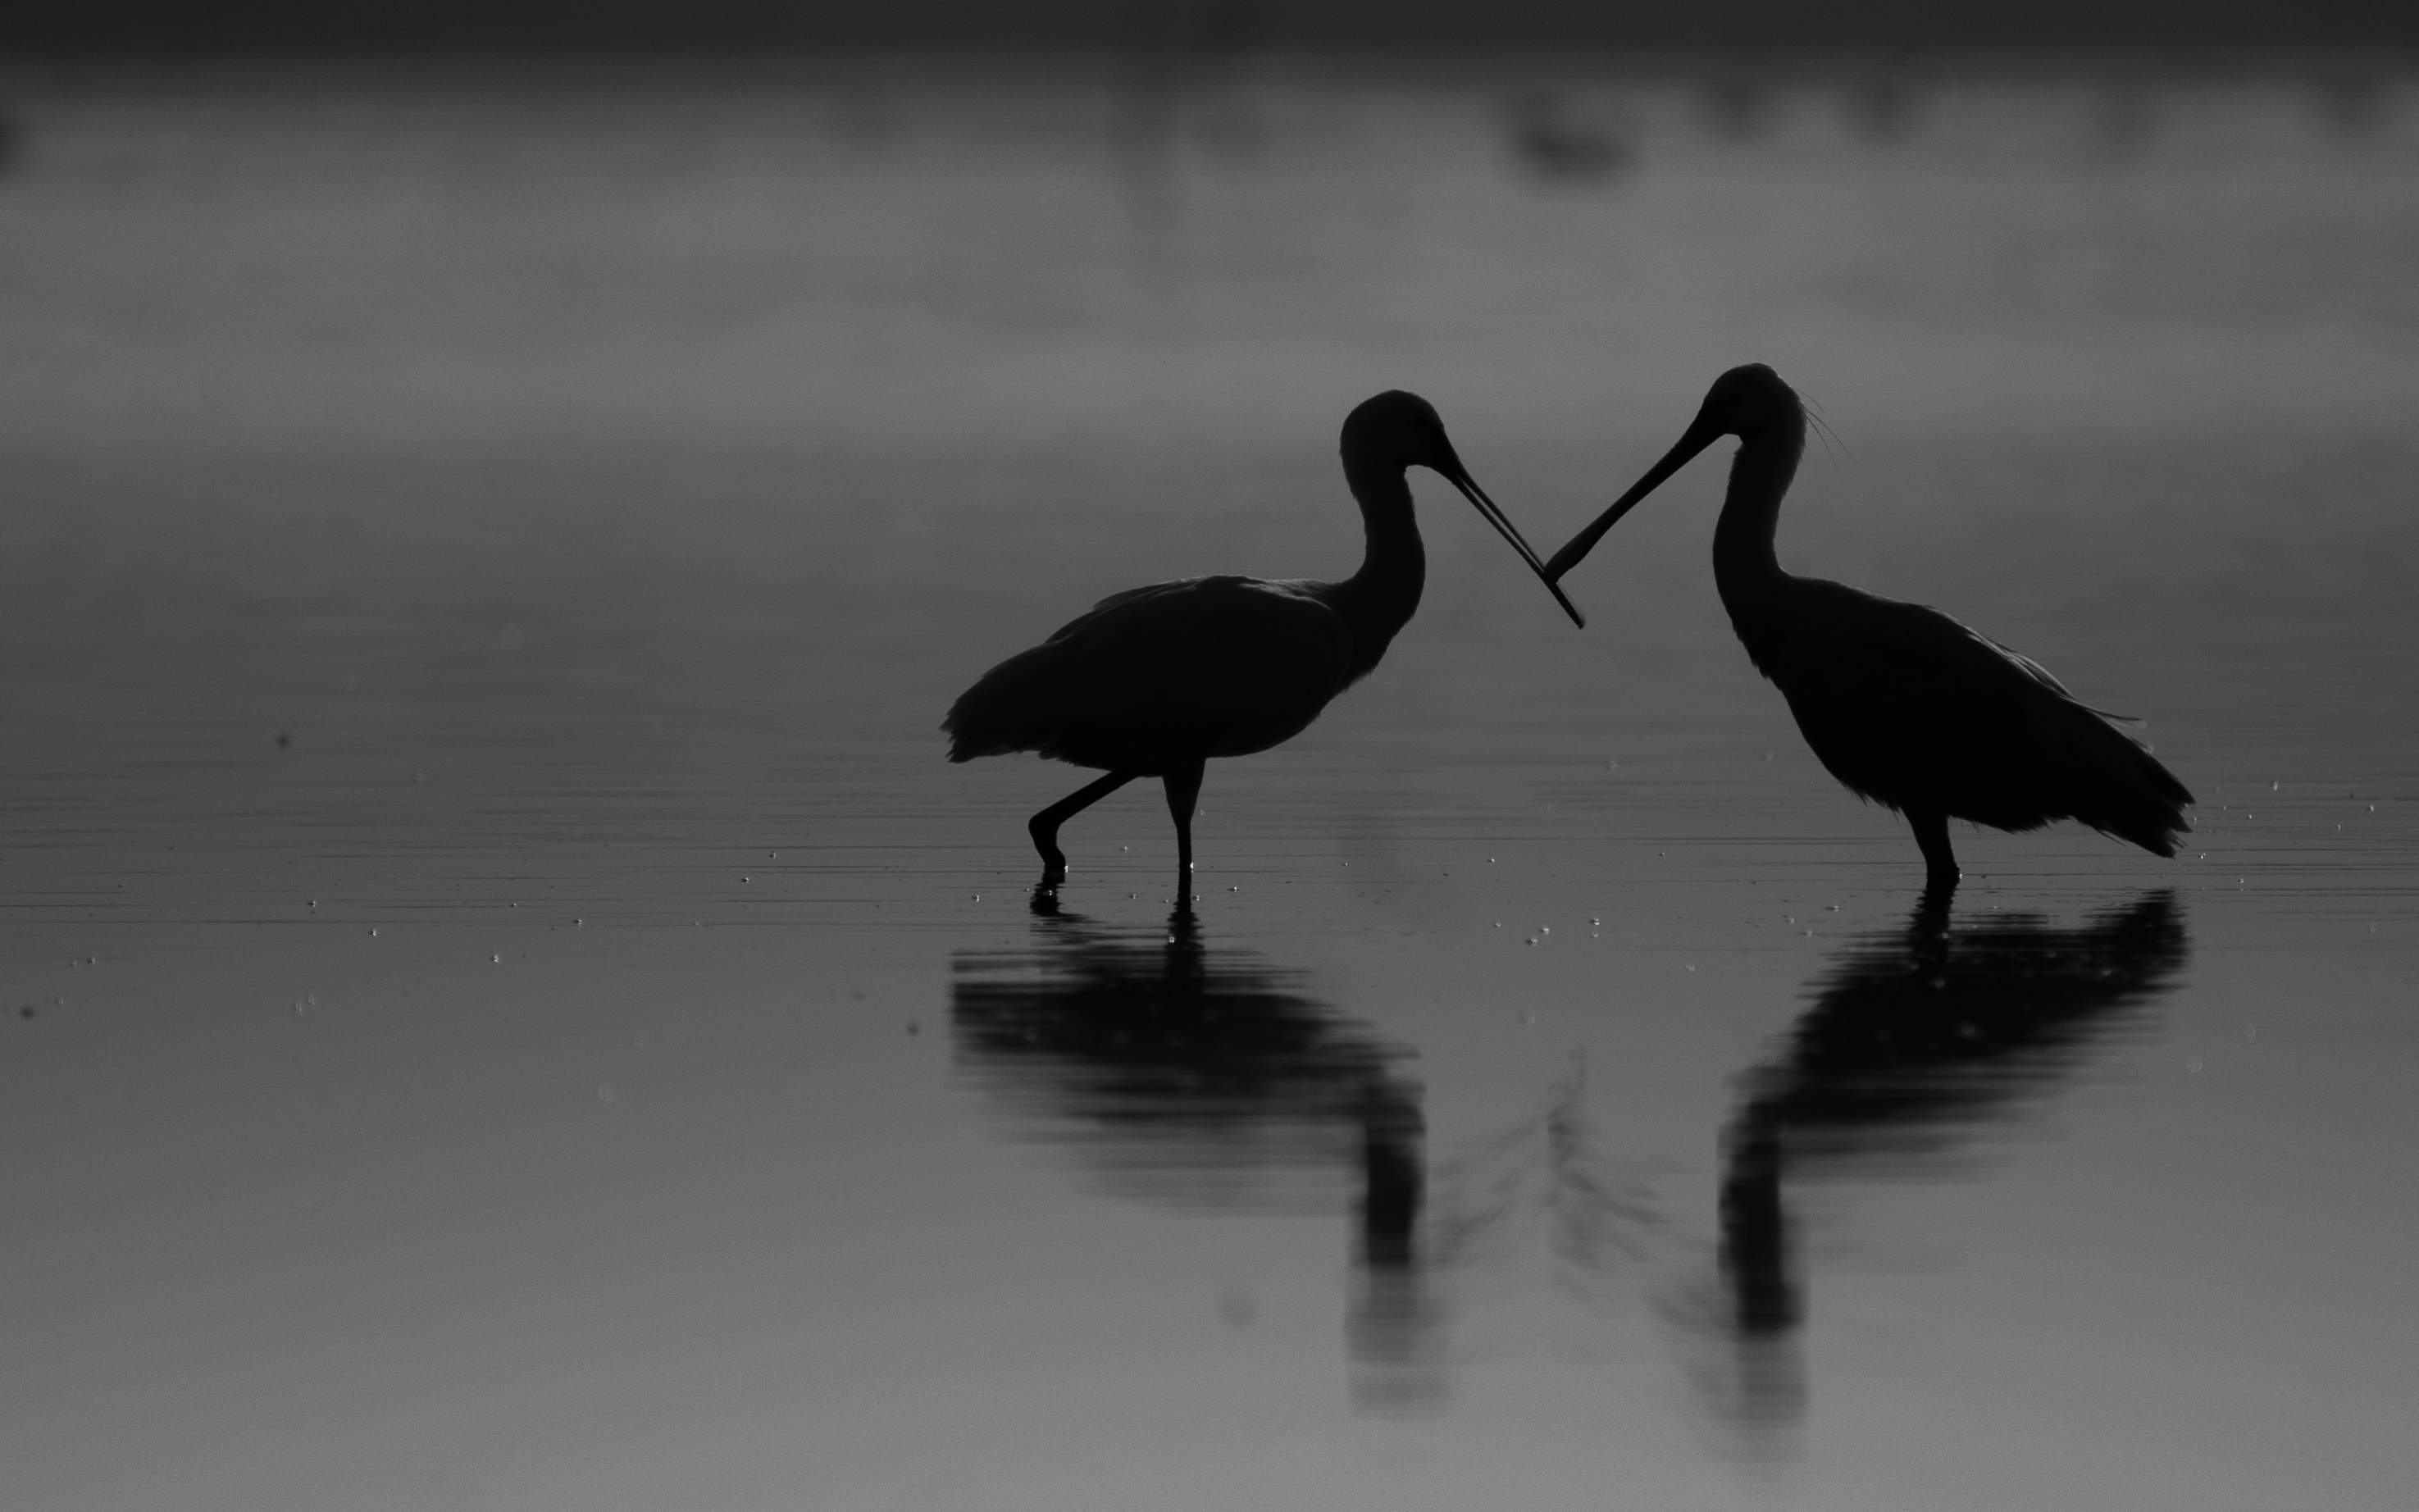
- Images where you want to show shape or action of the wildlife against the light during the golden early dawn or the dusk, this is a perfect time to capture silhouette images. In silhouette images, you need to underexpose the image instead of exposing to the right.
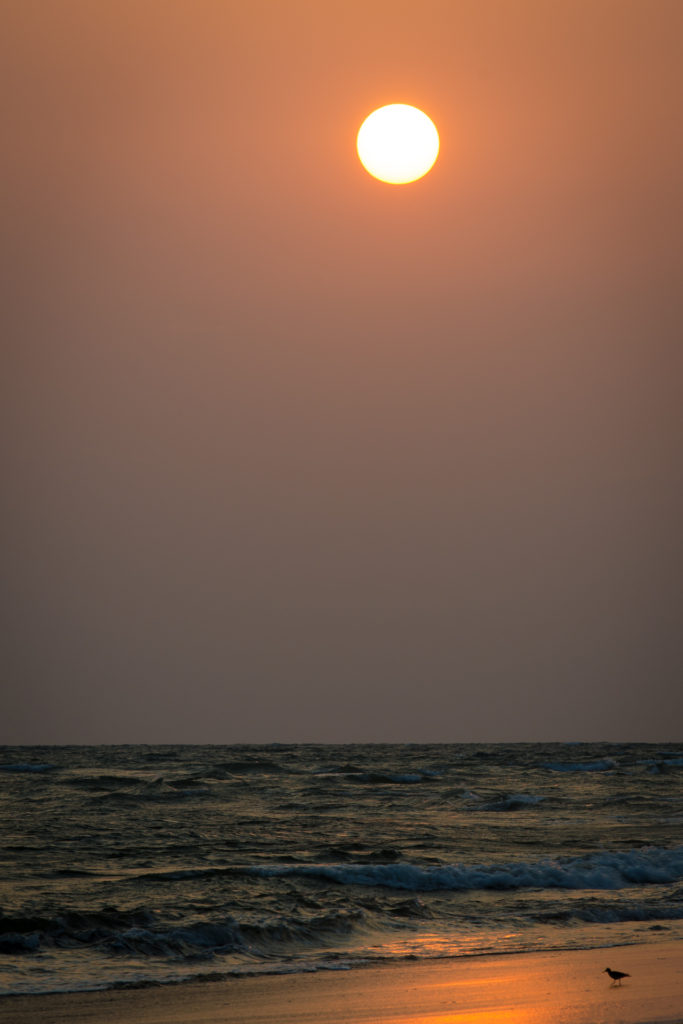
- In the forest canopy or during the cloudy days there will be a play of light and shadows. Object illuminated by such light and covered by shadows adds depth to the image. A balance of light and shadow is as important as the object. This type of scene demands for negative exposure compensation.
A histogram is a useful tool in order to evaluate an image on the field and make progressive decisions to capture creative wildlife images.
Next time after you have captured wildlife image, check out the histogram on the camera display. Based on the histogram and type of image you want to create you will be able to confidently decide on which way to go – ‘Expose to the right’ to show the details or ‘Underexpose’ to capture light and shadows creatively !’
10. Capture the natural behavior and habitat of the wildlife – it is a great way showcase natural history
Wildlife is a part of a nature. Capturing interactions between the wildlife and the habitat around is a key element. Showcasing a visual story will add life to your wildlife images.
While you photograph wildlife observe the following elements, which you may include in a photograph-
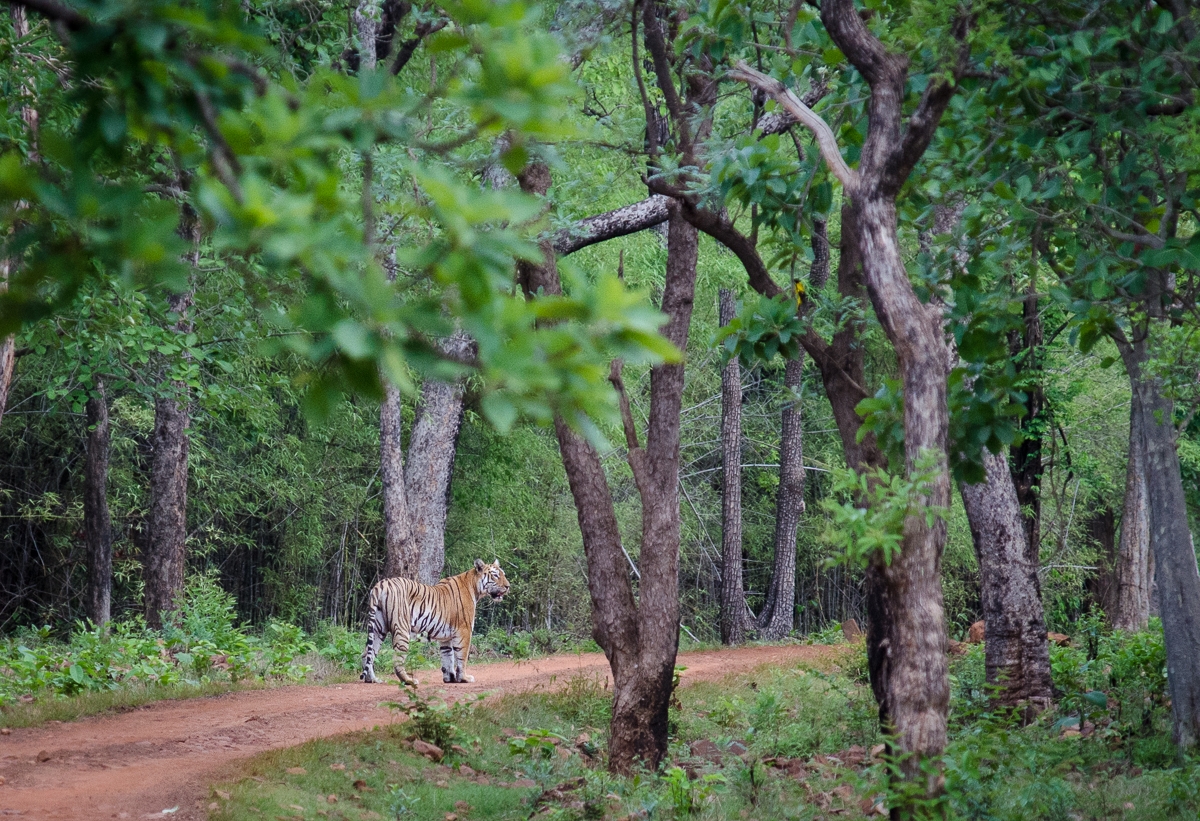
- Habitat around a wildlife such as Forest, Stream, River, Grassland, Desert and Mountains
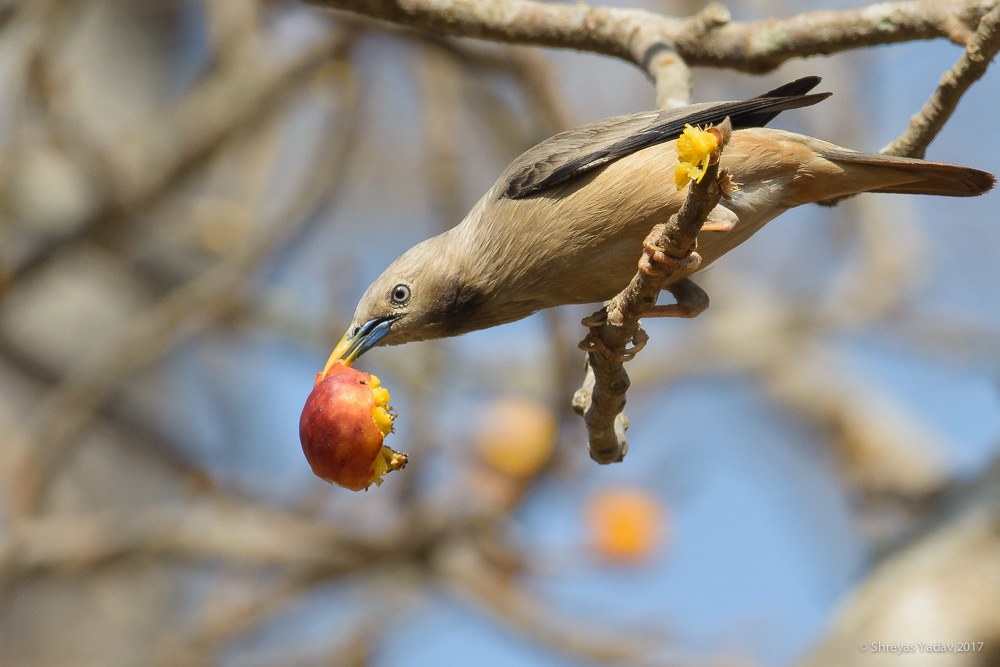
- Food on which wildlife is feeding such as fruits, leaves, grass, carcass, flower and other wildlife as a prey. Wildlife drinking water can also make great wildlife image.
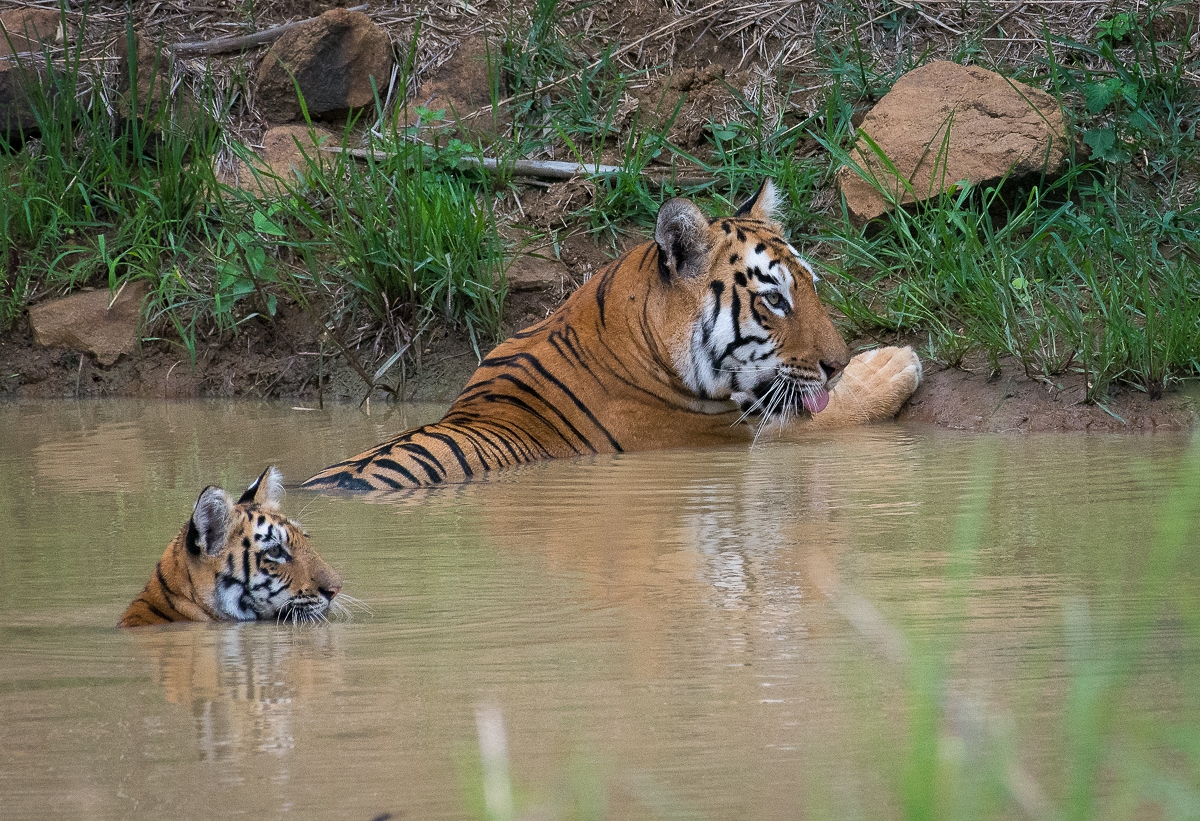
- Behavior of the wildlife towards other wildlife ( same or different species). Behavior can be love, affection, fear, aggression, harmony, fight, bond between mother and baby, leader, guardian, mating, special display or any species specific behavior
- Interaction and effect of natural surroundings on the wildlife such as fire, thunderstorms, rains, wind , summer, snow and any change in the habitat ( both positive and negative )
These elements are critical visual objects in a wildlife image. Placement of these critical visual objects along with a balanced blend of a natural light, main object (wildlife) and simplification of a image will make a compelling wildlife image.
Bonus tips and techniques –
Here are some of the unconventional yet effective techniques which I follow and I highly recommend. Implementing these techniques with faith, will not only skyrocket quality of your images but you will enjoy your trip into the nature . You will experience the peace never experience before and you will be in deep harmony with nature.
- Your best images will be the images where wildlife is undisturbed. Try to minimize the disturbance to the wildlife by becoming quiet, patient and observant. Patience is the key for Nature photography
- Stay hydrated during your stay in the forest. (If possible use some Natural Lemon squeezed in your water) . Staying hydrated will keep you fresh and far from tired. Hydration will keep your energy levels high
- During jungle safari, hiking or while waiting for wildlife, replace your processed snacks with Dry fruits and fruits. Next time when you are on wildlife tour include some dates, figs and almonds in your snacks and see what happens to your energy level. While you are on wildlife tours try to have light food ( food which is easy for digest) . Since the digestive process is a most energy consuming process of the our body, you will have less energy and focus if you eat heavy meals.
Bottom line eat healthy , stay hydrated and have healthy snacks. These 3 things will give you more energy to venture into the forest, observe wildlife and focus on the photography.
- The last one is truly unconventional and you are going to feel super powerful after you do this for a whole day !
It is going to be hard, you will almost hate it ! But, do it anyway and once you get awesome results , you will never go back to your previous version.
- Get up early in the morning , take a shower. Taking shower will pump energy into your body
- Do 7 to 11 Sun Salutations or Surya Namaskar ( Total 15 minutes )
- Do simple pranayama ( Breathing Exercise / Meditation ) ( Total 5 minutes )
As you spend these 20 minutes on the physical activity in the morning, your body will be full of energy. You will experience an energy levels like a fighter jet which is ready to take off !
Most importantly your mind and soul will be calm and focused. This calmness and focused mind will help you to get in tune with the nature.
You will enjoy the beauty of nature and will make the best possible images not just by applying photo techniques but with help of creative thinking !
Photo tip for you –
When you photograph wildlife, before clicking an image – visualize how you are going to tell a interesting story. Use the elements which we learned earlier in a creative and balanced way to narrate a visual story and showcase a natural history.
This single most wildlife photography technique will skyrocket the content quality of your wildlife image. Images depicting a natural history will make a deeper and stronger connect with a viewer.
Which of the photo techniques mentioned in this article helped you to enhance your wildlife photography skills ? Let us know in the comments section below .
With love and Passion
Shreyas
Read more about Wildlife Photography tips at Pixpa
Hi, this is a comment.
To get started with moderating, editing, and deleting comments, please visit the Comments screen in the dashboard.
Commenter avatars come from Gravatar.
Very useful…
Good one … a Detailed over view
Hi Suresh , I am glad it is useful for you.
Hello Shreyasyad,
Good article and informative. These are all steps I try to follow, most importantly up early and staying in shape. How else to carry the backpack, tripod and big lens. Being patient and studying the nature and habits of the animal or bird you’re trying to photograph. Best to get good shots of one species than trying to photograph many with half results.
I spent two years on and off trying to get a shot of a bird that I heard, but seldom saw. But it paid off.
Next stop leopards.
Happy shooting!
A very handy info in a single article.
Hi Raj, Great to hear, thank you!
Excellent notes that really help us
Hi Sachin, I am glad to know that these tips are helpful to you. Good luck !
Wow! What a detailed and useful article! I have been searching for such material for wildlife photography. Thanks a ton.
Hello M L Raju,
Thank you for your kind words. Great to know about it .
Shreyas
Dear Mr Yadav
It’s an excellent guide for not alone a wild life photographer but will be helpful for any line of photography.
I observe that you have taken a meticulous care to cover each and every point without fail. Only an advancement by photographer is possible from where he stands.
I will be referring your blog to many who ask me guidelines on wild life photography.
Mr Yadav when I took the digital photography there is hardly very limited guides were available and my pictures were really a pain. I was able to do a little better with film cameras at that time as I had a tried a few film SLR s and already wasted many film rolls.
Now with your guidelines many can do it far better if they sincerely read and follow your instructions.
The article well narrated in a fine way without missing a point. There is no ambiguity or complicated knowledge or difficult to follow steps are there.
An excellent Article and is fit for all.
Regards
Sivakumar VK
Hello Mr Sivakumar,
Great to know that this guide is helpful and adding value to your photography. Thank you for sharing the article with your friends – it means a lot to me.
Wish you all the best.
Thank you !
Thank you very much for a detailed explanation on wildlife photography, the article focuses both on creative thinking and camera settings which is very essential for any wildlife photographer, all the precautions, physical fitness, concentration and the mindset of the photographer is very well explained.
One of the most interesting topic for me is on the Histograms, though I have extensively used exposure compensation, I had never thought about connecting Histograms with metering and compensation. thanks again for sharing the knowledge.
Hello Muralidhara,
I am glad to know that these techniques are helping you in Wildlife photography.
Thank you for your kind words. Good luck!
Awesome tips Shreyas! I have just started shooting wildlife. Is it necessary to learn post processing? I have no experience in processing the images and I heard the tools like Adobe lightroom are quite costly. Are there any free tools? Please advice. Thanks.
Hello Sonu Negi,
Good to know you like wildlife photography. Post-processing the images will enhance the quality of your images. Yes Adobe Lightroom has monthly cost. However Adobe Camera is great tool for editing the images.
Thanks