Generative AI Remove in Adobe Lightroom: In this article, you will learn How to use the New Generative AI Remove tool ( Early Access ) to reduce your overall post-processing time.
You can remove distractions and unwanted objects in the image with an AI-powered remove tool. Generative AI remove tool can help you precisely remove distractions in your images.

If you are a Product, Portrait, Wildlife, or Nature photographer, you will love the Latest feature launched by Adobe Lightroom in their recent release.
The new Generative AI remove ( Early Access ) feature will help you to remove distractions from your images. This feature will save time and make your post-processing flow faster.
If you think that AI will post-process your images, no! AI will not post-process your image. You will have all the controls and creativity of your image.
However, the AI-based Generative Remove ( Early Access) tool will make your post-processing workflow easier and faster.
I have started using the Generative-AI Remove( Early Access ) tool while post-processing the images. It is saving me time. And the results are quite good.
And, I want you to try this tool to remove distractions in your images. This means less time in front of the computer and more free time for Photography.
In this article, you will learn about the Generative-AI remove ( Early Access ) tool and how you can use it to post-process your images effectively.
Let’s dive right in
Generative AI Remove Tool (Early Access)
- Generative AI and Object Aware
- How the Generative-AI Remove Tool Works
- How to Use the Generative-AI Remove – an Example
Generative AI and Object Aware remove
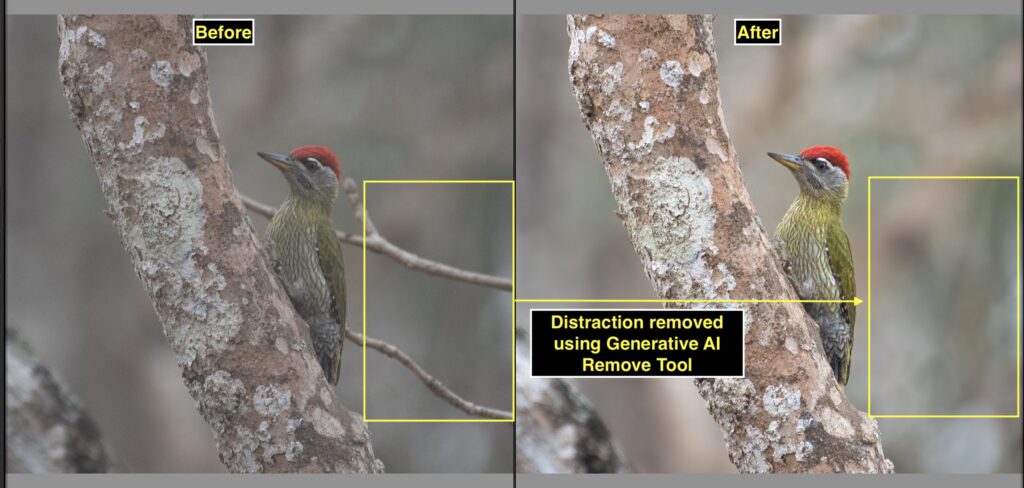
Generative AI Remove ( Early Access ) lets you remove distractions in the image. The feature will remove the area you select.
However, the Object Aware remove option approximately recognizes the object in an image. Once you paint with a brush over the object outline, the Object aware remove tool recognises the object and replaces it .
If a well-defined object needs to be removed, the Object Aware Remove tool is helpful. However, if the distraction is smaller and not related to a specific object, Generative AI-Remove is a handy tool.
How the Generative-AI Remove Tool Works
You can use a Generative AI tool to remove unwanted objects in an image. Once you select the area or an object that needs to be removed, Adobe Firefly algorithms will automatically remove the object. Also, the remove tool will generate a fill that blends with the surrounding image area
Now Let’s learn how to use the Generative AI Remove tool
How to Use the Generative-AI Remove – an Example

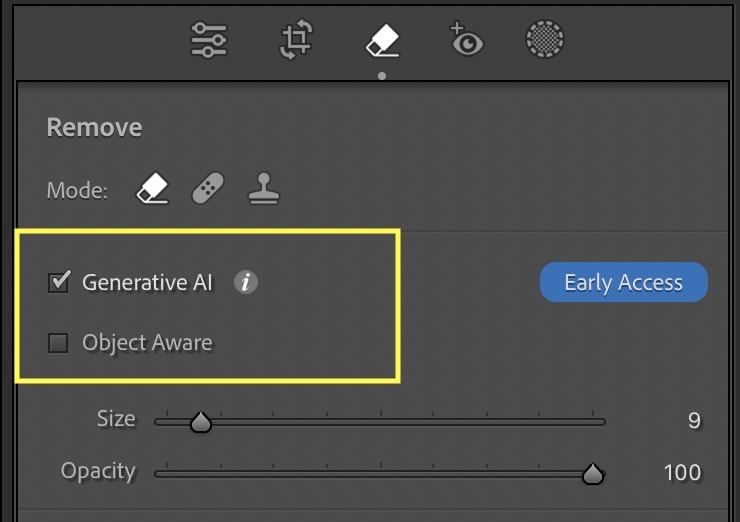
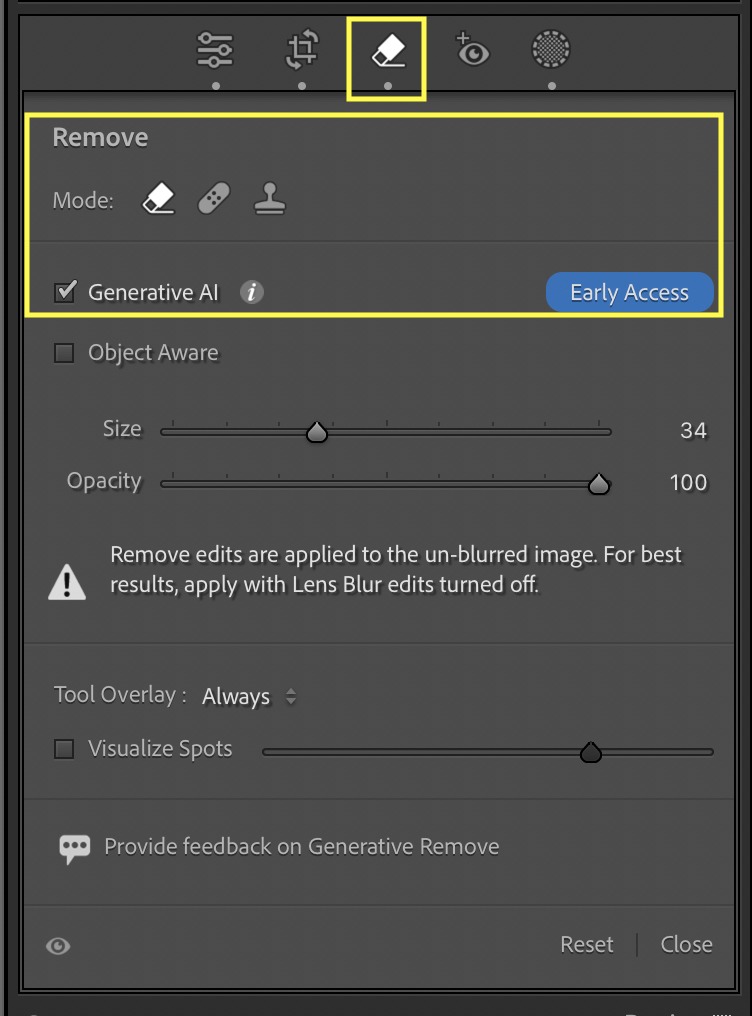
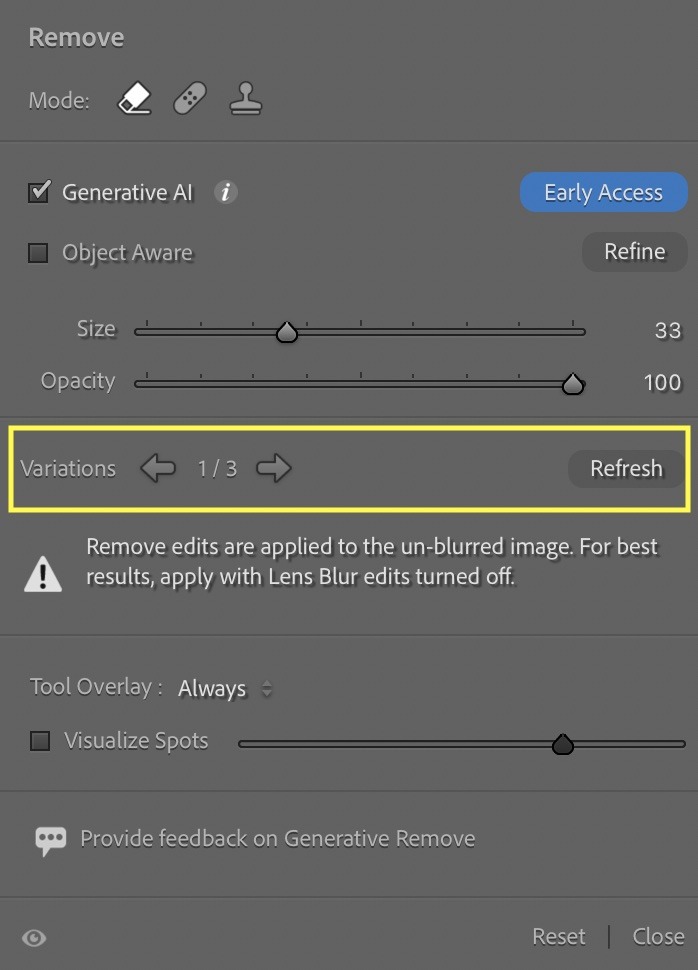
- Under the Develop Module, select the Remove
- Remove > Mode: ‘Remove’, check the Generative AI ( Early Access) option
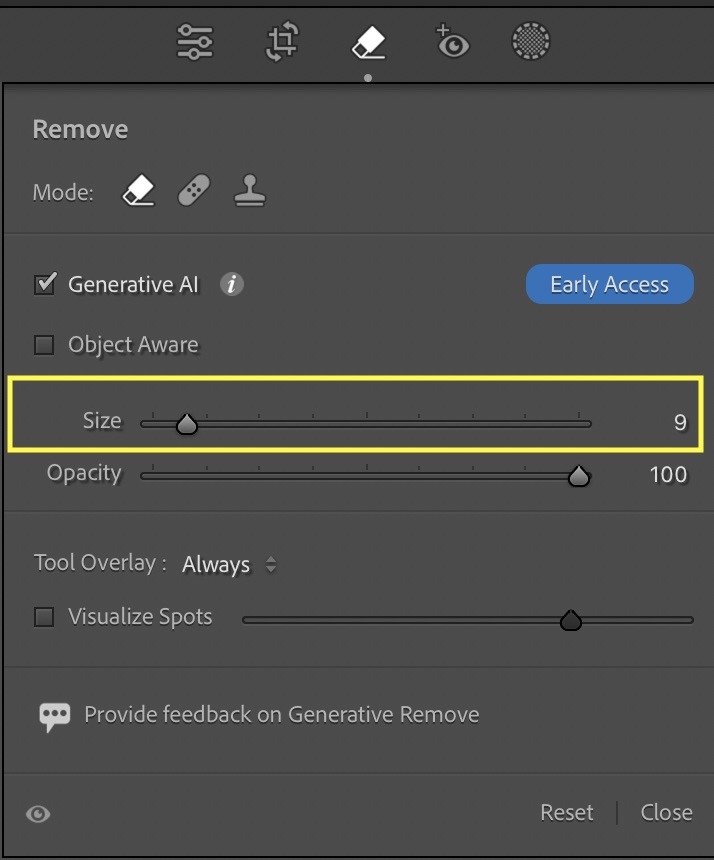
- Select the Size of the brush based on the Distraction you want to remove. For Smaller distraction removal use a smaller brush size and a larger brush size for larger objects.
- Here are some points useful while selecting Brush Size
- If you select an object , make sure the brush size covers the object you want to remove. Also, the brush size should be small enough to not touch the areas you don’t want to remove.
- To remove complex distractions accurately, you can zoom in on the image and use the brush.
- Here are some points useful while selecting Brush Size
- Select the Opacity.
- Opacity will control the intensity of distraction removal. Higher opacity will remove the distractions completely. Whereas, lower opacity will still show some of the distractions in the image.
- To remove major distractions, use the higher opacity value. If you want to reduce the distractions instead of completely removing it then use lower opacity value. ( This way the distraction removal will blend in properly with rest of the image)
- Paint over the area/object which needs to be removed.
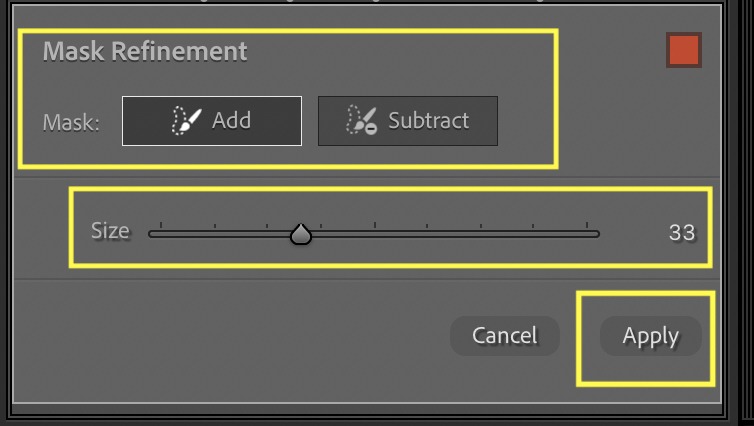
- Use the ‘Refine’ option to refine the object selection. You can add or remove the object selection using the Refine option.
- Under Refine there are two options Add and Subtract. To expand the brush selection select the option Add. And, paint over the area to be added to the existing selection.
- Similarly, to remove some of part of area from the selection click on Subtract. Paint over the area to be excluded from the selection.
- Using the Refine option, you can accurately do the selection.
- Once you select Apply, Adobe Lightroom will generate 3 fill variations.
- Check if the generated variations are suitable for your image.
- If none of the 3 variations are suitable then click Refresh.
- Generative AI will generate 3 more variations.
- Choose the variation that is suitable for an image.

Now it’s your turn
Do you find this Generative-AI Remove Tutorial helpful? Are you planning to use the Generative-AI Remove? Either way, let me know in the comments below
EXPLORE. PHOTOGRAPH. INSPIRE
Join our newsletter and get the best articles about Digital Post-Processing and Photography techniques. No charge. No Spam. Only love.
Very informative article. Thanks for sharing your insights.
Thank you Sir.