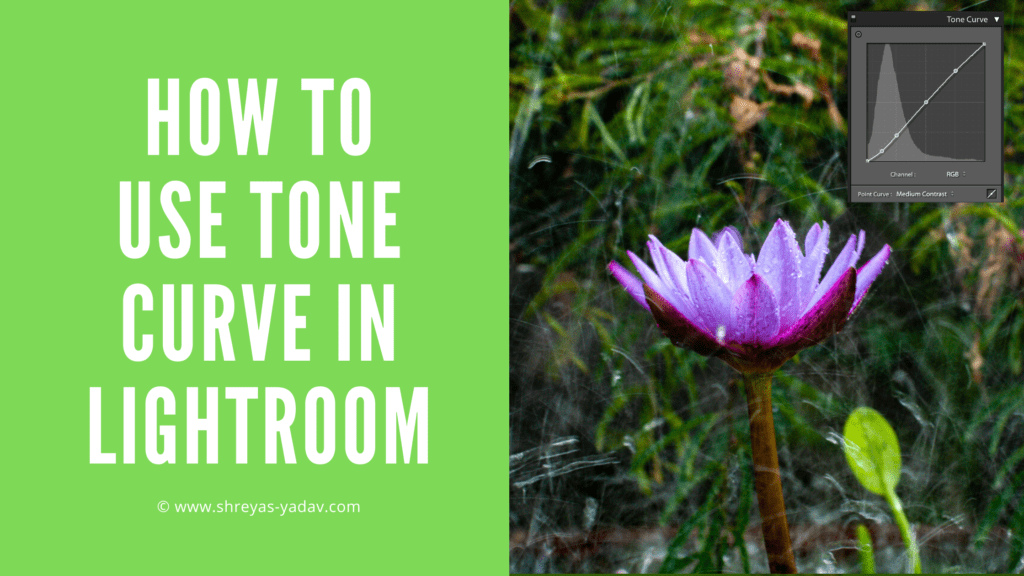
This step-by-step guide will help you to precisely adjust the Tonality and colors using Tone Curves in Adobe Lightroom
Do you want to create a beautiful contrast in your images?
Do you want to get beautiful colors in your images?
Or Do you want to learn how to use the Tone Curve?
Then you are in the right place.
Because in this step-by-step guide you will learn how to use the Tone Curve in the Lightroom to adjust Contrast and colors in your images.
After implementing the steps described in this guide, you will start making images with beautiful Contrast and colors.
And the best part is?
All of these proven techniques work great in Adobe Lightroom Classic 2020 and earlier versions of Adobe Lightroom.
Let’s dive right in!
Here are the steps you are going to learn in this post
- How to read a Tone Curve
- How to use Tone Curve in Lightroom
- How to adjust Contrast using the Tone Curve
- How to adjust Colors using the Tone Curve
1. How to read the Tone Curve
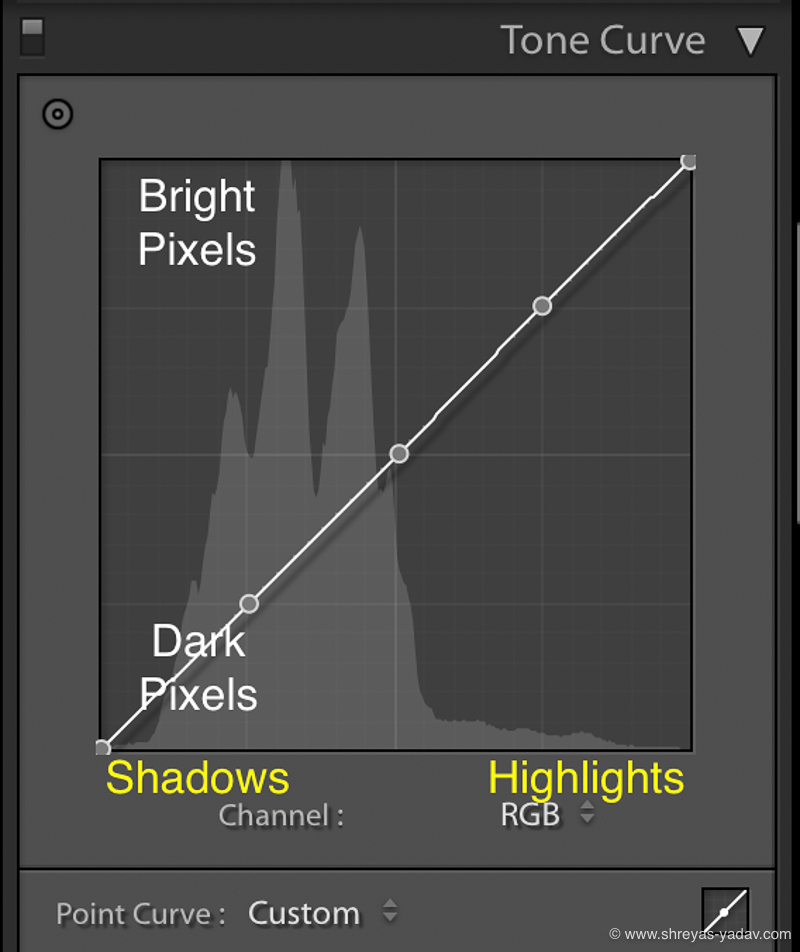
- In the Adobe Lightroom, under Develop module, you will find a Tone Curve
- On the X-axis, the left area represents the shadows in the image. The right side represents the highlights.
- On the Y-axis, the bottom area consists of dark pixels. A top area on the Y-axis represents bright pixels
- The pixels in the top region are bright, whereas the pixel at the bottom of the histogram is dark pixels.
- Similarly, pixels appearing on the left are under shadows. Pixels on the right are under highlights.
- You can adjust Contrast and colors for specific pixels based on where they lie, the shadow area, the Highlight area, and mid-tones.
2. How to use tone curve in Lightroom
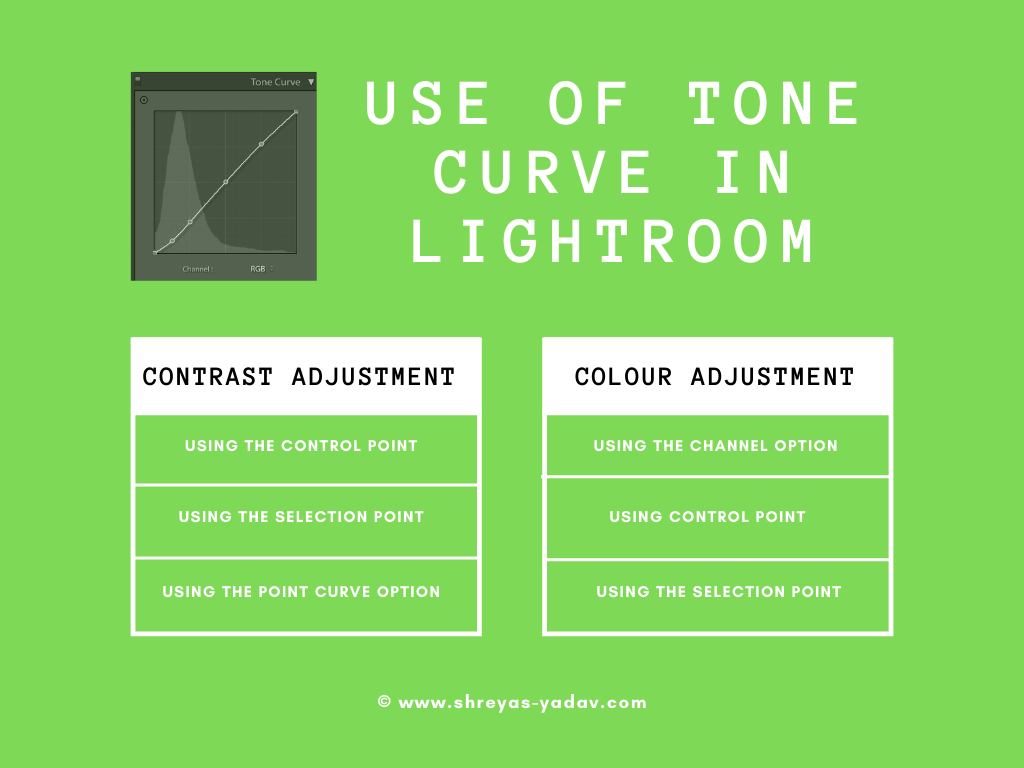
- Using the tone curve, you can adjust Contrast and Colours
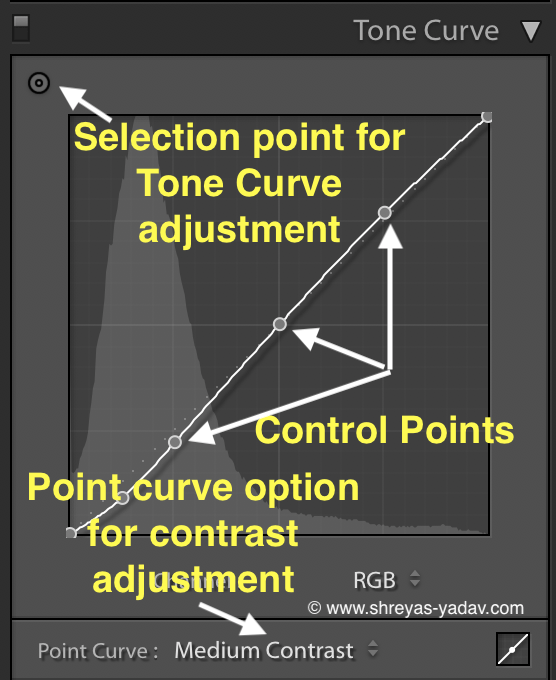
- There are three ways you can adjust the Contrast
- Using the control point on the tone curve
- Using the selection point
- Using the Point curve option
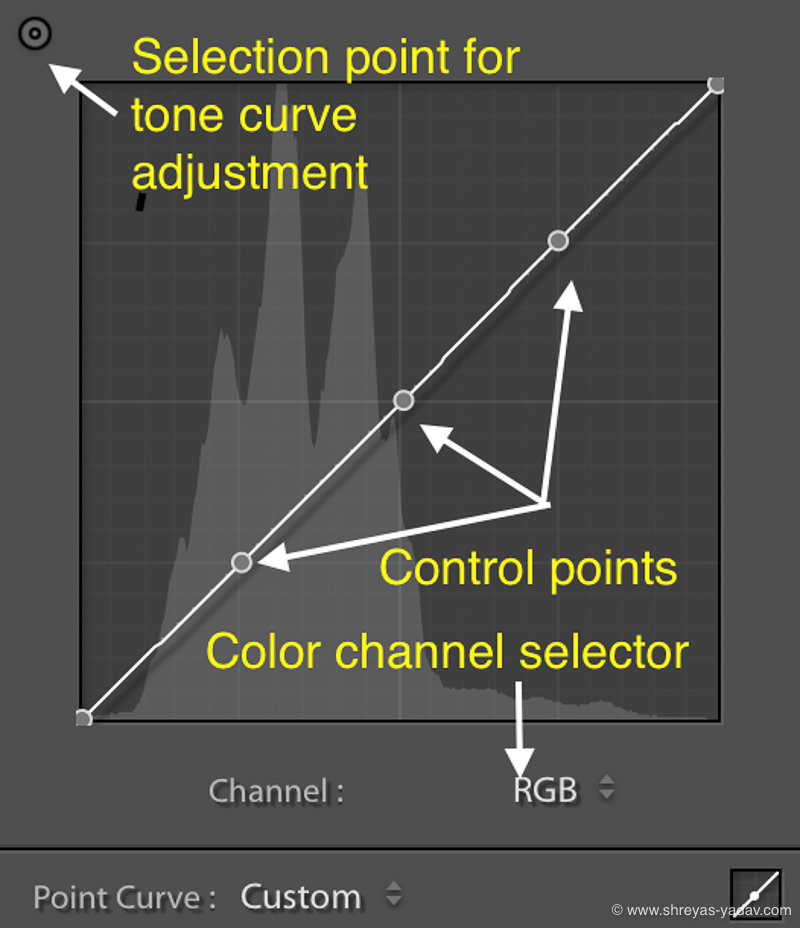
- Similarly, you can adjust colors by below methods
- Using the Channel option and selecting the required color
- Using control point on the tone curve
- Using the selection point
3. How to adjust Contrast using Tone Curve
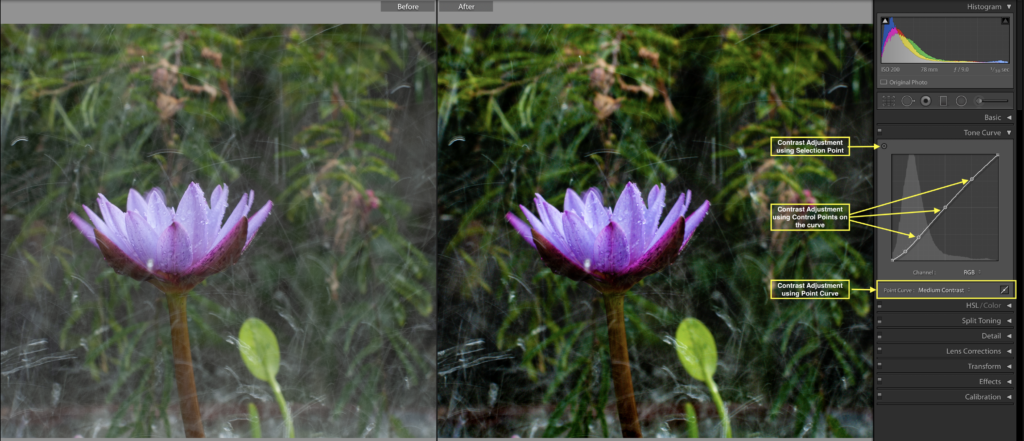
- You can adjust Contrast using the Contrast slider in the Basic panel. However, with the tone curve, you can precisely adjust the Contrast
- With Tone curve, you can set tonalities of dark, midtone and bright areas as per image requirement
- Use the Point curve option under the Tone Curve. Point curve has standardly preset for Contrast – Linear, Medium and High Contrast are the options available
- You can choose any type of preset available. I have found the Medium contrast option works best on most of the images. Linear options make very subtle differences. However, the Strong contrast option adds a sharper contrast to the picture. I feel a strong contrast is a bit overkill (at least to my images). Hence I use Medium Contrast. Choose the option from the dropdown which works best for you.
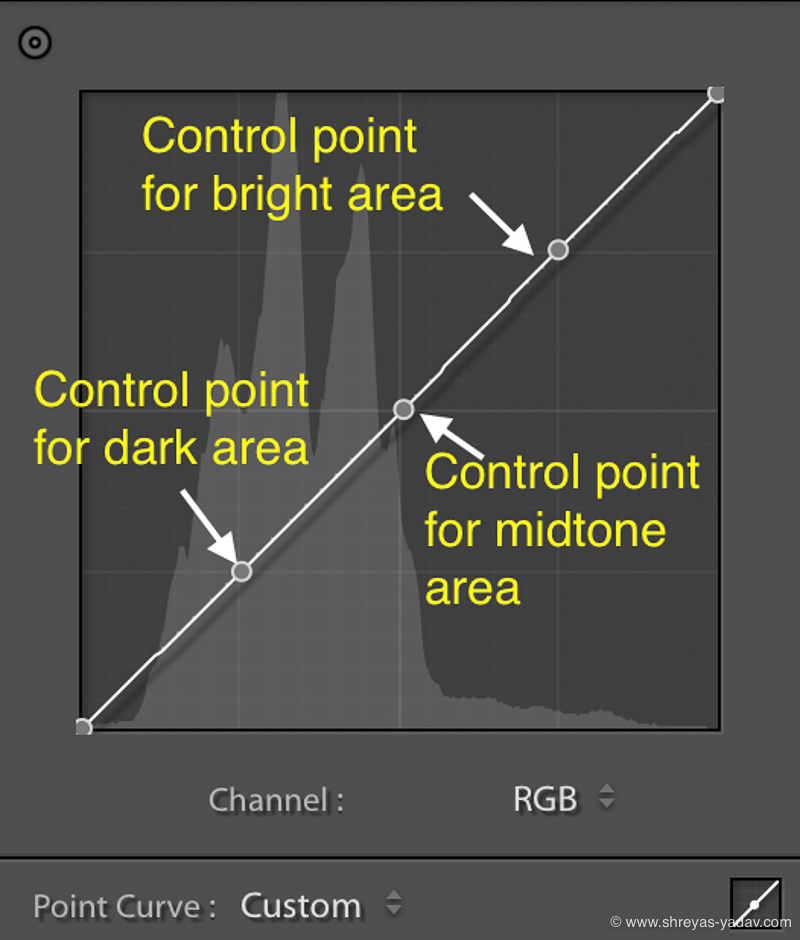
- Another method to adjust the Contrast is by using a point on the Tone curve. You can simply select the point on the tone curve and move it up or down. Moving up will make that area brighter. Moving down will make that area darker.
You can adjust 3 points on the tone curve. Select 3 points on the tone curve – One in the Highlight/ bright zone, second in the mid-tone zone, and third in the Shadow/dark region.
Now move the points in each zone up or down. Generally, to increase the Contrast, move the point in the bright zone up. Keep the midtone point as it is. Move the point in the dark zone lower. You can fine-tune the positions of all 3 points. By this method, you can achieve a beautiful Contrast in an image.
6. The third method to adjust Contrast is, use the Selection point option. Use this Selection point. ( Small circle icon )
Move this point on the image. Hover the point over the bright area of the image. Click and drag upwards. It will increase the brightness for brighter pixels in the image.
Similarly, click on the dark pixel in the image. Click and drag downwards. This way, the Dark area will become darker.
Midtone point you can either fix it to the center of the tone curve or fine-tune as required.
4. How to adjust Colors using the Tone Curve
In Tone Curve Color Adjustment, Remember
- Opposite of Red is Cyan
- Opposite of Green is Magenta
- Opposite of Blue is Yellow
Under the tone curve, there is a channel selection option. Select Red, Green, or Blue from the dropdown.
If you select Blue and reduce the blue, then the yellow color will be prominent and vice-versa. Similarly, you can adjust the Green, Magenta, Red, and Cyan colors.
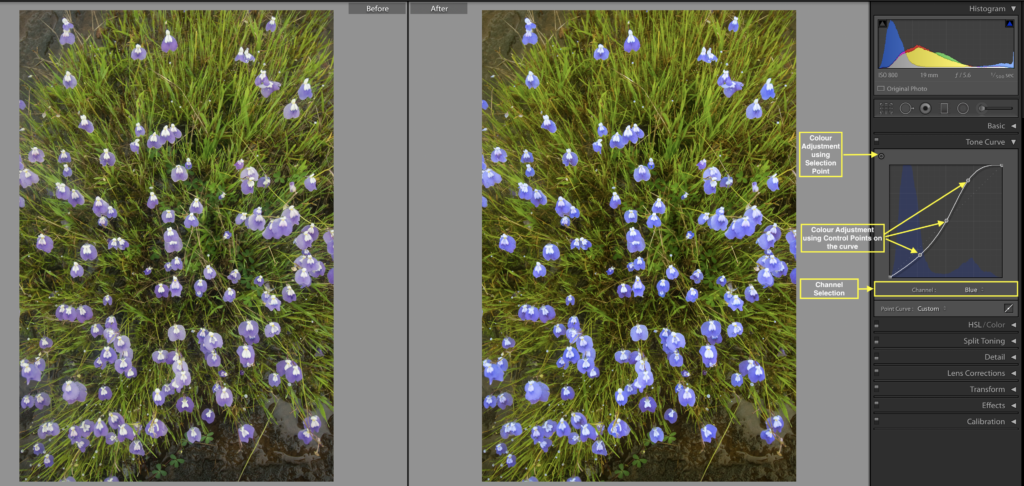
Adjusting the colors using control point on the curve
- Identify which color you want to fix. If it is Blue or Yellow, then select Blue from the dropdown
- Identify in which area you want to do color correction. You may wish to adjust the colors in the bright, mid-tone, or dark area of an image.
- For example, if you’re going to work in dark areas of the image, click on the cursor at lower left square
- If you want to increase the Blue color, then drag the curve upwards. If you’re going to reduce Blue or introduce Yellow color, then drag the curve down
- For adjusting the color in midtone, select the center of the square
- For brighter and highlight areas select the point in the upper right corner
- Similarly, you can do color corrections in mid-tone and brighter areas of the image.
Adjusting the colors using selection point
- Identify which color you want to fix. If it is Blue or Yellow, then select Blue from the dropdown
- Identify in which area you want to do color correction.
- Click on the Selection point. ( Small circle icon )
- Click on the area you want to adjust.
- Click and drag upwards or downwards to adjust Blue/Yellow color.
- You can adjust dark areas, mid-tones, and bright areas in similar ways
- Similarly, you can adjust Green, Magenta, Red, and Cyan colors.
Now it’s your turn
Which technique are you going to try first? Are you going to adjust Contrast
or Colors using a Tone Curve?
Let me know by leaving the comment below right now
EXPLORE. PHOTOGRAPH. INSPIRE
JOIN OUR NEWSLETTER AND GET THE BEST ARTICLES ABOUT DIGITAL POST-PROCESSING AND PHOTOGRAPHY TECHNIQUES. NO CHARGE. NO SPAM. ONLY LOVE.
It is more convenient n useful for beginners if yr step by step guide is in video form instead a article