This step-by-step Adobe Lightroom Tutorial will teach you how to use the Select a Subject tool in Adobe Lightroom.
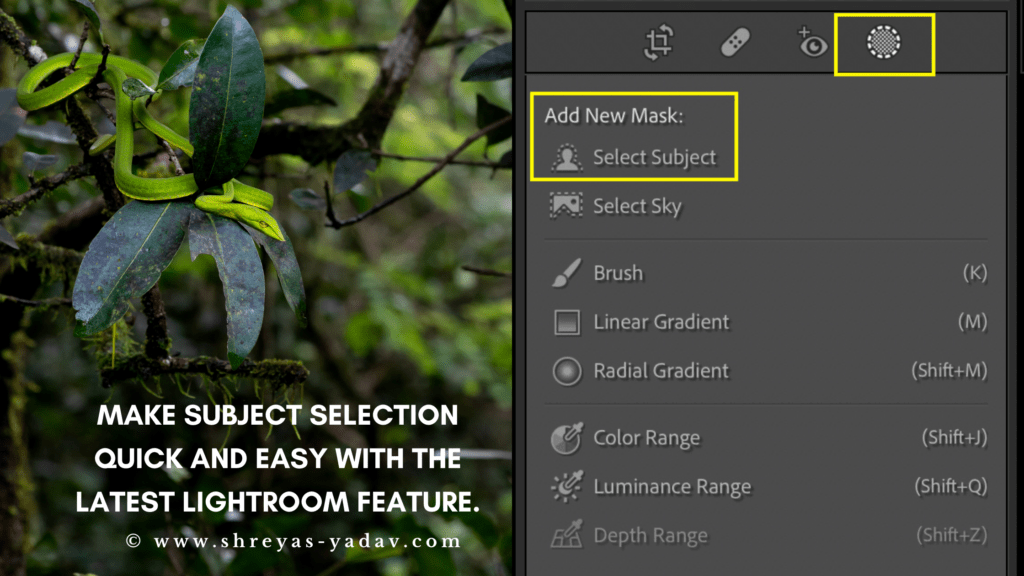
I think you will agree with me when I say it’s hard to quickly make subject selections.
Well, it turns out you can select Subject Precisely and quickly using the latest Lightroom tools.
Let us dive right in –
Subject Selection tool in Lightroom
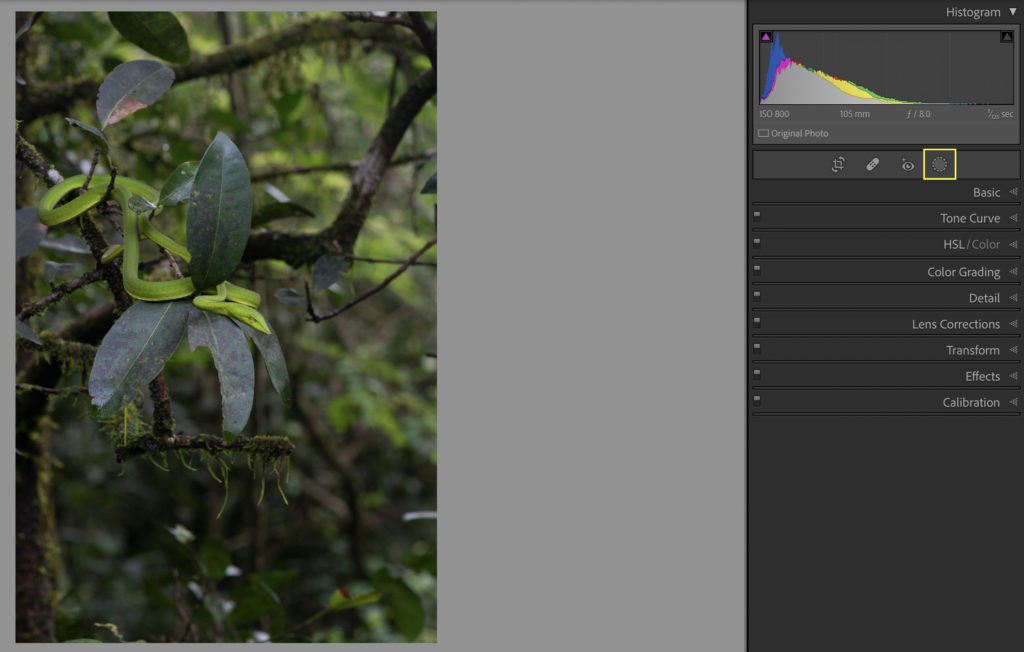
- Under the Lightroom develop module, select the masking option.
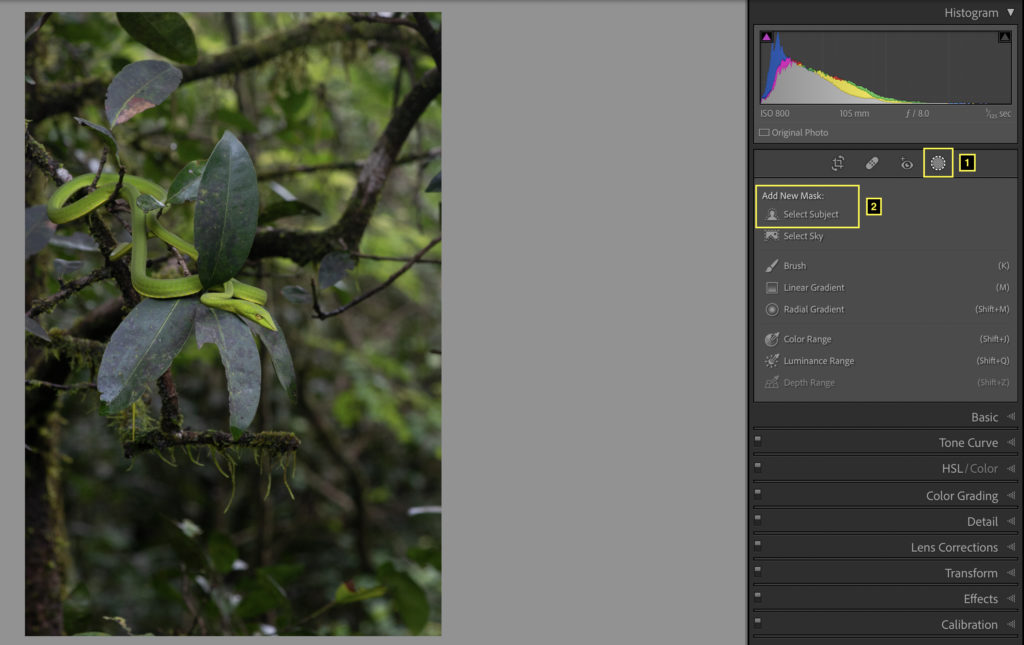
- Click on the Select Subject icon under Masking > Add New Mask.
- Mask Panel will appear. You can see the Subject. A subject that is in focus is selected. Check the Show Overlay checkbox to see which area is selected.
- You have made the initial subject selection. This type of subject selection is a good starting point for most images.
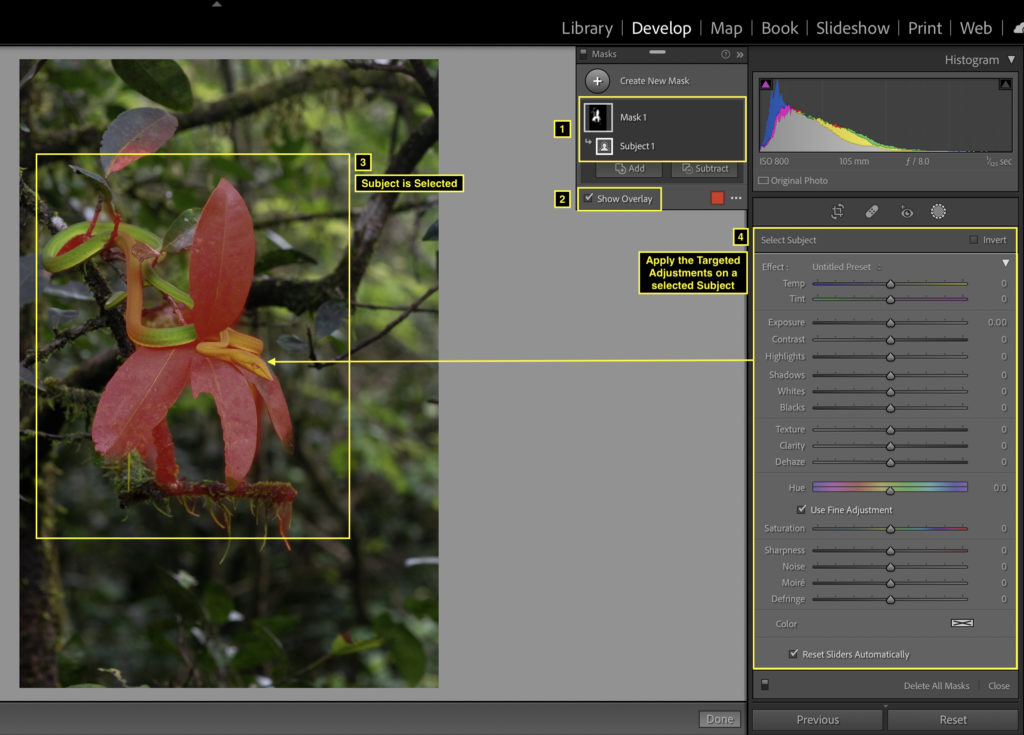
- Apply the targeted adjustments for a selected Subject.
Optional steps to refine your subject selections
- Once you make the initial subject selection, click on the selected Mask under the Mask panel.
- Below the Mask, there are 2 options- Add and Subtract
- For adding more areas to the subject selection, click on Add.
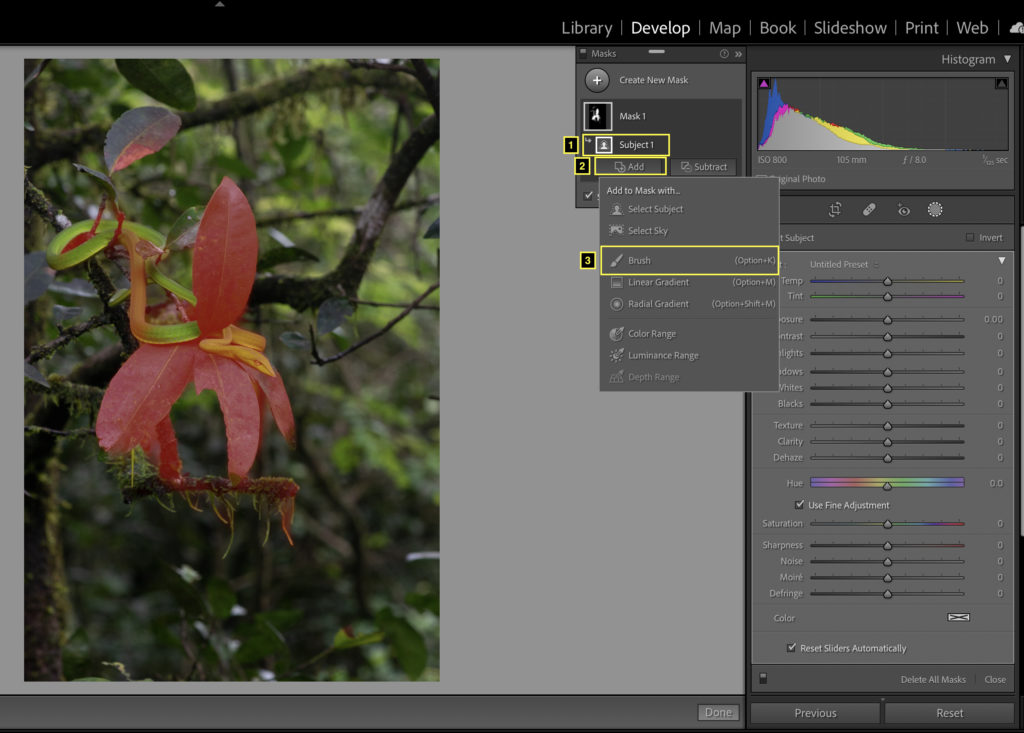
- There are multiple options to Add to the current selection.
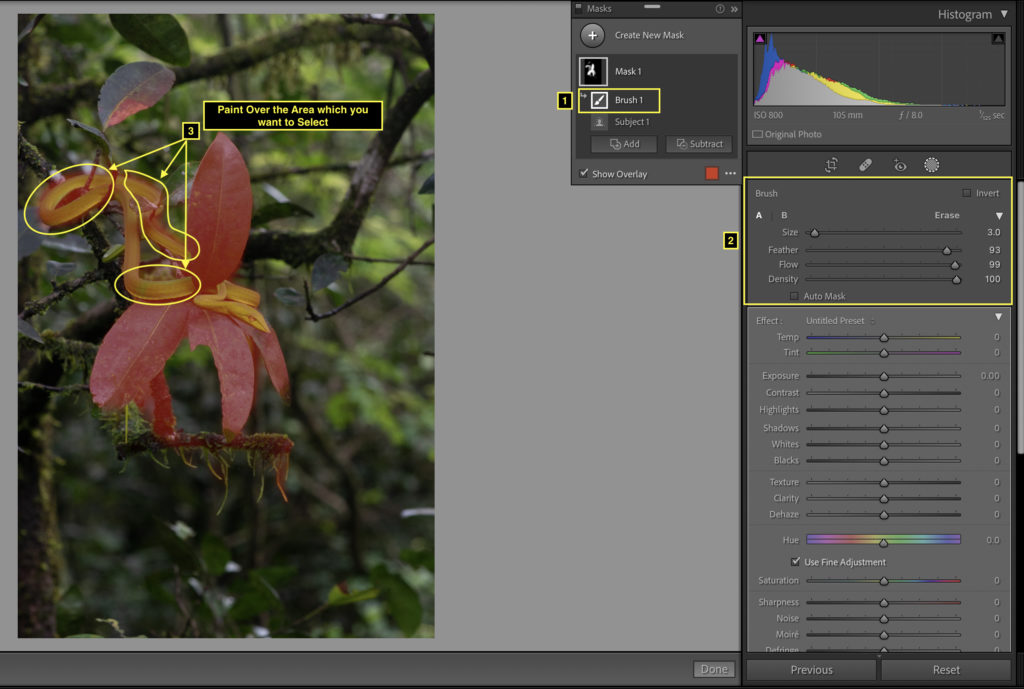
- The brush option helps extend the selections. Select the brush option and paint over the area you want to select.
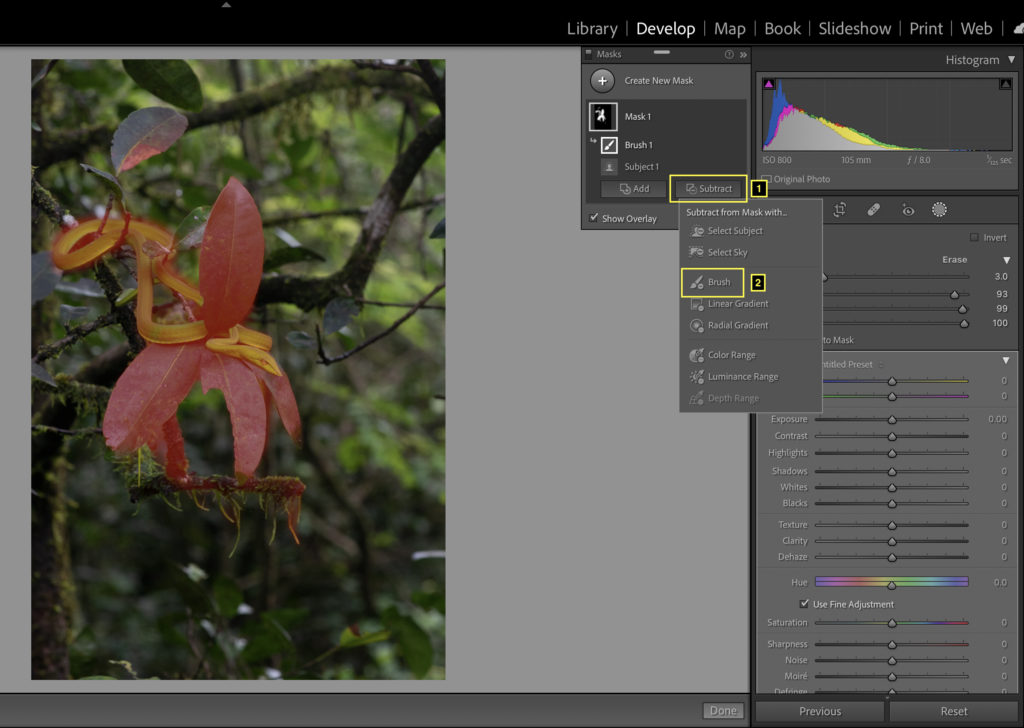
- To subtract from the selection, select the Subtract option. Select the brush and paint over the area you don’t want in the selection.
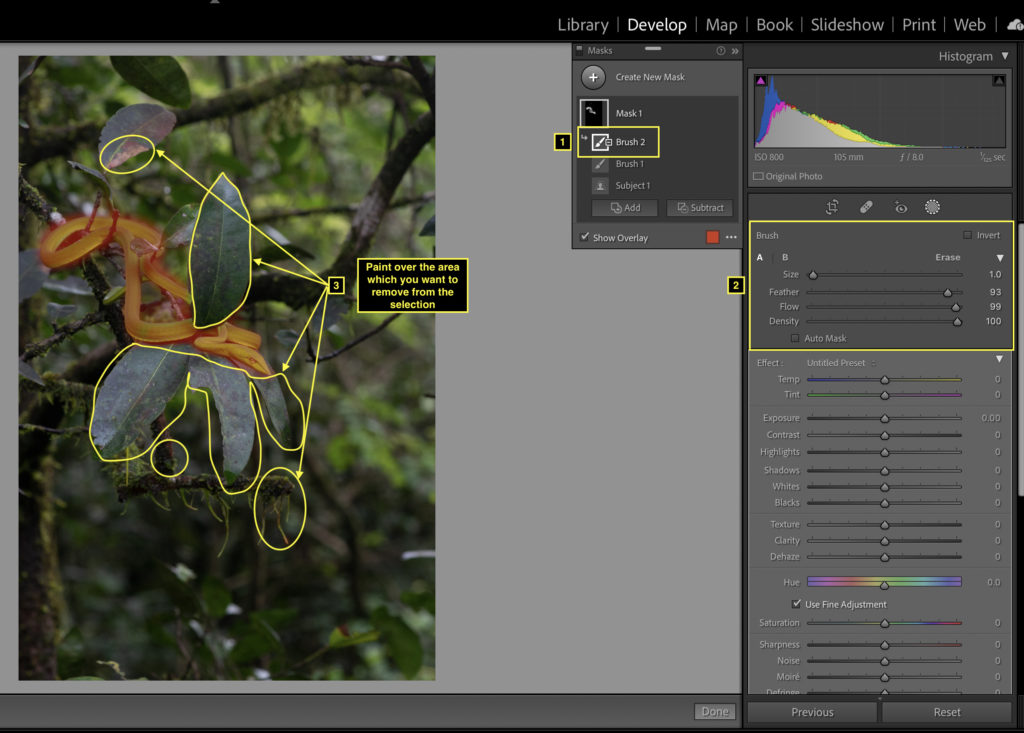
- I find the Brush option to help add or subtract the subject selection out of multiple options.
- If your subject selection demands additional selection options, feel free to give it a try.
Visualizing the overlay
- You can visualize the selected Subject using various overlay modes.
- To visualize the selection, check the Show overlay box under the Mask.
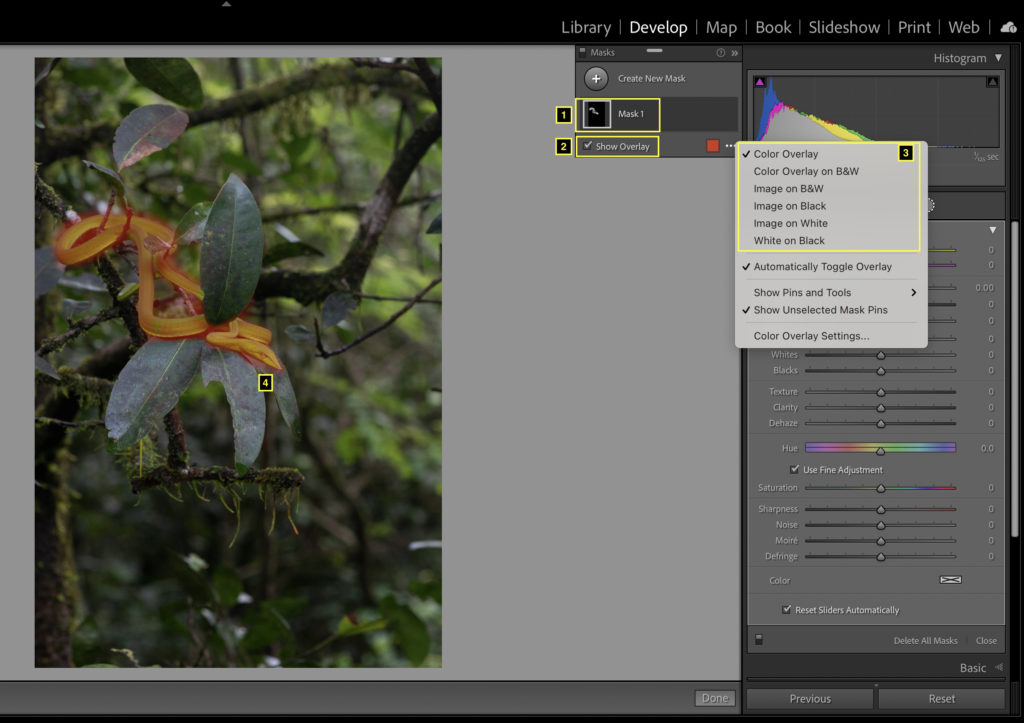
- You can see a default overlay as Color Overlay. Now you can choose a different color for overlay. Click on the color palette and select the color of the overlay.
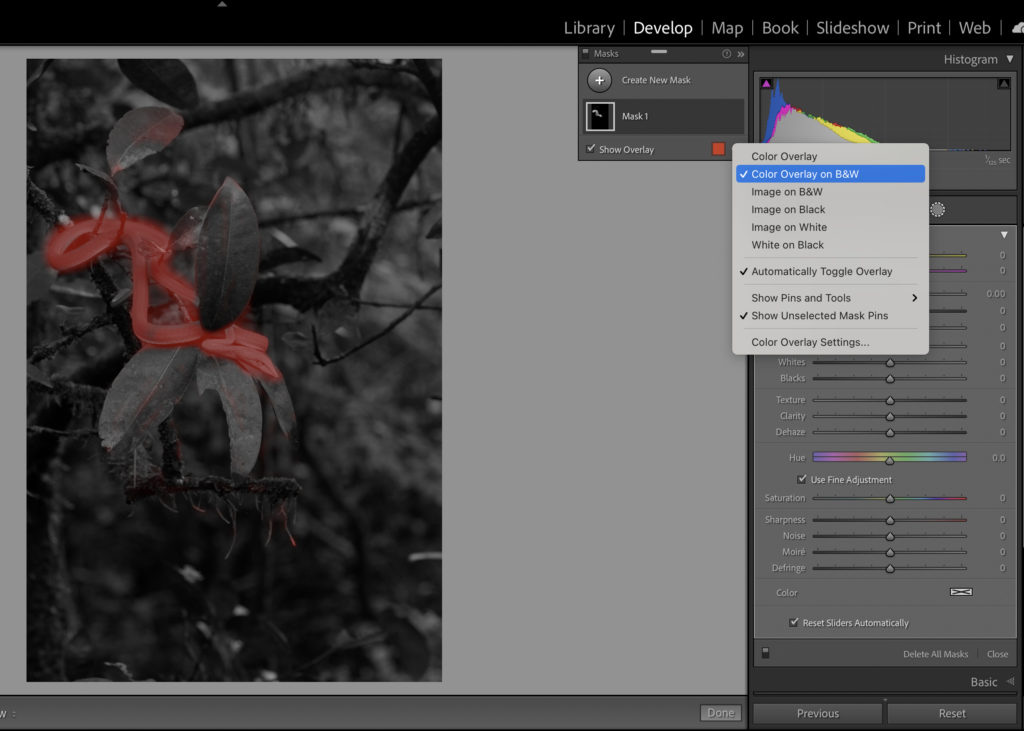
- Also, there are other overlay modes available. I Chose color overlay or Color Overlay on B & W as I find those overlay’s easy to refine the subject selections. You can choose which you find helpful for your images.
Bonus tip to quickly stand out your Subject in the image
- Select the Subject as mentioned in the above steps. Use Select for selecting the Subject.
- Make Targeted adjustments to the Main Subject. I recommend specifically targeted adjustments: Black and White point, Highlight/ Shadows, Vibrance and Saturation, and Sharpness. Every image is different; hence you can apply targeted adjustments per the image requirement.
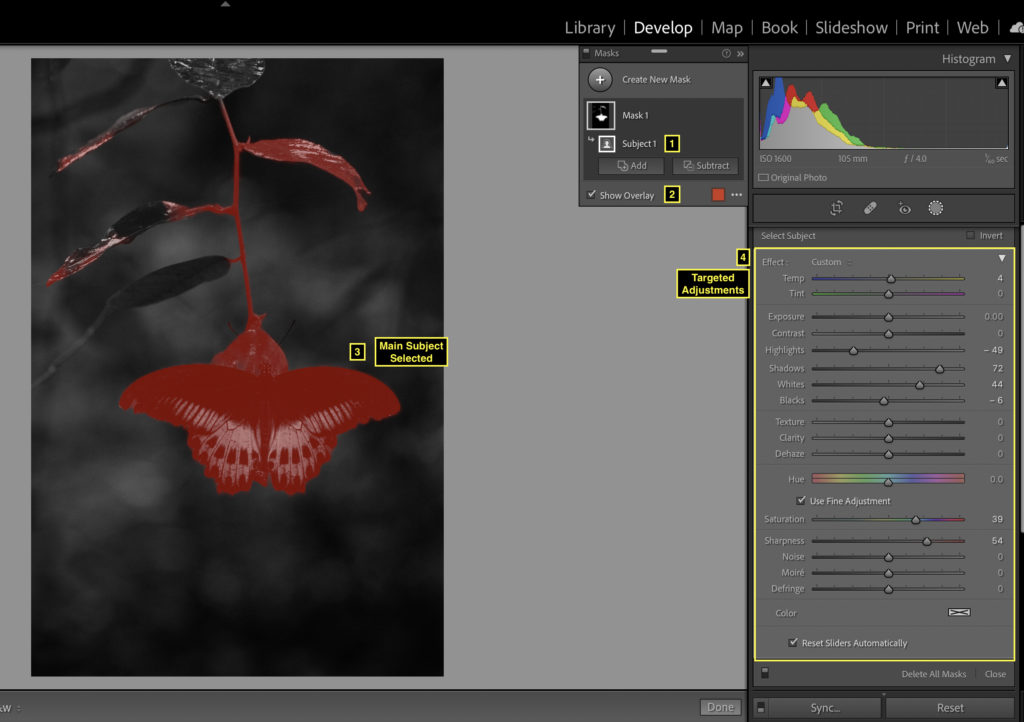
- Under the Mask panel, Click on Mask, which you have created using the Select Subject option.
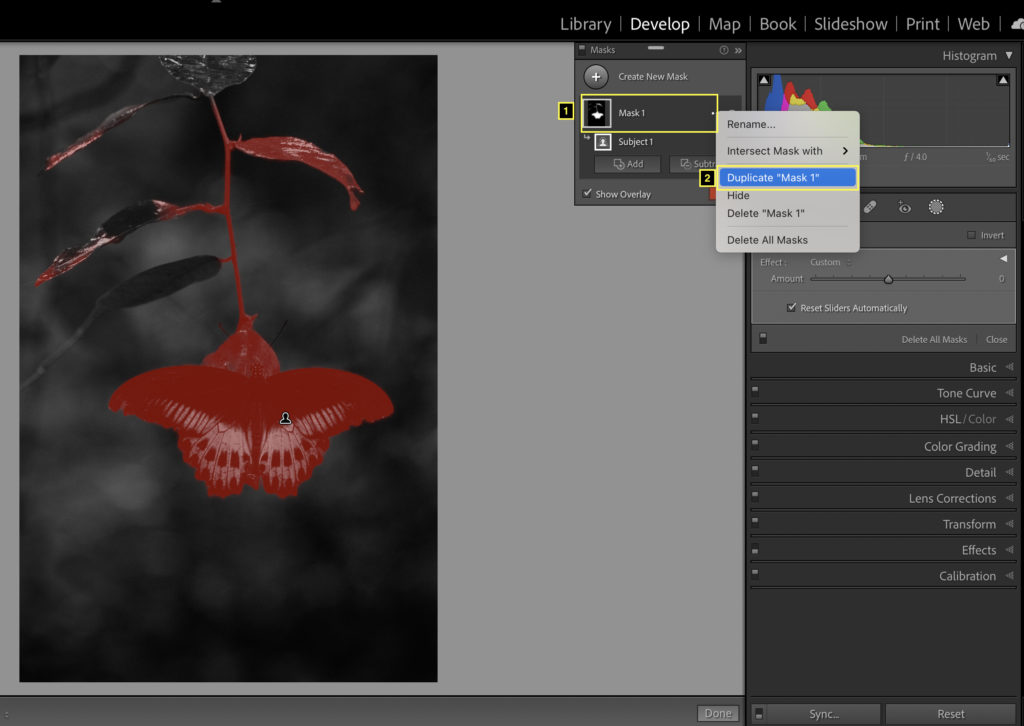
- Right Click on the Mask and Duplicate it. Another Mask is created, the same as the Initial Mask associated with Subject Selection.
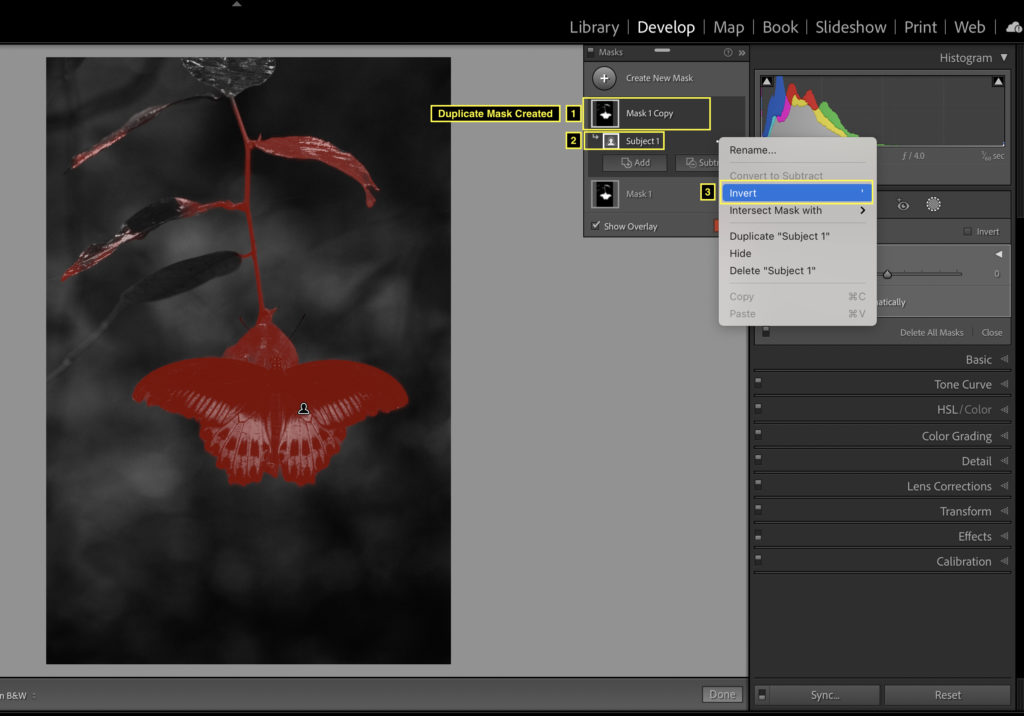
- Right-click on the Duplicate Mask you created. Select the option as Invert. ( Note – Now you have selected everything other than your main Subject)
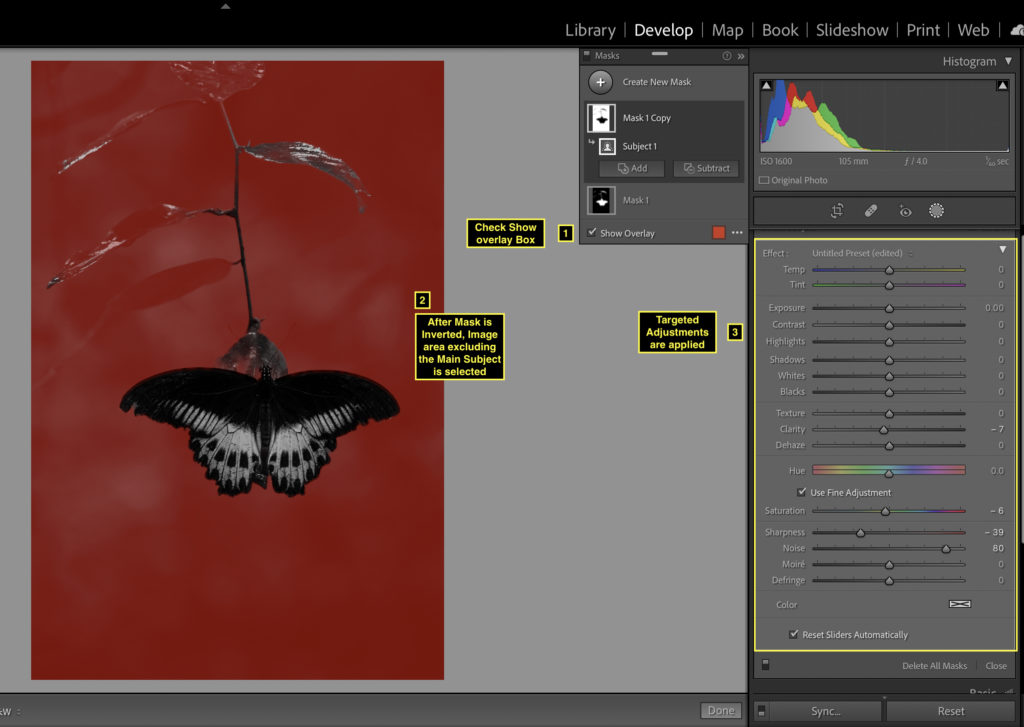
- Apply the Targeted adjustments on the area other than Main Subject. Typically I would Use Black point, Noise reduction, Sharpness, and Clarity reduction. However, every image is different, and it requires different processing.
- The Key Idea here is, emphasize the main Subject by applying the targeted adjustments.
- And apply targeted adjustments on the area other than Subject. Gently push the Subject’s surroundings down by reducing the exposure, clarity, sharpness, and colors.
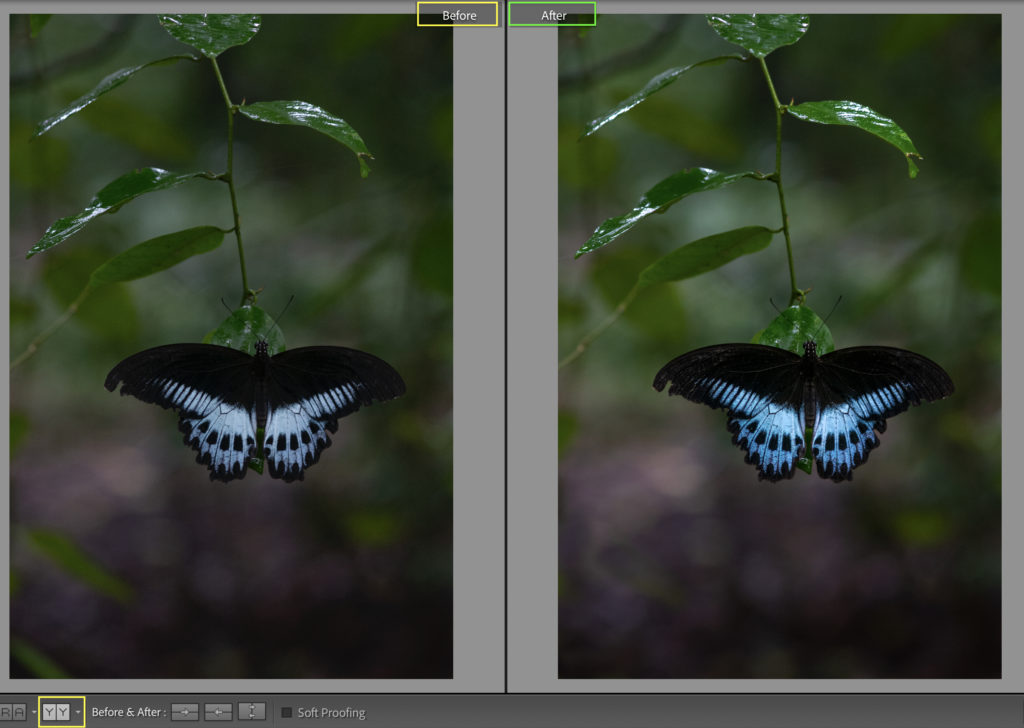
- This may help your Main Subject will pop up beautifully in terms of Light, Colors, and Sharpness.
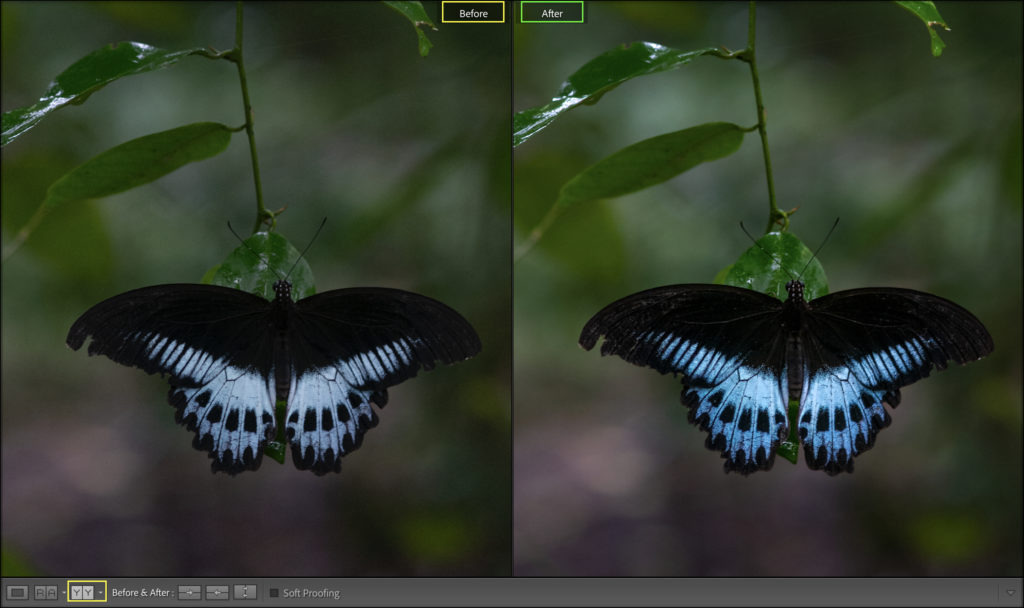
Now it’s your turn
I hope this Lightroom tool will help you select and edit the Subject faster and more accurately.
Now I would like to hear from you.
What type of images will you edit with Select Subject Feature in Lightroom. Let me know by leaving a comment below.
Very nice and helpful article. This feature makes the job so easy.
Hello Sarajit Sir, Thank you for your kind words. Yes, the Select feature is very easy for subject selections.